To ensure accurate dowel joinery, you need to properly set up your jig by verifying that the drill holes align with your measurements and securely stabilize the guides. Use A/B referencing by drilling test holes on both sides of the joint to confirm symmetry and correct any misalignment early. This careful process guarantees strong, precise joints and a professional finish. Keep going, as mastering these steps will markedly improve your woodworking results.
Key Takeaways
- Proper jig calibration ensures accurate dowel hole placement, preventing misalignments that weaken joints.
- Verify that jig drill holes align with workpiece measurements before drilling.
- Use A/B referencing by drilling reference holes on both sides to confirm symmetry and proper alignment.
- Secure workpieces and jig guides firmly to maintain consistent positioning during drilling.
- Regularly check and adjust jig setup to maintain precision across multiple joints for stronger, cleaner results.
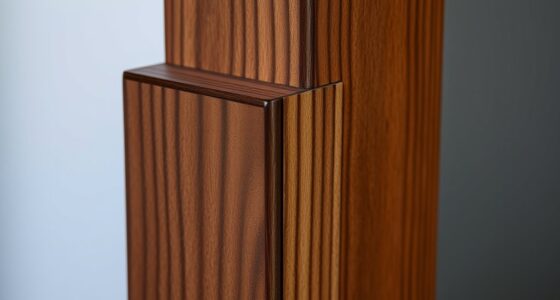
Achieving precise dowel joinery is crucial for creating strong, aligned furniture pieces. When you’re working with dowels, the key to accuracy starts with proper dowel placement. You want each dowel to sit exactly where it should, aligning perfectly with corresponding holes in the mating pieces. To do this, you need to be meticulous during the setup process and pay close attention to your jig calibration. If your jig isn’t calibrated correctly, even minor misalignments can result in joints that are weak or skewed, compromising both the appearance and the integrity of your project.
Proper jig calibration ensures accurate dowel placement and strong, aligned furniture joints.
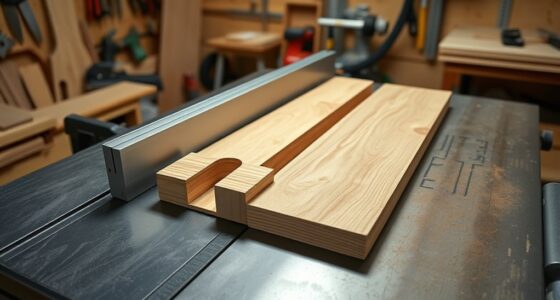
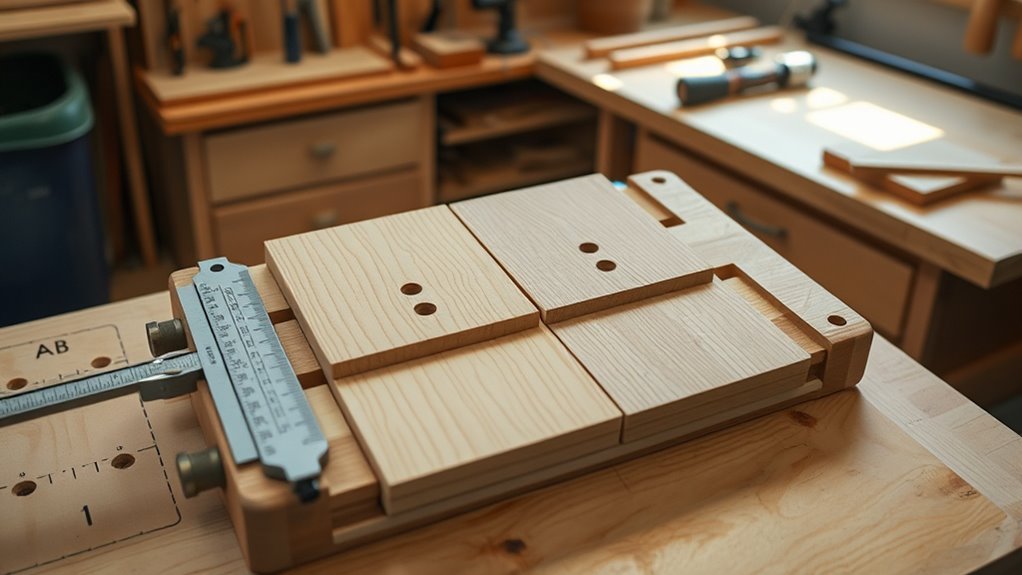
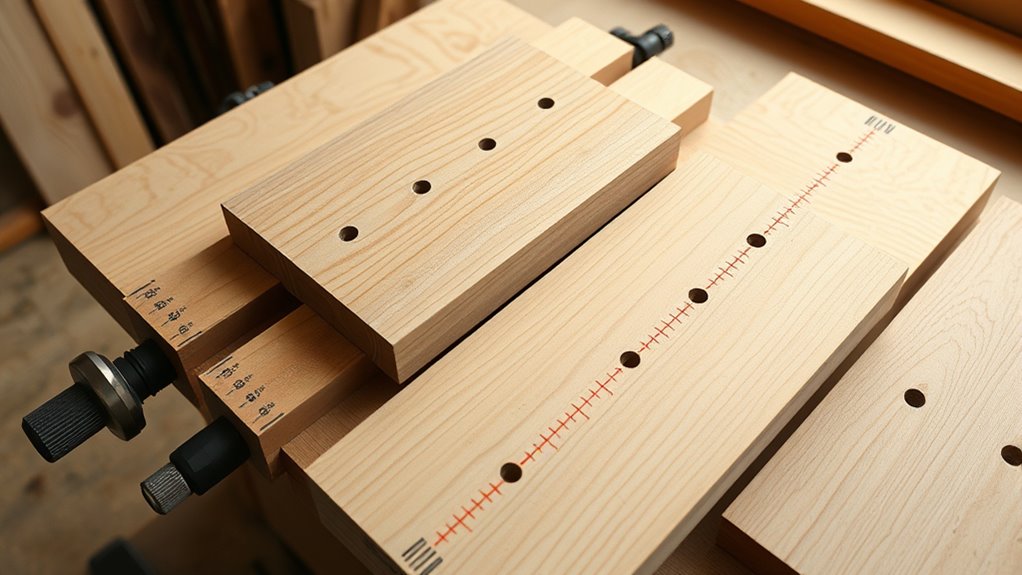
The first step is to verify your jig is properly calibrated before you begin drilling. Take the time to confirm that the drill holes on the jig align with the markings or measurements you’ve made on your workpieces. This calibration process involves checking the distance between the drill bit and the edge of your workpiece, ensuring it matches your intended dowel placement. Using a square or ruler, double-check that the jig’s guides are set at the correct spacing and that they’re secure. A slight miscalculation here can throw off your entire project, so don’t rush this step. Accurate jig calibration guarantees that your dowels will be positioned consistently and precisely across multiple joints. Additionally, understanding the importance of jig setup helps ensure that your measurements are maintained throughout the process.
Once your jig is calibrated, focus on precise dowel placement. Position your workpieces in the jig, ensuring they are firmly held and aligned as per your measurements. Double-check that the edges are flush and that the jig’s guides are snug against your workpieces. When you drill, do so steadily and avoid applying excessive force, which can shift the jig or cause the drill bit to wander. Keep the drill perpendicular to the surface to maintain clean, straight holes. Proper dowel placement hinges on these details—misaligned holes lead to gaps or skewed joints, so accuracy at this stage is crucial.
To further enhance precision, consider using A/B referencing. This involves drilling reference holes on both sides of your joint and comparing their positions to ensure symmetry. By doing so, you can identify any discrepancies early and make adjustments before completing the full assembly. This method acts as a quality check, confirming that your dowel holes are perfectly aligned from both perspectives. It’s a simple yet effective way to catch errors in your setup.

CNC Router Machine,3-Axis All-Metal with Steel Wheel Engraver Milling Machine,500W Trimmer & Linear Rail Driven,Working Area 15.75”x15.75”x2.95”,Acrylic Cutting Milling,GRBL Control (4040 PRO)
【Structural Stability】: The machine is built on a sturdy all-metal frame designed to increase stability during operation,offers a...
As an affiliate, we earn on qualifying purchases.
Frequently Asked Questions
How Do I Select the Best Dowel Size for My Project?
You should choose a dowel size based on your project’s thickness and load requirements. Consider the dowel material—hardwoods offer strength, while softwoods are easier to work with. Also, make certain the finish compatibility; thicker dowels can be more durable and better suited for finishing. Match the dowel diameter to your joint’s size, typically 1/4 or 3/8 inch, to ensure a snug fit and strong bond.
What Common Mistakes Affect Dowel Alignment Accuracy?
Imagine guiding your drill like a steady hand sketching a perfect circle—any wobble causes dowel misalignment. Common mistakes include rushing the setup, which leads to drilling inaccuracies, and neglecting to double-check jig alignment. These errors can make your dowels crooked or loose. To prevent this, take your time, secure your work firmly, and verify the jig’s position before drilling. Precision ensures strong, seamless joints every time.
Can I Use a Regular Drill for Dowel Joinery?
You can use a regular drill for dowel joinery, but it’s not ideal. A drill with adjustable depth stop guarantees precise holes, especially important for dowel material selection and achieving tight joints. Using a drill with a steady hand helps maintain accuracy. After drilling, apply proper finishing techniques like sanding and glue to enhance strength and appearance. For best results, consider a drill press or specialized doweling jig for consistent, accurate joins.
How Do Temperature and Humidity Impact Dowel Fit?
Sure, temperature and humidity are like that unpredictable friend who always crashes your woodworking plans. When it’s hot and humid, wood expands due to moisture effects, making dowel holes tighter and more difficult to fit. Conversely, cold and dry conditions cause wood to shrink, resulting in loose joints. So, you must account for these fluctuations to guarantee your dowel fit remains precise—otherwise, your perfect project might turn into a sloppy mess.
Are There Alternative Methods to Improve Joinery Precision?
You can improve joinery precision by using clamp techniques to make certain tight, consistent glue joints and prevent shifting. Additionally, selecting high-quality, stable materials minimizes expansion and contraction, enhancing accuracy. Consider using alignment guides or laser setups for precise positioning. Combining these methods with proper material choice and clamping ensures your dowel joints fit perfectly, reducing errors caused by movement or material inconsistencies.

LUNYEE 3018 PRO MAX CNC Machine 500W All-Metal CNC Router Machine 3 Axis Limit Switches & Emergency-Stop with GRBL Offline Control for Cutting Wood Acrylic MDF Plastic, Working Area: 300 x 180 x 80mm
500W Spindle & High Speed CNC Router Machine: The 500w Spindle is a Robust and Versatile Component Design....
As an affiliate, we earn on qualifying purchases.
Conclusion
Mastering dowel joinery accuracy isn’t just a small detail—it’s the secret to building furniture that lasts for generations. Proper jig setup and precise A/B referencing might seem like tiny steps, but they’re the backbone of flawless results. If you ignore these details, your project’s strength and appearance could suffer more than you realize. Think of it as the difference between a masterpiece and a pile of wood—your careful effort transforms your work into timeless craftsmanship.

FoxAlien Masuter Pro 3-Axis CNC Router Machine, Beginner Hobby Engraving Machine All-Metal Structure for Wood Acrylic MDF Nylon Routing Milling Carving
All-Aluminum Structure & Enhanced Stability: Engineered with an all-metal framework and linear rail Z-axis, the FoxAlien Masuter Pro...
As an affiliate, we earn on qualifying purchases.

SainSmart Genmitsu 3018-PROVer V2 CNC Router Machine for Beginner, Mini Milling Engraver Kit with Z-Probe, Limit Switches, E-Stop, Ideal for Wood, Acrylic, MDF, Plastic (Without Offline Controller)
Best Entry-Level: The Genmitsu 3018-PROVER V2 is the first choice for beginners looking to enter the world of...
As an affiliate, we earn on qualifying purchases.