To avoid tear-out when planing reversing grain, make sure your blades are sharp, as dull blades tear fibers instead of slicing cleanly. Take shallow cuts and feed the wood slowly to reduce stress on fibers, especially in tricky areas. Support the workpiece with sacrificial boards or clamp a scrap underneath to stabilize fibers. Scoring the surface lightly before planing can also guide the blades and prevent tear-out. Keep these tips in mind, and you’ll find ways to improve your planing results.
Key Takeaways
- Identify grain flow directions and plan cuts accordingly to minimize tear-out in reversing grain areas.
- Keep blades sharp and replace them regularly to ensure clean, smooth cuts through changing grain.
- Use shallow cuts and reduce feed rate to lessen fiber stress and prevent tear-out on tricky surfaces.
- Support the workpiece with sacrificial or scrap boards and lightly score the surface to guide blades and reduce tearing.
- Adjust cutting angles and techniques based on grain reversal points to improve cut quality and surface finish.

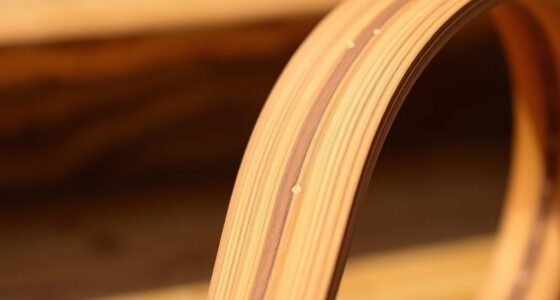
When planing wood, reversing grain can cause tear-out, leaving rough, torn surfaces that ruin your finish. To avoid this common problem, understanding the grain direction is essential. Wood grain isn’t always straightforward; it can change direction along the length of a board, especially in figured or burl wood. Before you start, take a close look at the surface and identify the grain flow. Typically, you want to plan in the same direction as the grain to produce a smooth cut. When you accidentally cut against the grain, tear-out becomes inevitable, leaving a rough surface that’s difficult to sand smooth later.
Using sharp blades is another critical factor in preventing tear-out. Dull blades tear the wood fibers rather than slicing through them cleanly, increasing the likelihood of chipping and tear-out, especially when dealing with reversing grain. Make sure your planer blades are freshly sharpened or replace them if they’re worn out. Sharp blades cut cleanly, reducing the stress on the wood fibers and allowing for a smoother, more controlled cut. When you encounter areas with changing grain directions, keeping your blades sharp ensures you can work through those sections without tearing the fibers.
Dull blades increase tear-out; keep them sharp for cleaner, smoother cuts when planing reversing grain.
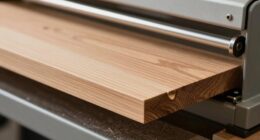
Adjusting the depth of cut is also crucial. Taking too deep a cut in a single pass can aggravate tear-out, particularly when the grain direction varies. Instead, make shallow passes, removing only a small amount of material each time. This approach minimizes stress on the wood and helps the blades cut more efficiently, especially in tricky grain areas. If you notice tear-out starting to occur, reduce the feed rate and slow down the planer’s movement. A slower feed allows the blades more time to do their job cleanly, reducing the chances of fiber tearing.
In addition to blade sharpness and cut depth, consider using a sacrificial board underneath your workpiece. Clamping a scrap piece of wood onto the surface stabilizes the fibers and provides additional support, helping prevent tear-out on the underside of your project. For particularly tricky sections with reversing grain, you might also try scoring the surface lightly with a utility knife before planing. Scoring helps to sever the fibers at the surface, guiding the blades and reducing tear-out. Furthermore, choosing the right cutting angle can make a significant difference in how cleanly the blades slice through the fibers, especially in challenging grain directions.
Frequently Asked Questions
How Can I Identify Grain Direction Accurately?
To identify grain direction accurately, start with surface inspection, feeling for the grain’s flow and texture. Look closely at the wood’s surface to see how the fibers run, often indicated by tiny lines or flecks. Check for the way the grain responds when you run your hand across it—grain orientation will feel smoother or rougher depending on the direction. This careful observation helps you plan your cuts to prevent tear-out.
What Tools Are Best for Planing Reversing Grain?
Ever wonder what magic tools make reversing grain less of a nightmare? Well, your trusty hand planes are your best friends here. Use a smoothing plane or a rabbet plane, designed for fine control, to follow the grain direction carefully. These tools help you minimize tear-out and achieve a smooth finish, even when grain seems to go rogue. Trust your hand planes—they’re the unsung heroes of reversing grain finesse.
Does Wood Type Affect Tear-Out Risk?
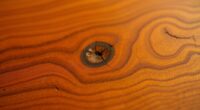
Yes, wood type substantially impacts tear-out risk because of its grain pattern and hardness. Dense, hard woods with irregular or highly figure grain patterns are more prone to tear-out when planing, especially if the grain reverses direction. You should adjust your technique accordingly, using sharp tools and taking lighter cuts. Understanding the specific characteristics of the wood you’re working with helps prevent tear-out and guarantees a smoother finish.
How Does Humidity Influence Grain Reversal?
When it comes to reversing grain, humidity can really throw a wrench in your plans. You might think you’re in the clear, but seasonal changes cause moisture content to fluctuate, which can make the grain switch direction unexpectedly. This means your wood becomes more prone to tear-out during planing. To keep your project smooth sailing, monitor humidity levels and acclimate your wood, so the grain stays consistent and doesn’t catch you off guard.
Are There Specific Finishing Techniques to Hide Tear-Out?
When hiding tear-out, you should focus on proper finishing techniques. Use a grain filler to smooth out imperfections and create an even surface. Sand with fine-grit paper to minimize scratches and blend the tear-out areas seamlessly. Applying a finishing coat afterward helps conceal minor flaws, giving your project a polished look. These steps ensure tear-out is less noticeable and your piece looks professional.
Conclusion
Think of your plane as a gentle brushstroke across the wood’s soul, guiding it smoothly without tearing the delicate fabric of its grain. When you respect the reversing grain, you’re not just shaping wood—you’re honoring its story, its hidden layers. Patience and awareness act as your compass, helping you navigate the unseen currents beneath the surface. Master this dance, and your work will unfold like a silent symphony—beautiful, seamless, and timeless.