To master spindle turning, focus on controlling your tools while managing the wood grain for smooth beads, coves, and fillets. Use sharp gouges and skew chisels, cutting with the grain to prevent tear-out and guarantee clean edges. Proper tool control and understanding how the grain interacts with each cut help you create polished, professional features. Keep practicing these fundamentals, and you’ll soon add impressive detail to your turnings. Successful techniques are just a few steps away.
Key Takeaways
- Use sharp, curved gouges and skew chisels designed for detailed bead, cove, and fillet shaping.
- Always cut along the wood grain to minimize tear-out and ensure smooth, clean shapes.
- Match tool size and curvature to feature dimensions for better control and precision.
- Maintain proper tool control and consistent technique to achieve refined, professional-looking details.
- Select straight-grain wood and adjust your approach based on grain direction for optimal results.

Spindle turning is a fundamental woodworking technique that involves shaping wood on a lathe to create symmetrical, cylindrical objects such as bowls, table legs, and decorative spindles. When you start working on a spindle, understanding the importance of wood grain plays a vital role. You’ll want to select a piece of wood with a straight, even grain, which helps guarantee smoother cuts and reduces the risk of tear-out. Properly aligning the wood grain with your intended design allows you to achieve cleaner beads, coves, and fillets, enhancing the overall quality of your work. Recognizing how wood grain interacts with your tools can significantly improve your precision and finish.
Selecting straight-grain wood ensures smoother cuts and higher-quality spindle turning projects.
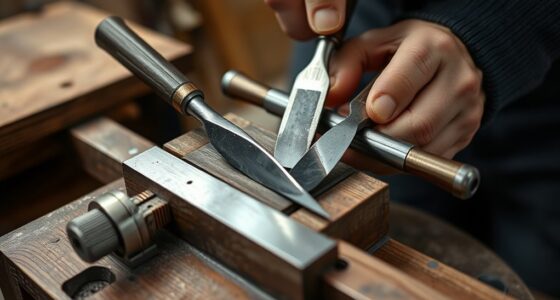
Choosing the right tools is indispensable when executing detailed spindle work. You’ll need a set of precision gouges and skew chisels designed specifically for spindle turning. For beads and coves, a spindle gouge with a sharp, curved edge provides control and versatility. A skew chisel is invaluable for smoothing and refining your shapes, especially when creating sharp coves or clean fillets. As you progress, you’ll find that selecting tools with the appropriate size and curvature allows for better control and more intricate detailing.
When working on a spindle, pay close attention to your tool selection based on the specific features you want to carve. For instance, a smaller gouge offers greater precision for detailed beads, while a larger one helps with shaping broader coves. The sharpness of your tools directly impacts the quality of your cuts; dull tools can cause rough surfaces and tear the wood grain, making it harder to achieve crisp, clean shapes. Regularly honing and sharpening your tools guarantees peak performance and reduces the strain on your hands.
Understanding how the wood grain interacts with your tools also guides your technique. Always cut with the grain whenever possible to avoid splintering or catching. When creating beads or fillets, you’ll want to carve along the grain lines carefully, gradually shaping the wood to prevent tear-out. The grain’s direction influences how smoothly your tools glide through the wood, making tool control and selection even more vital.
As you gain experience, you’ll learn to anticipate how different woods respond to your tools, adjusting your technique accordingly. Whether working with softwoods or hardwoods, the right tool selection combined with attention to grain direction helps you craft precise beads, coves, and fillets. Mastering these elements makes your spindle turning projects more refined, professional, and enjoyable.
Frequently Asked Questions
What Tools Are Best for Detailed Spindle Work?
For detailed spindle work, you want precision tools like small gouges and skew chisels. These enable you to master detail techniques, creating intricate beads, coves, and fillets with accuracy. Using sharp, fine tools helps you control cuts better, ensuring clean, crisp details. Keep your tools sharp and steady, and practice your technique to achieve the best results. With the right tools and skills, you’ll add impressive detail to your spindle projects effortlessly.
How Do I Correct Spindle Turning Mistakes?
When you hit a snag in spindle turning, don’t panic—you can often fix it. Use repair techniques like sanding out minor imperfections or carefully reshaping with gouges for larger mistakes. To prevent future errors, double-check measurements and go slowly on tricky sections. Remember, a stitch in time saves nine, so address mistakes early and learn from them to improve your craft. Patience and careful attention are your best tools.
What Safety Precautions Are Essential for Spindle Turning?
You should always wear protective gear like safety glasses and a dust mask to shield your eyes and lungs. Keep your work area clean and well-lit to prevent accidents. Make certain the lathe is properly set up and securely tightened before starting. Stay alert, avoid loose clothing, and keep your hands away from the spinning tool. These safety precautions help prevent injuries and maintain a safe, efficient turning environment.
How Do I Choose the Right Wood Type for Spindle Projects?
You’re on the right track by choosing the right wood for spindle projects, as it’s the backbone of your work. Consider wood characteristics like grain, hardness, and stability—softer woods like pine are easier to carve, while hardwoods like maple or cherry offer durability and a smooth finish. Think of finishing techniques as your secret weapon; selecting the right wood makes finishing easier and results in a polished, professional look.
Can I Combine Beads, Coves, and Fillets in One Piece?
Yes, you can combine beads, coves, and fillets in one piece to create intricate decorative patterns. Use careful planning to guarantee smooth transitions between each element, enhancing surface finishing. Mixing these features adds visual interest and complexity to your spindle, but be mindful of proportions and symmetry to maintain balance. Practice on scrap wood first to perfect your technique and achieve a polished, professional look.
Conclusion
Now that you know the basics of beads, coves, and fillets, you’re ready to refine your round, refined routines. With patience, practice, and precision, you’ll produce professional-looking projects that impress and inspire. Remember, mastering minor motions makes monumental marks—so stay steady, spar, and succeed. Keep keen on your carvings, and your craftsmanship will continually climb, creating compelling, enthralling creations that showcase your skill and spark your passion.


