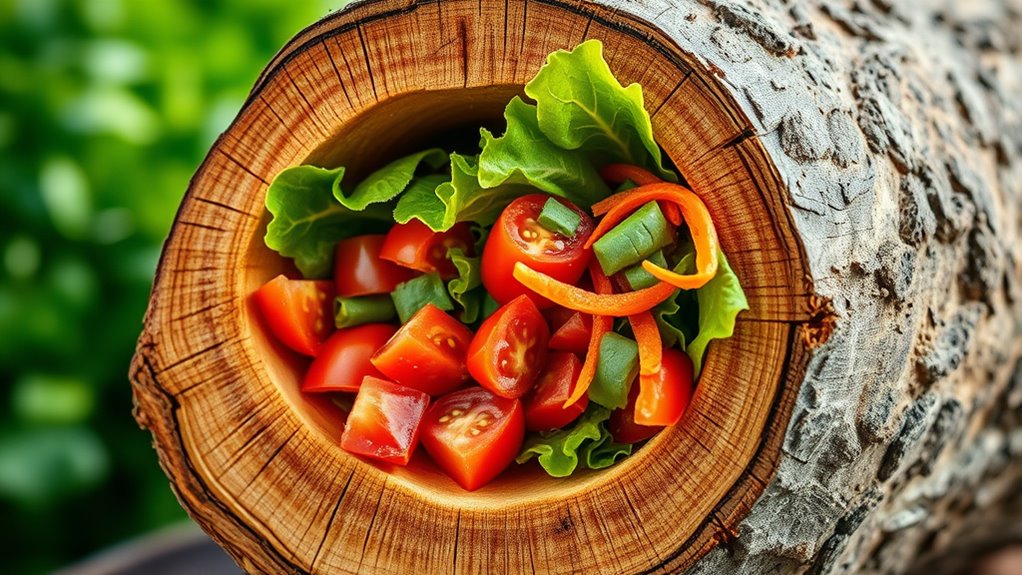

Start with a carefully selected, tight-grain log that highlights the wood’s natural beauty. Use a chainsaw for rough shaping, gradually hollowing out the center, then switch to rasps or sandpaper for smoothing. Apply a food-safe finish like mineral oil or beeswax to enhance the grain and protect the surface. Take your time, assess your progress, and refine until you achieve a stunning, inviting salad bowl—continue exploring for detailed steps.
Key Takeaways
- Select a visually appealing, tight-grain log with minimal knots for a smooth, attractive surface.
- Roughly shape the log into a bowl form using chainsaw or handsaw, focusing on symmetry.
- Refine surfaces with rasps, sandpaper, and rotary tools, smoothing interior and exterior thoroughly.
- Apply a food-safe finish like mineral oil or beeswax to enhance grain and protect the wood.
- Regularly assess the bowl’s shape and surface quality, and add final touches for a rustic, refined look.
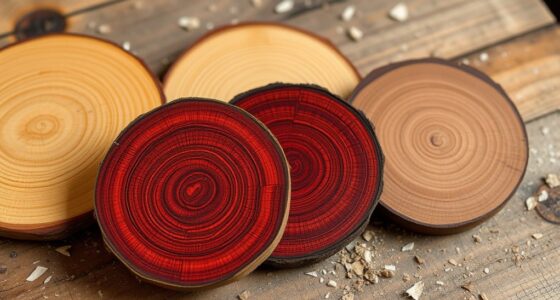
Transforming a simple log into a stunning salad bowl is easier than you might think, and it’s a perfect way to add a rustic, handcrafted touch to your table. The process begins with selecting the right log—look for one with tight grain and minimal knots, as these will help you achieve a smooth, even surface. Once you have your log, you’ll need to prepare it by cutting it into manageable sections, ensuring the grain runs in a way that highlights the natural beauty of the wood.
Selecting the right log with tight grain and minimal knots is key to creating a smooth, beautiful salad bowl.
Using basic woodworking techniques, you’ll start by rough shaping the log into a rough bowl form with a chainsaw or handsaw. Don’t worry about perfection at this stage; focus instead on removing excess material and establishing the approximate shape. Next, you’ll employ power tools like a router or gouges to refine the shape, carefully hollowing out the center. This step requires patience and steady hands, but it’s *vital* for capturing the bowl’s final form. As you work, remember to frequently check for symmetry and smoothness, removing any uneven spots or rough edges.
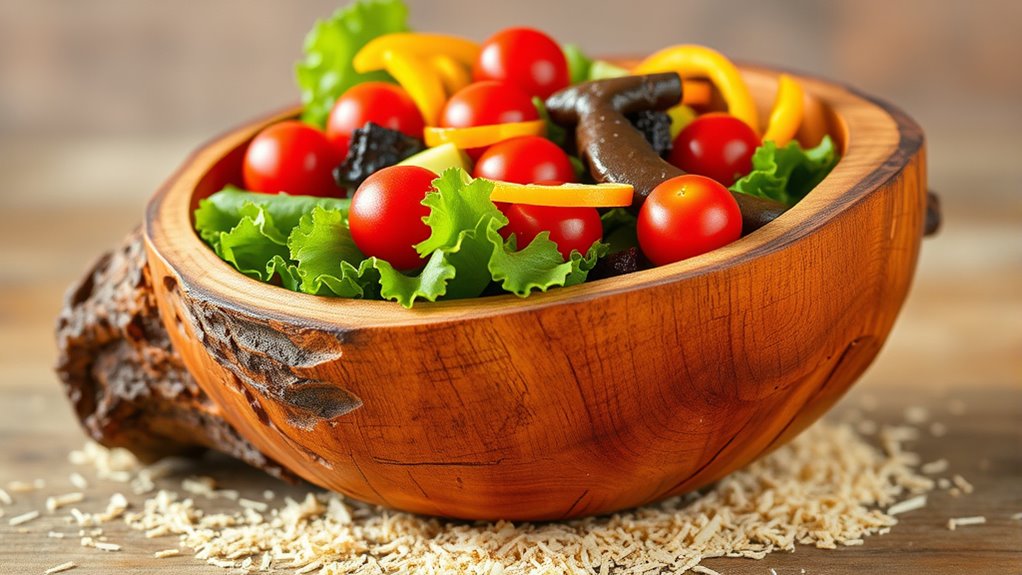
Once you’ve achieved the general shape, it’s time for finer woodworking techniques. Using rasps, sandpaper, or a rotary tool, you’ll smooth the interior and exterior surfaces. This is where proper salad bowl finishing really comes into play. You want to *guarantee* the surface is smooth enough to prevent splinters and to create an inviting feel. After shaping and smoothing, it’s *imperative* to apply a food-safe finish—such as mineral oil, beeswax, or salad bowl finish products—to protect the wood and enhance its natural grain. Proper salad bowl finishing not only improves appearance but also makes cleaning easier and extends the life of your handcrafted piece.
Additionally, understanding the importance of wood selection can greatly influence the durability and appearance of your salad bowl. Throughout the process, pay attention to safety precautions—wear goggles, dust masks, and gloves as needed, especially when working with power tools and finishing products. As you progress, step back periodically to assess your work, *making certain* that the bowl’s form and surface quality meet your expectations. If you notice any rough patches or uneven areas, take the time to sand or carve them out. The key is patience; rushing can compromise the craftsmanship of your bowl.
In the end, your effort will be rewarded with a beautiful, functional salad bowl that showcases your woodworking skills. The combination of woodworking techniques and careful salad bowl finishing results in a piece that’s both rustic and refined. It’s not just a bowl—it’s a handcrafted treasure that adds personality and warmth to your table, making every salad you serve feel special.

HFS(R) 58 Pieces 5/8" T-Slot Hold Down Clamp Clamping Set Kit for Use with Bridgeport mills (5/8" Slot 1/2"-13 Stud)
[Specification]: Table T-Slot size: 5/8IN;Stud size: 1/2IN-13;packing: T Nut No. TN-0212,Step Clamp:25S-12, 40S-12, 60S-12, (2pcs of Each size),Step...
As an affiliate, we earn on qualifying purchases.
Frequently Asked Questions
What Types of Logs Are Best Suited for Carving?
When choosing logs for carving, you want wood with a tight grain to prevent splitting. Softwoods like basswood and cedar are ideal because they’re easier to carve and have smooth surfaces. Hardwoods like maple and cherry work well for detailed techniques, but require more effort. Your best wood selection depends on your carving techniques and the desired finish. Always pick logs free of cracks and knots for a smoother, safer carving experience.
How Do I Prevent the Log From Cracking During Carving?
To prevent your log from cracking during carving, you need to focus on wood stabilization and carving safety. Keep the wood moist, wrap it in plastic, and store it in a cool, humid environment to maintain moisture levels. Use proper carving techniques, avoid excessive force, and work gradually. These steps guarantee your project stays intact, minimizes cracking, and keeps you safe during the carving process.
What Tools Are Essential for Turning a Log Into a Salad Bowl?
To turn a log into a salad bowl, you’ll need essential tools like a chainsaw or bandsaw for initial shaping, gouges, and chisels for detailed carving techniques. Start with good wood selection, choosing a dense, tight-grained wood to prevent cracking. Use carving tools carefully, applying even pressure, and work slowly to achieve smooth curves. These tools and techniques help you craft a beautiful, functional salad bowl from your log.
How Long Does the Process Typically Take From Start to Finish?
The process can seem like an eternity, but it usually takes about 10 to 20 hours, depending on your skill and the log’s size. You’ll need time for log preservation, carving safety, and shaping the bowl carefully. Patience is key—rushing risks damage or injury. With dedication, you’ll transform a raw log into a stunning salad bowl, enjoying the craftsmanship and artistry involved in every step.
How Should I Finish and Seal the Salad Bowl for Food Safety?
To finish and seal your salad bowl for food safety, apply a food grade finish like mineral oil or beeswax, ensuring it’s safe for contact with food. Use sealing techniques such as multiple thin coats, letting each coat dry thoroughly before applying the next. This creates a protective barrier, prevents moisture absorption, and keeps your bowl safe and beautiful for years. Remember to reapply the finish periodically for ongoing protection.

STRONGROWTH T track Hold Down Clamps - Double Cut Profile Universal T-Track Clamps, 6-3/8"L x 1-1/4"W - Woodworking and t slot clamp - Fine Sandblast Anodized - Red Color-4PK
Protective Features: T-Track Clamps 6-3/8" L x 1-1/4" W,Heavy-duty rubber pads on each end prevent slipping and protect...
As an affiliate, we earn on qualifying purchases.
Conclusion
By transforming a simple log into a stunning salad bowl, you’re not just crafting kitchenware—you’re creating a masterpiece that’ll wow everyone who sees it. With patience and a little bit of effort, you’ll turn ordinary wood into a show-stopping piece of art. Imagine serving salads in a bowl so beautiful, it’ll make your guests gasp in awe—like witnessing a magic trick right in your own home. Get ready to impress with your incredible woodworking skills!

Aluminum Clamp Set Of Four, Tool Room Clamps ,Hold Down Clamp, 1/4"-20 Threads
One set of four aluminum 6061 precision machined on CNC mills
As an affiliate, we earn on qualifying purchases.

POWERTEC 71168-P2V T-Track Hold Down Clamp, 5-1/2" L x 1-1/8" W, 4 Pack, T Track Clamps for Woodworking
INCLUDES: (4) Hold Down Clamps for T-tracks/T-slots; (4) 5/16-Inch-18 thread 3-1/2-Inch long T bolts; (4) Washers; (4) 5/16-Inch-18...
As an affiliate, we earn on qualifying purchases.