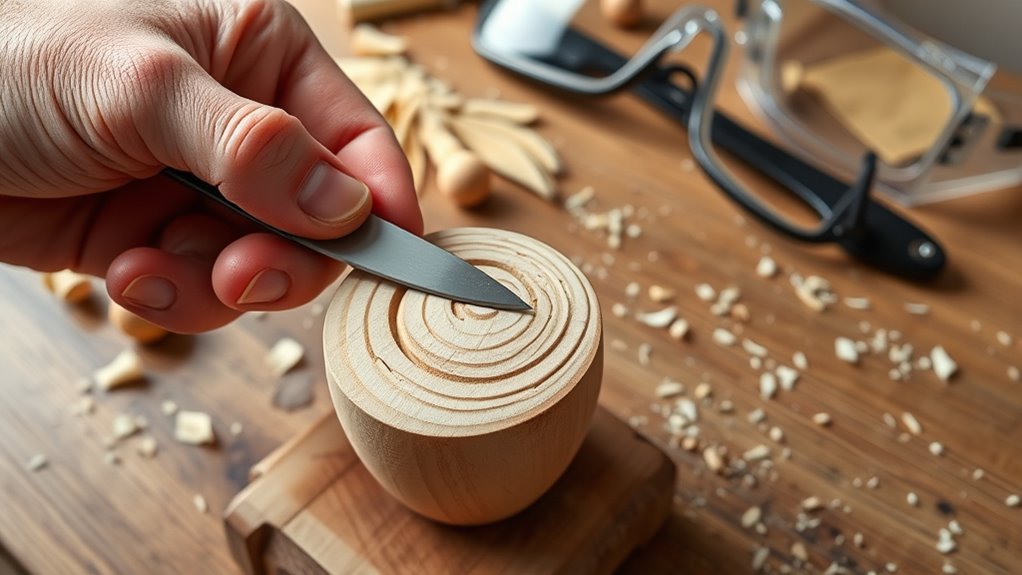

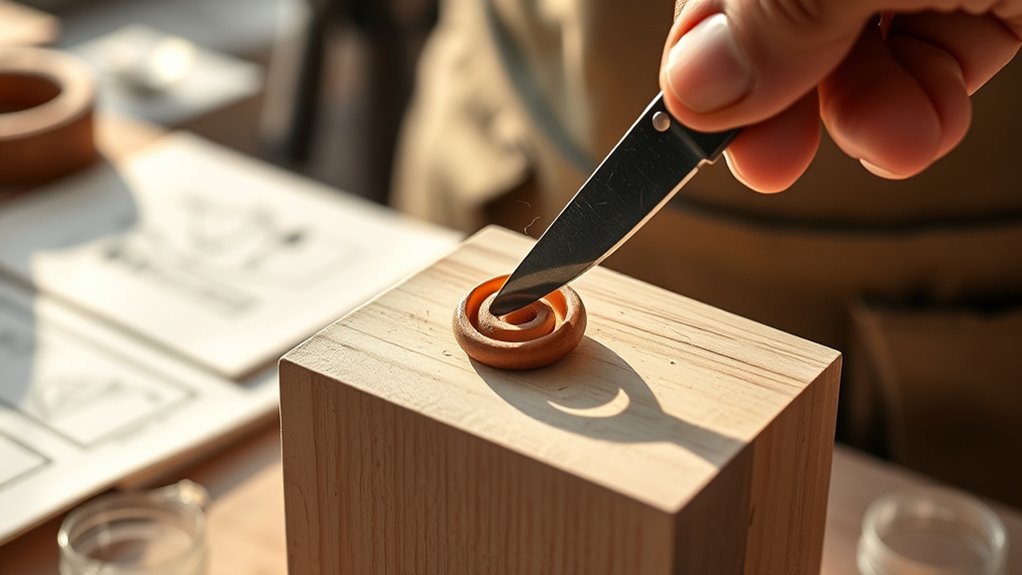
To whittle safely and start simple, choose dry, knot-free softwood like pine or basswood, and always use sharp tools to prevent slips. Pay attention to the wood grain to guarantee smoother cuts and avoid splintering. Regularly clean and sharpen your tools for better control. Keep your hands clear of blades and carve away from your body. By understanding these basics, you’ll build confidence—keep going to discover more tips for enjoyable and safe whittling.
Key Takeaways
- Always use sharp, well-maintained tools to reduce slips and ensure safer carving.
- Choose soft, dry wood with straight grain, free of knots and cracks for easier, safer whittling.
- Carve away from your body and keep your hands behind the blade for maximum safety.
- Start with simple beginner projects like spoons or animals to practice basic techniques safely.
- Regularly inspect tools and workpieces to prevent accidents caused by damage or rough wood.
Are you interested in transforming a simple block of wood into a detailed sculpture? If so, your first step is understanding how vital wood selection is. Choosing the right type of wood can make a big difference in your project’s success. Softwoods like pine or basswood are ideal for beginners because they’re easier to carve and less likely to splinter. Hardwoods such as oak or maple offer more durability and detail but can be tougher to work with, so it’s best to start with softer options until you gain confidence. Look for blocks that are free of knots, cracks, or rough patches, as these can complicate your carving process. Smooth, even-grained wood will give you cleaner cuts and a more precise finish. When selecting your wood, also consider its moisture content—drier wood is easier to carve and less likely to crack over time. Additionally, understanding wood grain can help you plan your cuts more effectively and achieve a smoother final piece.
Once you have your wood, focus on maintaining your tools properly. Sharp, well-maintained tools are essential for safe and effective whittling. Dull blades require more force, increasing the risk of slips and accidents. Regularly check your knives and gouges for nicks or dullness, and sharpen or replace them as needed. Keep your tools clean and dry to prevent rust, which can impair their performance. Proper tool maintenance not only prolongs their life but also ensures your cuts are smooth and controlled. Handling your tools with care and keeping them sharp makes the carving process more enjoyable and safer, especially for beginners still mastering control.
WEN Benchtop Belt and Disc Sander with 1 x 30 in. Belt and 5 in. Sanding Disc (6515T)
Two-in-one sanding machine includes both a 1-by-30 inch belt and a 5-inch disc
As an affiliate, we earn on qualifying purchases.
Frequently Asked Questions
What Types of Wood Are Best for Beginners?
You should choose beginner-friendly woods like basswood, pine, or cedar for your projects. These types of wood are soft, easy to carve, and less likely to splinter, making them ideal for beginners. They also have a fine, even grain that helps you control your cuts better. Using these woods will boost your confidence and make your whittling experience more enjoyable, so start with these for the best results.
How Do I Choose the Right Knife for Whittling?
Imagine wielding a tiny sword in a battle for wood’s soul—your knife choice matters! Opt for a blade with a comfortable handle that feels like an extension of your hand, not a medieval torture device. Look for a versatile, sharp knife with good handle grip, so you don’t wrestle with your project. Your perfect whittling partner should be safe, precise, and comfortable—like a good joke, it should feel effortless.
Are There Specific Safety Gear Recommendations?
Yes, you should always wear safety gear when whittling. Protective equipment like cut-resistant gloves helps prevent slips and cuts, while safety goggles shield your eyes from flying wood chips. Consider using a thumb guard for added finger protection and a dust mask if you’re working with dry or dusty wood. Prioritizing safety gear guarantees you enjoy whittling while minimizing risks, making your experience safer and more enjoyable.
How Can I Prevent Wood From Splitting?
Did you know that understanding wood grain can reduce splitting by up to 50%? To prevent wood from splitting, always cut along the grain rather than against it. Use sharp knives to make clean cuts, and avoid applying excessive force. Additionally, soaking your wood slightly or scoring the area before whittling can help prevent splitting. These tips guarantee your projects stay intact and safe to work on.
What Are Some Common Mistakes to Avoid?
You should avoid common mistakes like using dull or improper sharp tools and gripping your knife incorrectly. Always keep your tools sharp to prevent slips, and hold the knife firmly with a proper grip to maintain control. Rushing or applying too much pressure can cause accidents or wood splits. Take your time, focus on your technique, and follow safety guidelines to guarantee a safe and enjoyable whittling experience.

O'SKOOL Router Lift Systems for 3-1/2" Diameter Motors, 9-1/4'' x 11-3/4'' Plate 5-Piece Insert Ring Kit, RTS05
This router lift features a 3.5" diameter carriage and is compatible with popular 3-1/2” router models such as...
As an affiliate, we earn on qualifying purchases.
Conclusion
As you carve your first projects, remember that safety isn’t just a rule—it’s your foundation. Think of whittling like tending a small garden; patience and care yield the best results. I once watched a beginner transform a simple stick into a tiny sculpture, proving that even the simplest start can lead to mastery. Keep practicing with caution, and soon you’ll find yourself creating intricate pieces that tell a story—one gentle cut at a time.
VEVOR 6" Disc Sander & 4" x 36" Belt Sander, 400W Professional Belt Disc Sanders Combo with 0-45° Adjustable Worktable & Dust Collection Port for Woodworking, Knife Sharpening, DIY Crafting
Efficient Sanding: VEVOR 6" disc sander & 4" x 36" belt sander combo is powered by a 400W...
As an affiliate, we earn on qualifying purchases.

DEWALT Router, Fixed Base, 12-Amp, 24,000 RPM Variable Speed Trigger, 2-1/4HP, Corded (DW618)
2-1/4 HP (maximum motor HP), 12.0 Amp electronic variable speed motor provides the power to rout smoothly through...
As an affiliate, we earn on qualifying purchases.