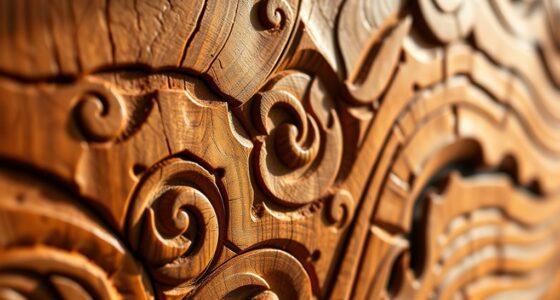
To finish carved pieces, you can use oils, waxes, and sealers to protect and enhance your work. Oils soak in deeply to enrich color and provide a matte finish, while waxes add a lovely sheen and a buffable protective layer. Sealers, like varnishes or lacquer, guard against moisture and scratches. Applying these finishes evenly and in thin coats guarantees durability and a professional look. Keep exploring to discover the best options for your project.
Key Takeaways
- Oils penetrate deeply to enrich color and provide a matte, natural finish while offering moisture protection.
- Waxes add a glossy sheen, enhance appearance, and create a buffable protective layer on carved surfaces.
- Sealers protect against moisture, dirt, and wear, improving durability and sealing pores for better sealing effectiveness.
- Applying thin, even coats with proper drying between layers ensures optimal adhesion and finish quality.
- Choosing the right sealing method depends on material type and desired aesthetic, balancing protection and appearance.

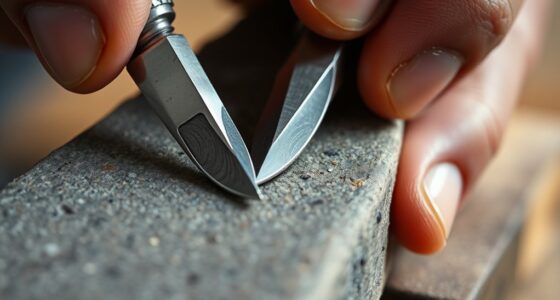
Finishing carved pieces is a crucial step that enhances their appearance and protects the work. After you’ve carefully carved your piece, the next move is to give it a polished, professional finish. This involves applying the right polishing techniques and sealing methods to bring out the beauty of your craftsmanship while ensuring durability. Your goal is to create a smooth, attractive surface that resists wear and environmental damage, and this begins with understanding how to properly polish and seal your work.
Polishing techniques are essential in achieving a refined surface. You might start with progressively finer abrasive pads or sandpapers to smooth out rough areas and eliminate tool marks. As you move to finer grits, the surface becomes increasingly smooth, preparing it for the finishing products. Once the surface is adequately smooth, you can switch to polishing compounds or pastes that add a subtle shine and depth to the wood or material. These polishing steps not only improve the visual appeal but also help close the pores, making the sealing process more effective.
Start with coarse abrasives, then move to finer grits for a smooth, polished surface ready for sealing.
Sealing methods are equally important because they protect your carved piece from moisture, dirt, and wear over time. The choice of sealant depends on the material and the desired finish. For wooden carvings, oils, waxes, and specialized sealers are common options. Oils penetrate deeply into the wood, enriching its color and providing a natural, matte finish. Waxes, on the other hand, add a soft sheen and a protective layer that can be buffed to a higher gloss if desired. Sealing methods also include applying a clear sealer or varnish, especially if you want a glossy, durable surface that’s resistant to scratches and water.
When applying these finishes, consistency is key. Use clean, soft cloths or brushes to apply oils or waxes evenly, working with the grain of the material. Allow each coat to penetrate and dry thoroughly before adding the next. For sealers and varnishes, a thin, even coat is best to prevent drips and uneven spots. Light sanding between coats can improve adhesion and give you a smoother final appearance. Additionally, understanding the different sealing options available can help you choose the best product for your specific project and desired finish.
Frequently Asked Questions
How Long Should I Wait Between Applying Multiple Coats of Finish?
You should wait at least the recommended drying time between coats, which varies depending on the finish you’re using—usually 24 hours for oils and waxes. Check the product’s label for specific recoating intervals, as rushing can cause uneven coverage or imperfections. Confirm each coat is fully dry before applying the next to achieve a smooth, durable finish. Patience guarantees the best results for your carved piece.
Can I Use Household Oils Like Olive or Mineral Oil on Carved Wood?
You can use household oils like olive or mineral oil on carved wood, but consider household oil safety first. Olive oil isn’t ideal because it can turn rancid over time, leading to unpleasant odors and potential damage. Mineral oil is a safer, natural finishing option that penetrates well and protects the wood without rancidity. Always apply thin coats and allow proper drying time between layers to ensure good results.
What Are the Best Sealers for Outdoor Carved Wood Pieces?
For outdoor carved wood pieces, you should choose weatherproofing solutions like exterior sealers or polyurethanes designed for outdoor use. These provide durable protection against moisture, UV rays, and temperature changes. You can also consider natural preservation methods, such as tung oil or linseed oil, but verify they are formulated for outdoor conditions. Applying a high-quality sealer will extend your wood’s lifespan and maintain its appearance over time.
How Do I Repair a Damaged or Scratched Carved Finish?
To repair a damaged or scratched carved finish, start by gently cleaning the area. Use fine-grit sandpaper to smooth out scratches, then carefully match and blend finish layers with color-matched touch-up products or wax. Apply a small amount of finish or wax, working into the carved detail to restore its depth. Finish by buffing lightly, ensuring the repaired area blends seamlessly with the surrounding surface for a restored, cohesive look.
Are There Eco-Friendly Finishing Options Suitable for Carvings?
You wonder if eco-friendly options exist for your carvings, and the answer is yes. Natural alternatives like beeswax, plant-based oils, and biodegradable finishes provide beautiful protection without harming the environment. These options not only enhance the wood’s natural beauty but also guarantee your project stays sustainable. Choosing eco-friendly finishes adds a layer of meaning to your art, transforming it into a statement of care for your craft and the planet.
Conclusion
When you finish carving with oils, waxes, and sealers, you’re not just protecting your work—you’re creating a masterpiece that could outlast history itself. Think of your piece as a legendary artifact, shimmering brighter and stronger with every coat. With your skill and these finishes, your carved creation will stand tall through ages, turning ordinary wood into an extraordinary marvel that will make even time itself stand still in awe.