To carve Celtic knots as a beginner, start by studying traditional designs with flowing, interlaced lines. Pick soft wood like basswood for easier carving, and set up a stable workspace with good lighting. Use sharp tools to carefully outline your pattern, then carve the background with precise stop cuts and background carving techniques. Focus on smooth progressions, consistent depths, and finishing touches to enhance contrast. Follow this guide to develop your skills and create intricate, beautiful Celtic designs.
Key Takeaways
- Study traditional Celtic knot designs emphasizing continuous, flowing lines and interlacing patterns before starting your carving.
- Choose soft woods like basswood or pine for easier, cleaner carving, and prepare a stable, well-lit workspace.
- Use proper transfer techniques and double-check outlines to ensure pattern accuracy and precision during carving.
- Employ specific carving techniques such as stop cuts, stab cuts, and bent gouges to create clean, layered interlaced effects.
- Smooth and refine edges with fine sandpaper or files, ensuring consistent depth for shadows and a polished, dimensional appearance.
Understanding the Design and Planning Your Celtic Knot
To create a detailed and accurate Celtic knot, start by studying traditional designs to understand their continuous, flowing lines and interlacing patterns that have no beginning or end. Recognize how interlacing patterns weave seamlessly, creating an intricate look. Begin by sketching your design lightly on your material, paying close attention to proportions and symmetry. Use simple, thin lines to map out the pattern, which helps you visualize the final piece. Planning your carving sequence is essential—you should identify the outline boundary, internal cut lines, and areas for relief before starting. This step prevents mistakes and guarantees a smooth process. Focus on clear, continuous lines, making carving easier and more precise, and confirm your pattern’s placement to match the material’s grain. Additionally, understanding the importance of cybersecurity vulnerabilities can help you safeguard your digital work from potential threats during your creative process. Incorporating traditional design principles ensures your Celtic knot maintains authenticity and visual harmony throughout the carving process. Being aware of visual cues and feedback can also enhance your accuracy and help you make adjustments during carving. Moreover, paying attention to design consistency can help maintain the harmony and balance essential for a visually appealing Celtic knot. Recognizing how safety precautions are vital during carving can prevent accidents and injuries as you work with sharp tools.
Selecting the Right Materials and Preparing Your Workspace
Start by choosing soft woods like basswood or pine, which are easier to carve and help you achieve clean lines. Set up your workspace in a well-lit, ventilated area that’s free of clutter to stay safe and accurate. Gather your sharp carving tools and secure your wood to a backing board before you begin to guarantee stability and precision. Additionally, understanding automation in business can help you identify tools that streamline your process for more efficient carving. Incorporating safety precautions is essential to prevent accidents and ensure a positive carving experience. Utilizing the right skincare ingredients can also keep your hands and skin protected during carving sessions. Incorporating sound healing science concepts, such as calming vibrations, can create a more focused and relaxed environment while working. Furthermore, choosing appropriate essential oils may enhance your workspace ambiance and promote mental clarity during your carving projects.
Choosing Suitable Wood Types
Choosing the right wood is essential for a successful Celtic knot carving project, especially if you’re just starting out. Soft woods like basswood or aspen are ideal because they have a fine grain and are easier to carve, making your work smoother and more precise. Avoid wood with knots, splits, or irregular grain, as these can cause breakage or uneven cuts. Hardwoods such as cherry or sycamore offer durability but require sharper tools and more effort. Before carving, ensure your wood is securely glued to a backing and aligned with your design to prevent movement. Proper material selection helps you achieve clean, controlled cuts and sets a solid foundation for your Celtic knot project. Additionally, understanding projector technology can help you choose the best tools and workspace setup for detailed work like wood carving.
Setting Up a Stable Workspace
Setting up a stable workspace is key to achieving precise Celtic knot carvings. Start with a work surface that’s flat, sturdy, and well-lit to guarantee stability during detailed work. Choose materials like soft woods such as gelatol or harder woods like cherry, and secure them firmly to a backing board with clamps or glue. Organize your tools, including gouges, chisels, and marking instruments, within arm’s reach to stay efficient. Keep your workspace clean and free of debris to prevent accidents and protect your tools and materials. A stable work surface minimizes vibrations and movement, which is essential for accuracy. Additionally, selecting the right self-watering plant pots can help maintain healthy plants with minimal effort, allowing you to focus more on your carving projects. Incorporating ergonomic tools can reduce fatigue and improve precision during long carving sessions. Furthermore, understanding the importance of security measures in payment processing can safeguard your financial information when making online purchases related to your supplies. Being aware of Bitcoin IRA options can also help you explore alternative ways to fund your creative pursuits securely. By preparing your workspace properly, you set the stage for safe, precise, and enjoyable Celtic knot carving.
Gathering Essential Carving Tools
To achieve detailed Celtic knot carvings, selecting the right tools and preparing your workspace are essential steps. Start by choosing appropriate carving tools like gouges, chisels, and V-tools designed for intricate work. These tools help you create fine lines and precise details. Opt for soft woods such as basswood, which are easier to carve and less likely to splinter during detailed work. Set up a clean, well-lit workspace with a stable surface to ensure safety and accuracy. Secure the wood piece with clamps or adhesive to prevent movement while carving. Keep your tools sharp and organized, and ensure your workspace has adequate lighting to see fine lines clearly. Proper tool maintenance makes the carving process smoother and more enjoyable. Additionally, understanding interest rates can help you plan your budget for purchasing quality tools and materials. Using ergonomic tools can also reduce hand fatigue during extended carving sessions. Incorporating ergonomic techniques into your carving routine can further enhance comfort and precision.
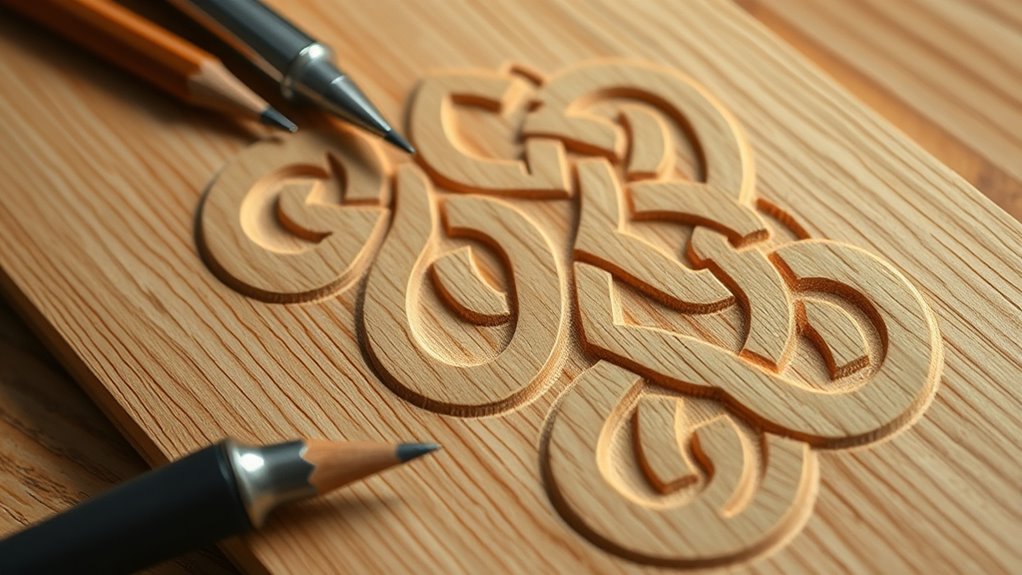
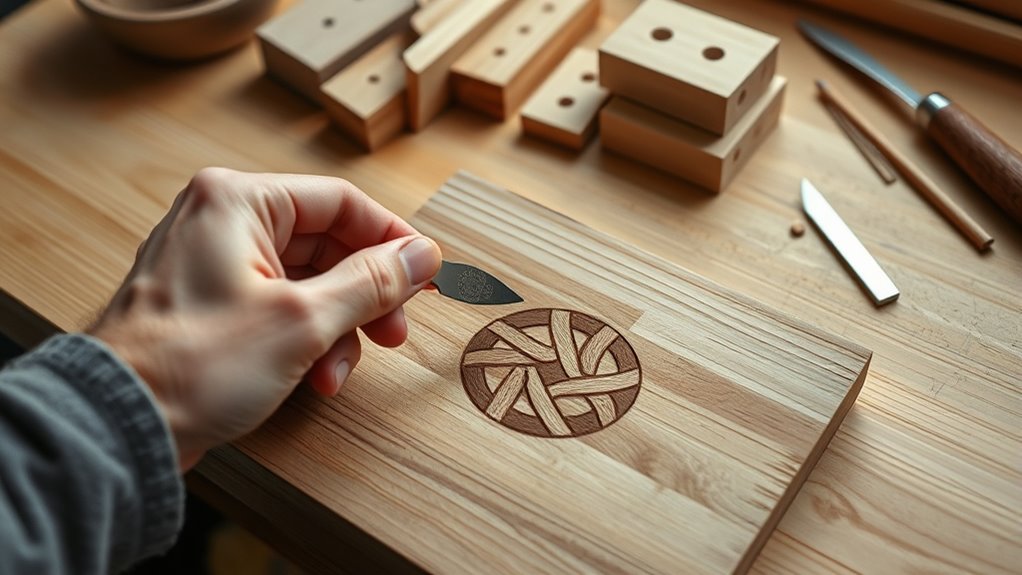
Marking the Pattern and Outlining the Interlacing Lines

Begin by carefully marking the outer boundary of your Celtic knot pattern with a V-tool, running just above the background surface to keep the lines clear and distinct. This outline defines the boundary and establishes the overall shape. Next, draw continuous, thin lines to outline the interlacing bands, ensuring smooth flow through each crossing point. Pay close attention to marking crossing points and intersections clearly, guiding your internal carving and preventing mistakes. Use a flat tool to level the background surface, providing a consistent base for your detailed lines. Additionally, consider precise measurement techniques to ensure accuracy in your design. In addition, referencing existing Celtic knot patterns can help you achieve authentic and balanced designs. Incorporating secure carving techniques can further improve the precision of your work and prevent accidental slips. Proper marking and outlining are essential because they serve as your primary guide for the entire carving process. Accurate design transfer methods can also help maintain the integrity of your pattern during carving. For added stability, applying proper tool maintenance ensures your carving tools remain sharp and effective throughout the project. Finally, double-check all outlines for precision, as these lines serve as your primary guide for the entire carving process. Proper marking and outlining set the foundation for a beautifully interwoven Celtic knot.
Carving the Background and Setting the Boundary Edges

Before carving the background, mark the boundary lines of your Celtic knot design with a V-tool, running just above the surface to clearly define the edges. This boundary guides your background carving, helping you maintain clean separation between the design and the surrounding wood. Start by carefully removing material within the background area, keeping your cuts straight and controlled to avoid damaging the boundary. Use a chisel to establish a straight, neat edge at the boundary, ensuring your cut goes straight down to prevent grain breakout. Create stop cuts with a screw or fishtail chisel along the boundary to guide your gouge and protect the design. Once the background is carved, smooth the surface with scraping or sanding for a consistent, polished finish.
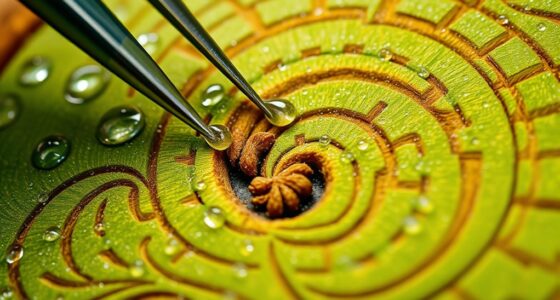
Creating Recesses and Over/Under Cuts for the Interlaced Effect
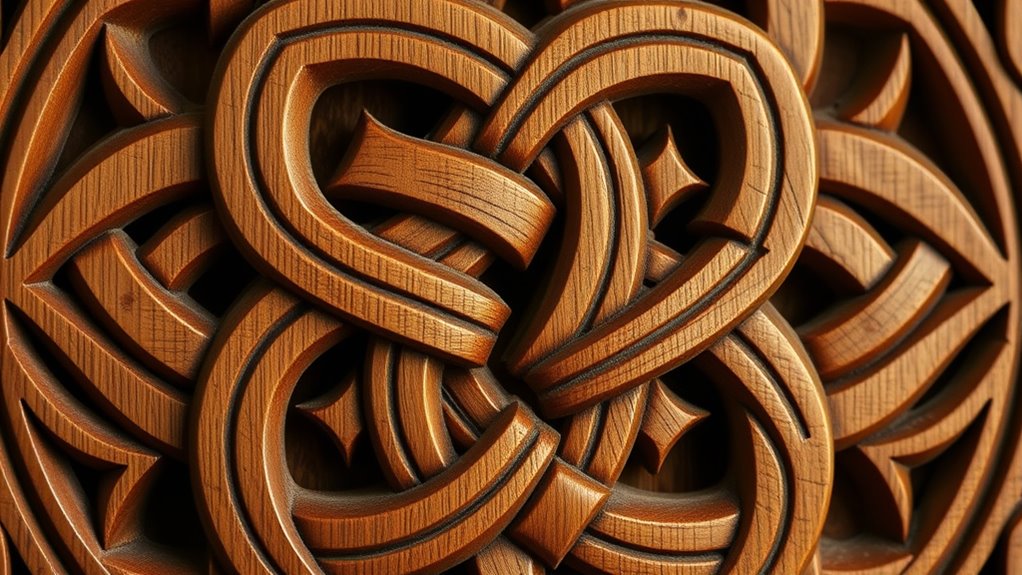
Creating the recessed areas and over/under cuts is essential for achieving the interlaced Celtic knot effect. To start, you’ll make straight, square cuts at a consistent depth to create an undercut that makes bands appear to pass underneath each other. Use a bent gouge or narrow chisel to carefully carve out the background along boundary lines for clean separation. Employ stab cuts along edges to set precise depths, then deepen them gradually to define curves and intersections smoothly. Maintain uniform depth across all cuts to guarantee a seamless, three-dimensional look and prevent uneven shadowing. Work steadily, removing small notches and excess material gradually. This controlled carving process creates the illusion of depth and layering, bringing your Celtic knot to life with crisp, over/under transitions. Additionally, paying attention to ice cream flavors can inspire your color choices for painted or stained wood surfaces, adding vibrant accents to your design.
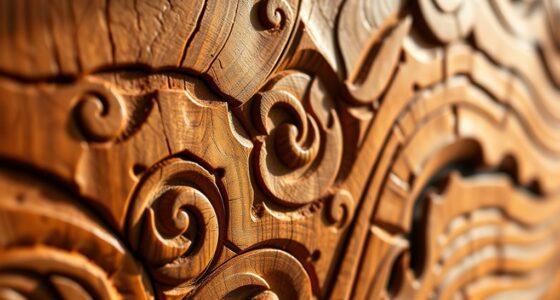
Handling Curves, Corners, and Internal Surfaces With Precision

Handling curves, corners, and internal surfaces with precision is essential for achieving a clean and professional Celtic knot. Use stab cuts for straight lines, stopping short of curves or intersections to prevent grain breakout. When carving curved sections, employ bent gouges of various widths to carefully follow the natural flow of the design, removing material smoothly. For tight corners and intricate curves, make precise snap cuts to sharply define edges without damaging the surrounding grain. Keep your cut depth consistent and follow the surface’s contour, ensuring a uniform finish. These techniques help you maintain control and accuracy, resulting in crisp lines and smooth internal surfaces. Proper handling of these features elevates your carving from rough to refined, giving your Celtic knot a polished, professional look.
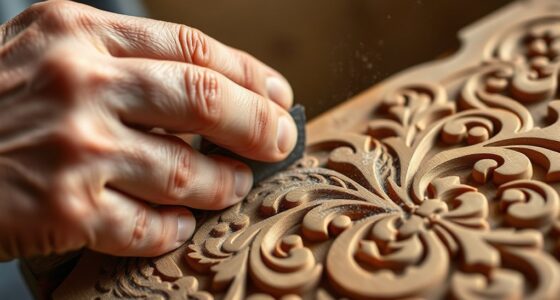
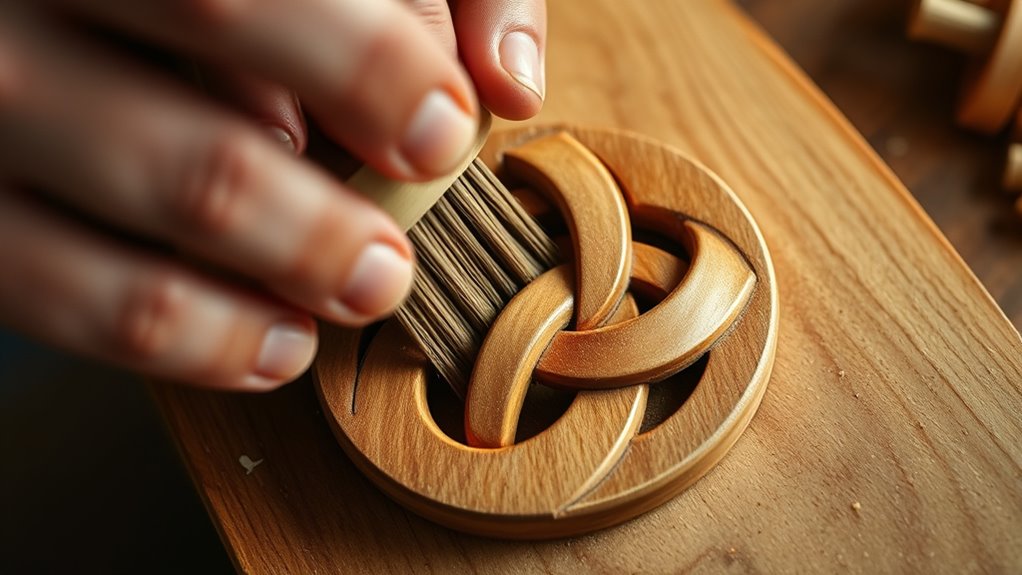
Refining the Carving: Smoothing, Merging, and Detailing

Refining your Celtic knot carving involves carefully smoothing and merging the carved areas to enhance its overall appearance. Start by gently smoothing the edges and internal surfaces with fine grit sandpaper or small files, removing tool marks and rough spots. Next, focus on blending the carved sections by unifying transitions between the background and raised bands, creating a seamless flow. You can also scrape away any residual wood or paper backing for a clean, unified look. For added detail, lightly round or hollow out internal surfaces, maintaining consistent depth for proper shadowing. Regularly check for sharp edges or unevenness to guarantee all lines are crisp. This process of smoothing, merging, and refinement brings your Celtic knot to life with a polished, cohesive finish.
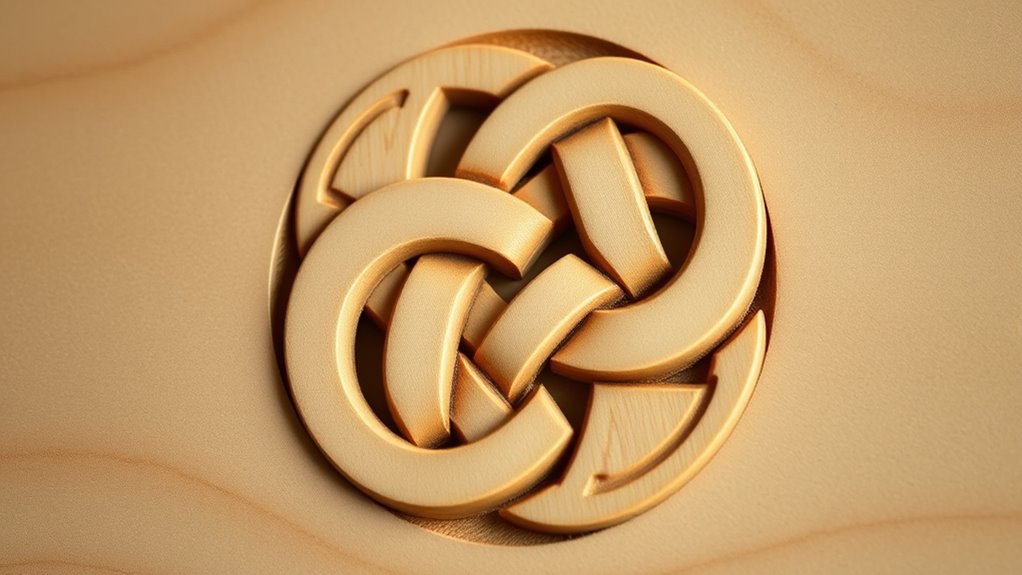
Final Touches: Cleaning Up, Surface Finishing, and Enhancing Contrast
To achieve a polished Celtic knot, start by carefully removing any remaining reveal wood or backing material to guarantee sharp edges and a clean appearance. Next, lightly sand the entire piece to smooth surfaces and enhance the finish. Use precise tools to clean up rough edges or uneven surfaces, ensuring a professional look. To create striking contrast, verify that the background depth is about one-third of the total thickness, producing subtle shadows and depth.
| Step | Focus | Result |
|---|---|---|
| Remove backing | Clean edges | Sharp, defined lines |
| Lightly sand | Surface smoothness | Even, polished finish |
| Clean up | Fine detail refinement | Professional appearance |
| Enhance contrast | Background depth and shadows | Visual depth and clarity |
Tips for Maintaining Consistency and Achieving a Professional Look
Maintaining consistency throughout your Celtic knot carving is essential for a professional finish. To achieve this, focus on precision and steady techniques. First, keep your cut depths uniform to create consistent shadowing and a cohesive three-dimensional look. Second, use the same carving tools and techniques around the pattern, ensuring smooth, continuous lines. Third, regularly check your alignment and line quality, making small adjustments to keep the over-and-under weaving clear. Fourth, work slowly and deliberately, especially at intersections and curves, to prevent irregularities. Pay close attention to grain direction, using appropriate tools to minimize breakout and maintain sharp edges. These tips will help you develop consistency and produce a polished, professional-looking Celtic knot carving.
Frequently Asked Questions
What Is the Easiest Wood Carving for Beginners?
If you’re just starting out, the easiest wood carving for you is soft woods like basswood, butternut, or pine. These woods are gentle to carve, with minimal grain resistance, making your work smoother. Use small, sharp tools like gouges and V-tools for precise cuts. Begin with simple, straight-line designs and carve along the grain to prevent breakouts. Practice on scrap wood to build confidence and refine your technique before moving to more complex projects.
What Are the 4 Elements of the Celtic Knot?
You’re asking about the four elements of a Celtic knot. These include the continuous, interlaced bands that symbolize eternity and interconnectedness. The over and under crossings create the intricate weaving pattern, emphasizing complexity and unity. The central loop represents infinity, and the borderlines frame the design, giving it structure and coherence. Together, these elements work to convey meanings of eternity, unity, and endless connection inherent in Celtic art.
How to Make a Celtic Knot Step by Step?
Imagine weaving a story with your tools, each stroke building a timeless pattern. To make a Celtic knot, start by sketching flowing lines that intertwine smoothly. Mark crossings with a V-tool, then carve the background with straight, controlled cuts. Use gouges and stab cuts to carve out the pattern, creating depth. Finish by cleaning edges for a crisp, interlaced look, symbolizing unity and eternity in your finished piece.
What Is the Rule of Three in Wood Carving?
The Rule of Three in wood carving divides your design into three main parts: foreground, middle ground, and background. You use this technique to create depth, balance, and clarity, making your carving more visually appealing. Focus on carving the main bands, interlacing lines, and background at these three levels. This approach helps guarantee your over-under crossings are clear and your overall composition is harmonious and proportional.
Conclusion
As you complete your Celtic knot, remember it’s like weaving a story in wood—each line and curve symbolizing connection and eternity. Your patience and precision are the threads that hold the design together, transforming raw material into art. With every carve, you craft not just a pattern, but a symbol of unity and craftsmanship. Keep honing your skills, and watch your creations become timeless symbols of beauty and tradition.