
If your veneer is water-damaged, act quickly to minimize further harm. Start by thoroughly drying the affected area with fans or low heat, then gently reattach any lifted veneer using a high-quality wood glue applied carefully with a small brush. Clamp the veneer until it adheres firmly, and once dry, lightly sand to smooth out discoloration or swellings. Regularly protect the surface from future moisture and consider sealing it with a moisture-resistant finish—if you keep going, you’ll discover even more effective ways to restore and preserve your veneer.
Key Takeaways
- Act quickly to dry the affected area with fans, dehumidifiers, or low heat to prevent further damage.
- Carefully reattach lifted veneer using high-quality wood adhesive and clamp until set.
- Gently sand the surface after securing the veneer to remove discoloration or swelling, avoiding additional damage.
- Apply a protective sealant or finish to create a moisture-resistant barrier and prevent future damage.
- Regularly inspect for leaks or spills and maintain proper ventilation to minimize water exposure risks.

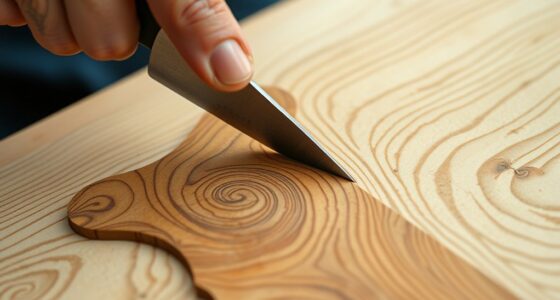
When water damage strikes your veneer, quick action can make the difference between saving the surface and needing a full replacement. The first step is to assess the extent of the damage. If the veneer is still firmly attached and shows only minor warping or staining, you can often salvage it with careful wood repair techniques. Acting swiftly helps prevent moisture from penetrating deeper into the wood, which can cause further deterioration and make repair more difficult.
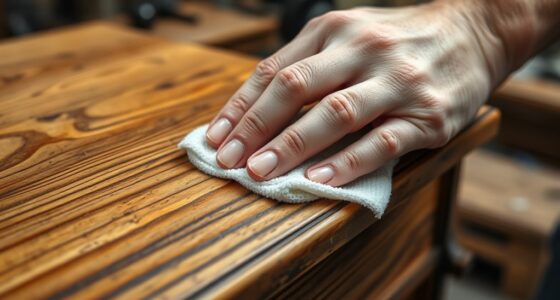
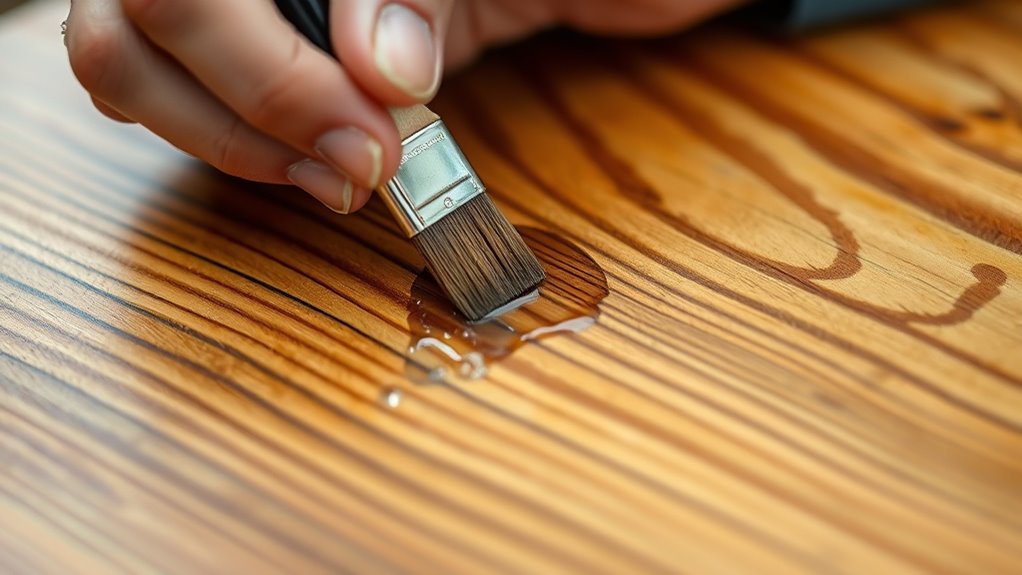
Start by drying the affected area thoroughly. Use fans, dehumidifiers, or even a heat gun set on low to accelerate moisture evaporation. It’s essential to remove as much water as possible to prevent mold growth and further damage. Once dry, identify areas where the veneer has lifted or separated from the substrate. Gentle pressing with a clean cloth or applying light weight can sometimes help it re-adhere, but for more stubborn cases, you’ll need to re-glue. Use a high-quality wood adhesive suitable for veneer, applying it carefully with a small brush or syringe. Press the veneer down firmly and clamp it if necessary, holding it in place until the glue sets. This process is a form of wood repair that restores the veneer’s attachment and prevents the need for more invasive fixes.
Dry thoroughly, then re-glue lifted veneer with high-quality adhesive and clamps.
During this process, it’s vital to incorporate moisture prevention techniques to avoid repeat damage. Keep the area dry and well-ventilated, and consider applying a protective finish or sealant once the veneer is secure. This barrier helps repel future water exposure and makes it easier to maintain the surface. Regular inspection and prompt cleaning of spills or leaks can also be effective in moisture prevention, extending the life of your veneer.
Additionally, understanding the Self Watering Plant Pots system can help you manage moisture levels more effectively in your home, reducing the risk of water damage to veneer surfaces from leaks or spills nearby. If the water damage has caused discoloration or swelling, you might need to gently sand the surface to smooth out irregularities, but only after ensuring the veneer is firmly attached. For more severe cases, consult a professional to avoid accidental peeling or further damage. Remember, the key to rescuing water-damaged veneer without peeling it off lies in promptness, proper drying, careful wood repair, and preventing future moisture intrusion. When you act quickly and follow these steps, you can often restore the beauty and integrity of your veneer, saving time, money, and the effort required for complete replacement.

Gorilla Ultimate Waterproof Wood Glue, Natural Wood Color, 8 Ounce (Pack of 1) – Waterproof for Indoor or Outdoor Projects and Repairs
Use indoors or outdoors: Give your indoor or outdoor projects a Gorilla Tough bond with waterproof Ultimate Gorilla…
As an affiliate, we earn on qualifying purchases.
As an affiliate, we earn on qualifying purchases.
Frequently Asked Questions
Can Water-Damaged Veneer Be Salvaged Without Replacing the Entire Piece?
You can often salvage water-damaged veneer without replacing the entire piece through veneer restoration. Start with water damage mitigation by drying the area thoroughly and removing excess moisture. Lightly sanding the surface helps blend the damage. Applying a wood conditioner and stain can restore color, while a veneer-specific adhesive can repair lifts. With patience and proper techniques, you can effectively restore your veneer, avoiding costly replacements.
How Long Does It Take for Veneer to Fully Dry After Water Exposure?
The drying process for veneer after water exposure varies, but typically it takes 24 to 72 hours depending on moisture absorption and environmental conditions. You should guarantee good airflow and low humidity to speed up drying. Keep in mind that if moisture has deeply penetrated, it may take longer. Patience is key, and checking regularly helps prevent further damage or warping during the drying process.
Are There Specific Products Recommended for Repairing Water-Damaged Veneer?
For repairing water-damaged veneer, you should consider using cleaning solutions designed for wood to remove dirt and mold. After cleaning, apply a high-quality wood filler to seal cracks and chips. Look for products specifically suited for veneer repairs, such as water-resistant wood fillers. These products help restore the surface without peeling, giving your veneer a cleaner, more uniform appearance while preventing further damage.
Will Water Damage Cause the Veneer to Swell or Warp Permanently?
Think of water damage as a storm hitting a delicate sail; it can cause the veneer to swell or warp, but it doesn’t always mean permanent harm. Water absorption weakens the veneer’s structural integrity, risking long-term damage if left untreated. However, quick action and proper drying can often restore stability, preventing permanent warping. You can often repair minor damage without removing the veneer completely, saving your surface from further deterioration.
How Can I Prevent Future Water Damage to Veneer Surfaces?
To prevent future water damage to veneer surfaces, you should regularly apply a high-quality sealant to create a protective barrier. Additionally, installing moisture barriers in areas prone to humidity or spills can help keep water away from the veneer. Keep spills cleaned promptly, avoid placing veneer near water sources, and maintain good ventilation. These steps will considerably reduce the risk of water infiltration and damage over time.

4 Inch Bar Clamps for Woodworking, 5 Pcs Trigger Quick Grip Clamps, One Handed Ratchet Wood Working Clamp, Mini Small Bar Woodworking Clamps for Wood Gluing Crafts (4Inch)
Superb Material: The durable material provides a construction that won’t buckle or bend under pressure and repeated use,…
As an affiliate, we earn on qualifying purchases.
As an affiliate, we earn on qualifying purchases.
Conclusion
Don’t let water damage drown your veneer’s beauty. With patience and the right techniques, you can breathe new life into your damaged surface, turning despair into renewal. Think of your veneer as a delicate canvas—each careful step is a stroke of restoration. Remember, even in the face of adversity, the potential for revival remains. So roll up your sleeves and restore your veneer’s story—because every blemish holds the promise of a comeback.

SEAL-ONCE MARINE – 1 Gallon Penetrating Wood Sealer, Waterproofer & Stain. Water-Based, Ultra-low VOC formula for high-moisture areas to protect wood docks, decks, piers & retaining walls.
MARINE SEALANT: Our liquid formula creates a UV-stable coating for protection against the elements, saltwater spray, and water…
As an affiliate, we earn on qualifying purchases.
As an affiliate, we earn on qualifying purchases.

SEEKONE Heat Gun 1800W 122℉-1202℉(50℃- 650℃)Fast Heating Heavy Duty Hot Air Gun Kit Variable Temperature Control Overheat Protection with 4 Nozzles for Crafts, Shrinking PVC, Stripping Paint(5.2FT)
▶ 【Strong Power With 2 Modes】 SEEKONE 1800W heat gun provides strong power quickly heat up to 1202℉(650℃)…
As an affiliate, we earn on qualifying purchases.
As an affiliate, we earn on qualifying purchases.