When replacing a missing veneer, it’s crucial to match both the grain and color to create a seamless, natural appearance. Your dental provider carefully evaluates the natural enamel pattern and uses advanced shade-matching tools to replicate the tooth’s unique texture and hue. They consider lighting conditions and fine-tune the veneer for translucency and tone. Keep going, and you’ll discover how these detailed steps ensure your new veneer blends flawlessly with your smile.
Key Takeaways
- Carefully evaluate surrounding teeth to match natural grain patterns for seamless integration.
- Use advanced shade-matching tools to ensure accurate color blending with adjacent teeth.
- Consider lighting conditions, such as sunlight and indoor lighting, during color assessment.
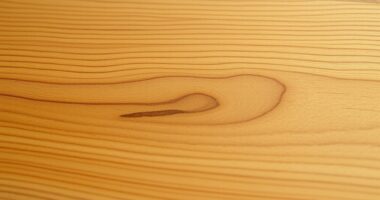
- Replicate natural enamel texture and grain in the veneer for a realistic appearance.
- Make final adjustments to fit, translucency, and texture for a flawless, natural look.

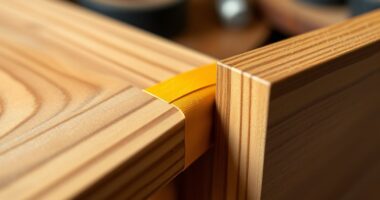
If you’ve noticed a veneer has chipped or fallen off, replacing it promptly is essential to restore both the appearance and protection of your tooth. When getting a new veneer, one of the most critical aspects is ensuring it seamlessly integrates with your existing teeth. This involves paying close attention to matching grain and color blending. Matching grain means selecting a veneer that mimics the natural texture of your tooth enamel, which is essential for a realistic look. Every tooth has a unique pattern, so your dental provider will carefully evaluate the natural grain of your surrounding teeth to find a veneer that mirrors it as closely as possible.
Ensuring veneer grain and color match seamlessly creates a natural, flawless smile restoration.
Color blending is equally important. Your new veneer should match the shade of your neighboring teeth to avoid any noticeable differences. Dentists use advanced shade-matching tools to determine the precise hue, tone, and translucency that will blend seamlessly with your existing teeth. They may also consider how your teeth look under different lighting conditions, ensuring the veneer doesn’t appear mismatched in natural sunlight or indoor lighting. Achieving perfect color blending involves fine-tuning the shade and sometimes customizing the veneer to match subtle variations in your natural tooth color.
The process begins with your dentist taking detailed impressions and photographs of your teeth, which help in selecting the most suitable veneer. During the matching process, your provider will compare the veneer to your natural teeth in various lighting settings, ensuring the grain pattern and color are as consistent as possible. Sometimes, they might use digital technology to simulate how the final result will look, giving you a preview before proceeding.
Once the ideal match is identified, the veneer is carefully fabricated to replicate the natural grain and color blending of your teeth. When it’s time for placement, your dentist will make final adjustments to ensure it fits perfectly and looks natural. They might also polish the veneer to enhance its translucency and texture, making it indistinguishable from your other teeth.
In the end, the goal is to restore your smile so that no one notices the difference. Proper matching of grain and meticulous color blending are key to achieving a natural, aesthetically pleasing result. Replacing a missing veneer isn’t just about functionality; it’s about maintaining your confidence and ensuring your smile looks as flawless as possible. With the right techniques and attention to detail, your new veneer will blend seamlessly, restoring both your bite and your smile’s natural beauty.
Frequently Asked Questions
How Do I Prevent Veneer From Cracking During Replacement?
To prevent veneer from cracking during replacement, guarantee proper veneer adhesion by thoroughly cleaning and preparing the surface. Use a high-quality adhesive and apply it evenly. Additionally, control moisture levels in the environment, as excessive humidity or dryness can cause the veneer to expand or contract, increasing crack risk. Keep the workspace stable, and allow sufficient curing time before handling the veneer to maintain its integrity and prevent cracking.
Can I Match Veneer Color With Painted or Stained Surfaces?
Yes, you can match veneer color with painted or stained surfaces using veneer color matching techniques. For painted veneer solutions, you might need to modify the paint or stain to closely resemble the veneer’s natural hues. It’s best to test small areas first, blending colors carefully. This way, you ensure a seamless look, making the replacement blend smoothly with your existing finish.
What Tools Are Best for Precise Veneer Removal?
You should use specialized veneer removal tools like a veneer scraper or a chisel to carefully lift the veneer without damaging the substrate. Precision cutting tools, such as a utility knife or a fine saw, help you make clean cuts and avoid splintering. These tools give you control, ensuring a precise removal process, which is essential for a seamless veneer replacement or repair. Always work slowly and carefully to prevent damage.
How Long Does Veneer Replacement Typically Take?
Veneer replacement usually takes about 2 to 4 hours, depending on the repair’s complexity. Timing considerations include preparing the surface, matching grain and color, and carefully bonding the new veneer. You’ll want to allocate extra time for proper adhesion and drying. Rushing the process can affect the final look, so plan accordingly to guarantee a seamless match and a professional finish.
Is Professional Help Necessary for Complex Veneer Repairs?
While DIY techniques and veneer repair kits can handle simple fixes, complex veneer repairs often need professional help. Think of it like a delicate art piece—your skills might suffice for small scratches, but intricate grain and color matching demand expert attention. Professionals guarantee seamless blending and durability, saving you time and frustration. If your repair involves extensive damage or detailed matching, trusting a pro ensures the best, long-lasting results.
Conclusion
When replacing missing veneer, matching grain and color ensures a seamless repair. While it might seem intimidating, taking your time to select the right veneer and blending carefully will yield professional results. Don’t let the fear of imperfection hold you back—precision and patience make all the difference. With a keen eye and proper technique, your repair will look virtually undetectable, restoring your furniture’s beauty and integrity with confidence.