To prevent peeling or warping when painting veneer, start by thoroughly cleaning and lightly sanding the surface for better adhesion. Use a primer designed for veneer or laminate to create a smooth base, then apply high-quality, durable paint in thin, even coats, allowing each coat to dry completely. Finish with a protective sealant to lock in moisture. Focusing on proper preparation and application techniques will guarantee a long-lasting, professional finish—if you continue, you’ll discover even more expert tips.
Key Takeaways
- Thoroughly clean and lightly sand the veneer surface before priming to ensure proper adhesion.
- Use a primer formulated for veneer or laminate surfaces to create a uniform base.
- Apply multiple thin, even coats of high-quality paint, allowing full drying between coats.
- Seal the painted veneer with a protective topcoat or sealant to prevent moisture intrusion.
- Follow proper drying times and avoid rushing the process for a durable, long-lasting finish.
Have you ever wanted to update the look of a piece of furniture or a surface without replacing the veneer? If so, painting veneer can be an excellent way to breathe new life into your old furniture or surfaces. However, to guarantee your project turns out beautifully and lasts, you need to focus on proper surface preparation and furniture refinishing techniques. Skipping these steps often leads to peeling, warping, or peeling paint down the line, which can be frustrating to fix.
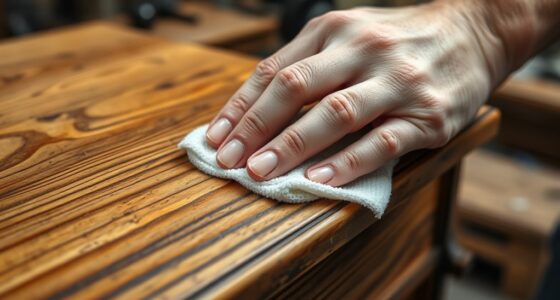
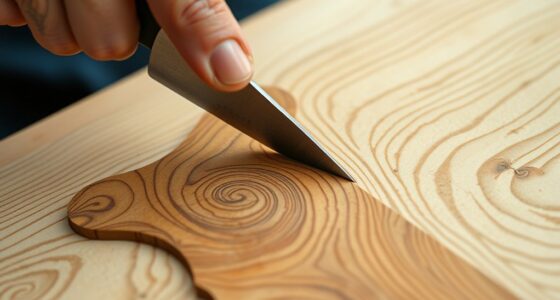
First, surface preparation is critical. Veneer, being a thin layer of wood or laminate glued onto a substrate, can be delicate. You want to start by cleaning the surface thoroughly to remove dust, grease, or any residues that might interfere with paint adhesion. Use a gentle cleaner or a mixture of mild soap and water, then dry the surface completely. Next, lightly sand the veneer with fine-grit sandpaper—around 220-grit—to create a smooth, slightly rough surface that helps the primer and paint adhere better. Be careful not to sand too aggressively, as you could damage or sand through the veneer. After sanding, wipe away all dust with a tack cloth or a damp cloth, making sure the surface is spotless before moving forward.
Start with thorough cleaning and gentle sanding for a smooth, paintable veneer surface.
Once the surface is clean and prepped, you can move on to furniture refinishing. Applying a good primer designed for veneer or laminate surfaces is essential. Primer helps seal the surface, creating a uniform base and preventing the paint from soaking unevenly, which can cause warping or peeling over time. Allow the primer to dry fully according to the manufacturer’s instructions. When choosing paint, opt for a high-quality, durable type such as acrylic or oil-based paint, especially if the piece will see frequent use. Use a brush or roller suitable for smooth surfaces to apply thin, even coats. Multiple light coats will give you a better finish than one thick layer, and they help prevent drips or uneven coverage.
To further improve adhesion and longevity, consider applying a protective topcoat or sealant after the paint has dried completely. This extra layer helps prevent moisture from seeping in and causing the veneer to warp or peel. Additionally, understanding Kia Tuning options can be helpful if you want to customize your furniture’s aesthetic or performance, ensuring your piece remains both beautiful and durable. Throughout the process, patience is key. Rushing the drying times or skipping steps like thorough surface preparation can lead to peeling or warping down the road. With careful attention to detail, your painted veneer furniture or surface can look fresh, modern, and last for years to come. Proper surface preparation and finesse in furniture refinishing are your best tools for a professional, lasting result.
Frequently Asked Questions
What Types of Paint Are Best for Veneer Surfaces?
You should choose high-quality, acrylic latex or oil-based paints for veneer surfaces. These paints offer excellent paint adhesion and durability. Before painting, make sure proper veneer preparation by cleaning and lightly sanding the surface to enhance adhesion. Using a primer specifically designed for veneer can also help prevent peeling or warping. Avoid cheap or low-quality paints, as they’re more prone to chipping and may not adhere well to the veneer surface.
How Long Should Veneer Dry Before Painting?
A stitch in time saves nine, so give your veneer ample dry time before painting. You should wait at least 24 to 48 hours for the veneer to dry thoroughly, ensuring no moisture remains. Proper drying time is essential for maximum paint application and to prevent peeling or warping later. Rushing it can compromise your finish, so patience now guarantees a smooth, lasting result.
Can I Paint Over Already Peeled Veneer?
Yes, you can paint over already peeled veneer, but proper veneer preparation is essential for good paint adhesion. First, remove all loose veneer pieces and sand the surface gently to create a smooth, even texture. Clean off dust and grime thoroughly. Applying a primer designed for veneer helps improve adhesion, ensuring the paint sticks well and prevents future peeling or warping. This preparation guarantees a smooth, durable finish.
What Tools Are Recommended for Painting Veneer?
You should choose a high-quality synthetic brush for smooth, even coverage on veneer. A small to medium-sized brush works best for detailed areas, while a roller can be used for larger surfaces. Before painting, apply a suitable primer to enhance adhesion and prevent peeling. Make sure your tools are clean, and use consistent, gentle strokes to achieve a professional finish. This approach helps your paint adhere properly and minimizes warping or peeling.
How Do Temperature and Humidity Affect Veneer Painting?
A touch of finesse in your environment can make all the difference. You should prioritize moisture control and temperature regulation, as fluctuations can lead to veneer issues like peeling or warping. Humidity that’s too high or low causes the veneer to expand or contract, while extreme temperatures can hinder proper adhesion. Keep your workspace steady, using dehumidifiers or heaters as needed, to guarantee your painting project remains flawless and durable.
Conclusion
Think of your veneer as a delicate sailboat gliding smoothly across a calm lake. With the right care—proper preparation, gentle cleaning, and careful painting—you guarantee it stays afloat and beautiful for years to come. Neglect or harsh treatment, however, can cause it to crack or warp like a stormy sea threatening to upset your vessel. Treat your veneer with kindness and patience, and it’ll continue to shine like a steadfast boat on tranquil waters.