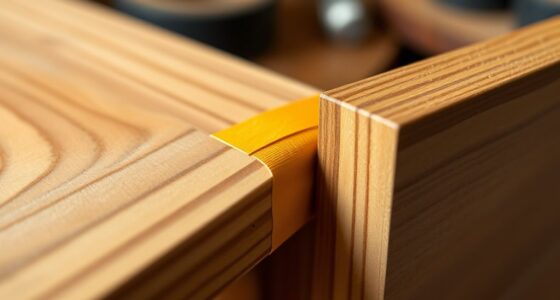
When cutting new veneer patches, it’s essential to match the grain and direction carefully. Follow the existing grain line closely with your saw or utility knife to guarantee clean, precise edges. Align the grain of your patch with the surrounding surface during both cutting and installation. Properly matching grain and direction makes the repair blend seamlessly and lasts longer. Keep these tips in mind, and you’ll discover more ways to achieve professional-looking results.
Key Takeaways
- Always align the veneer’s grain direction with the existing wood to ensure seamless blending.
- Cut the veneer following the grain line closely for cleaner edges and better fit.
- Transfer the existing grain pattern onto the new veneer before cutting for a natural match.
- Use sharp tools and cut with the grain to prevent fraying and achieve precise edges.
- Pay attention to grain orientation during installation to maintain the repair’s strength and aesthetic.
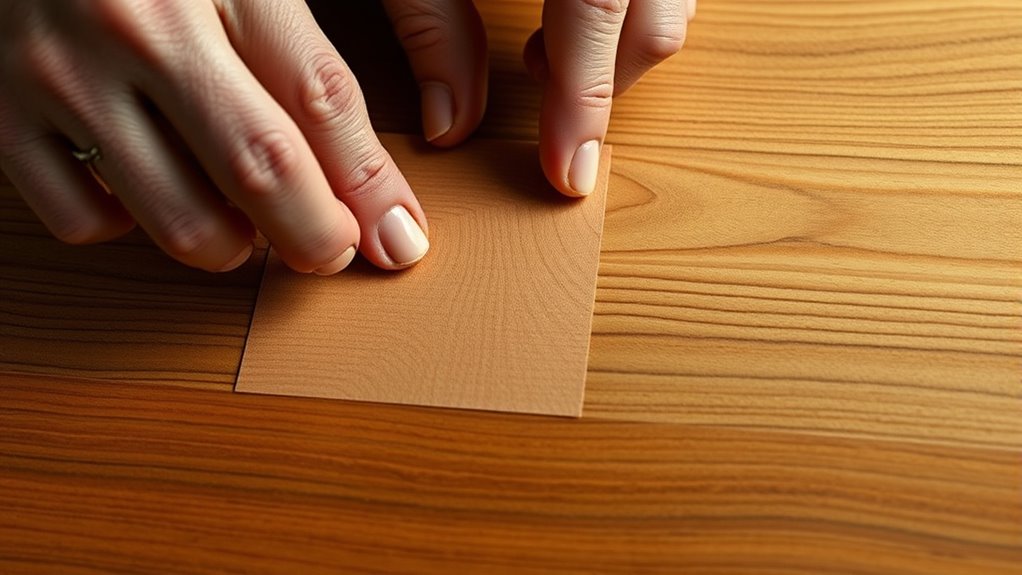
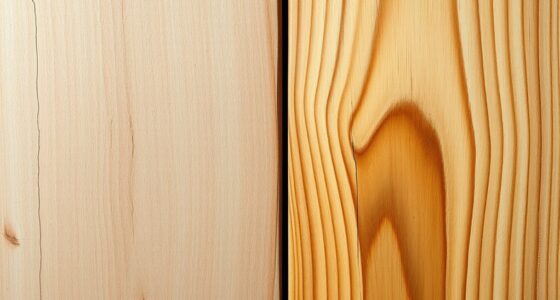
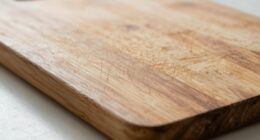
Veneer patches are a simple and effective solution for repairing damaged or worn-out wood surfaces. When you’re cutting new veneer patches, one of the most critical aspects to regard is matching the grain and direction. Properly aligning the grain ensures that your repair blends seamlessly with the existing wood, making the patch nearly invisible. If the grain runs in a different direction from the surrounding surface, it can stand out and compromise the overall appearance of your repair. To avoid this, take a close look at the grain pattern on the damaged area and carefully transfer that pattern onto your new veneer before cutting. This attention to detail helps you achieve a natural, cohesive look once the patch is glued into place. Additionally, understanding the artistic significance of grain alignment can help guide your choices for a more refined finish.
Aligning the grain isn’t just about aesthetics—it also impacts the strength and durability of your repair. When the grain direction is consistent, the veneer is less likely to split or crack over time, especially in areas prone to stress or movement. As you cut your veneer patch, make sure your saw or utility knife follows the grain line closely. Cutting against the grain can create rough edges that are tougher to blend and may cause the veneer to chip or fray. By maintaining a precise grain alignment during cutting, you set the stage for a cleaner, more professional finish.
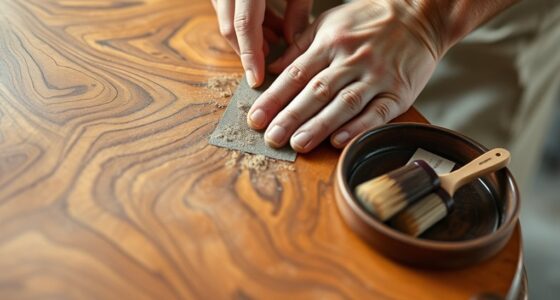
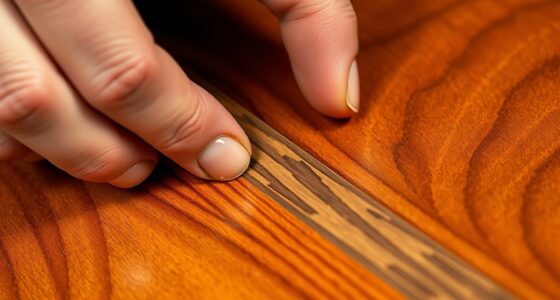
Patch blending is equally important to make your repair as invisible as possible. Once you’ve cut your veneer to size with the correct grain direction, you’ll want to focus on blending the patch into the existing surface. This involves more than just applying glue; it means ensuring the edges of your patch are smooth and flush with the surrounding wood. Use fine-grit sandpaper to gently feather the edges, making the transition seamless. When applying stain or finish, match the color and sheen as closely as possible to the existing surface. This careful blending minimizes the visual differences, giving your repair an almost original look.
In the end, taking your time to pay attention to grain alignment and patch blending makes all the difference in veneer repair. When you cut your patches with precision and carefully blend the edges, you’ll create a repair that’s durable and visually indistinguishable from the rest of the piece. It’s a process that rewards patience and accuracy, but the result is a restored surface that looks professionally done and stands the test of time.

GreenForest Folding Desk with Wheels and Storage Shelf, 24.8 Inch Compact Portable Rolling Desk for Small Spaces, Mobile Foldable Computer Table, Easy Assembly, Pure White
Smooth Mobility and Locking Wheels: 6 swivel casters move effortlessly on any floor. Roll portable workstations from bedroom...
As an affiliate, we earn on qualifying purchases.
Frequently Asked Questions
How Do I Choose the Right Veneer Patch for My Project?
You should carefully consider grain matching and patch selection to guarantee a seamless repair. Look for veneer patches with grain patterns and directions that closely match your existing surface. Check the color and texture as well, so the patch blends naturally. When choosing, hold the patch next to the damaged area to compare grain flow. Proper patch selection with matching grain and direction makes your repair look professional and less noticeable.
Can Veneer Patches Be Used on Curved Surfaces?
Yes, veneer patches can be used on curved surfaces. To get a seamless look, you need to carefully match the grain alignment with the surface’s curvature. Flex the veneer slightly if needed, and cut the patch with the grain running in the same direction as the curve. This guarantees the patch blends smoothly, maintaining a natural appearance and strength across the curved area.
What Tools Are Best for Cutting Veneer Patches Accurately?
Your tools can make or break your veneer patch, so don’t settle for less! For precision cutting, use a sharp utility knife or a fine-tooth saw like a Japanese pull saw. A sharp blade guarantees clean, accurate cuts, essential for matching grain and direction. Consider a craft knife for detailed work and a saw for larger patches. Proper blade selection helps you achieve flawless results effortlessly.
How Do I Prevent Visible Seams When Applying Patches?
To prevent visible seams when applying veneer patches, focus on grain alignment and seamless blending. Carefully match the grain direction of your patch to the surrounding veneer, ensuring they run in the same way. Use fine sandpaper to smooth the edges, feathering the shift for a more cohesive look. Applying a thin layer of adhesive evenly helps avoid bumps, and blending the edges with a compatible finish makes the seam nearly invisible.
Is It Possible to Stain Veneer Patches to Match Existing Wood?
Think of staining veneer patches like blending watercolor shades on paper. Yes, you can stain veneer patches to match existing wood. Use color matching techniques and stain blending to achieve a seamless look. Apply a small test patch first, then build up color gradually, blending edges carefully. This approach helps the patch blend naturally with the surrounding veneer, making it almost invisible, just like a watercolor artist perfects their shades.

JYLH JOYSEEKER Foldable Mobile Standing Desk, 27 Inch Small Rolling Laptop Cart Height Adjustment, 90° Tiltable Bedside Table, No Assembly Needed Portable Computer Workstation, White
Foldable & Portable Desk:26.8''x15.7''x0.6'' beveled desktop, 0-90° Tiltable sofaside table, provide a comfortable working condition at home. Only...
As an affiliate, we earn on qualifying purchases.
Conclusion
When you’re cutting new veneer patches, always focus on matching the grain and direction for a seamless look. Take your time, like a true artisan from the Renaissance, and double-check your work before gluing. Remember, even the finest craftsmanship can be undone if the grain isn’t aligned perfectly. With patience and attention to detail, your repair will blend in as smoothly as a polished monolith. Trust your skills, and you’ll have a flawless finish that’s fit for a palace.
Vaunn Medical Pneumatic Adjustable Overbed Bedside Table with Wheels (Hospital and Home Use)
MULTIPURPOSE OVERBED TABLE - Helps disabled and handicapped individuals and anyone with physical limitations or injuries perform their...
As an affiliate, we earn on qualifying purchases.

AMSXNOO Height Adjustable Standing Desk, No Assembly Folding Collapsible Computer Desk, Rolling Laptop Table for Workshop Home Office
【NO INSTALLATION REQUIRED】This standing computer desk does not require installation and can be easily deployed for use. It...
As an affiliate, we earn on qualifying purchases.