
Building a shop-vac dust separator for under $30 is simple and effective. You’ll need a large plastic container, flexible hose, and some fittings to create a sealed system that diverts debris into the container instead of clogging your vacuum filter. By drilling holes in a sturdy, airtight container and attaching the hoses properly, you can keep your workspace cleaner, extend your vacuum lifespan, and improve safety. If you want to see step-by-step instructions, keep going—this guide will walk you through everything.
Key Takeaways
- Use a large airtight container and connect it to your shop vac with a flexible hose for effective dust separation.
- Drill matching holes in the container lid and near the bottom for hose attachment and debris collection.
- Ensure all connections are sealed tightly to prevent dust escape and maintain vacuum efficiency.
- Regularly empty the container outside to prevent dust buildup and prolong your vacuum’s lifespan.
- Build the separator with simple tools and affordable materials, keeping the total cost under $30.
A shop-vac dust separator is an essential accessory that helps keep your workspace clean and your vacuum running efficiently. When you’re working with wood, drywall, or other dusty materials, dust collection becomes critical—not just for keeping your area tidy but also for protecting your health. Dust particles can become airborne, potentially causing respiratory issues or aggravating allergies. That’s where a DIY dust separator can make a big difference. By diverting debris before it reaches your shop vac, you extend the life of your vacuum and reduce the amount of fine dust that escapes into the air. Incorporating Natural Language Processing (NLP) can also help analyze feedback or troubleshoot issues more effectively.
Building a dust separator for under $30 is simple and cost-effective. The key is to understand the importance of safety precautions during the process. Always wear eye protection and a dust mask to shield yourself from debris and dust particles. When cutting or modifying materials, work in a well-ventilated area to avoid inhaling dust. Use proper tools and handle sharp edges carefully to prevent injuries. Remember, a homemade dust separator isn’t just about convenience—it’s about creating a safer workspace.
Always wear safety gear and work carefully when building your dust separator.
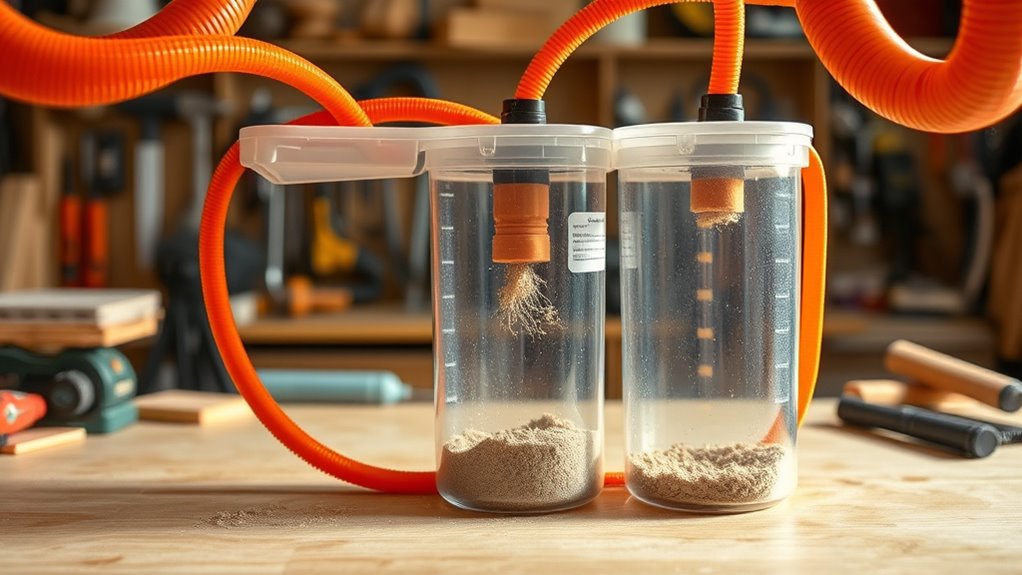
Your first step is to gather some basic materials, such as a large plastic trash can or a similar container with a lid, a section of flexible hose, and some fittings. You can often find these at hardware stores or repurpose items you already have. Make sure the container is sturdy and airtight when sealed. Drill a hole in the lid that matches the diameter of your vacuum hose, ensuring a snug fit. Attach the hose securely, creating a sealed connection that prevents dust from escaping. Then, cut a hole near the bottom of the container for the dust collection outlet—this is where debris will settle.
Once assembled, your dust separator works by allowing debris to fall into the container instead of clogging your vacuum’s filter or motor. When you turn on your shop vac, the suction pulls dust and debris through the hose into the container, where heavier particles settle at the bottom. This setup markedly reduces dust in the airflow, making your vacuum more efficient and prolonging its lifespan. To maintain safety, always empty the container outside or into a proper waste receptacle, avoiding dust buildup inside your workspace.
In the end, building a shop-vac dust separator for under $30 is an easy project that pays off in cleaner air, safer working conditions, and a more efficient vacuum. By paying attention to dust collection and safety precautions, you create a more comfortable, healthier environment for all your projects. It’s a smart, budget-friendly way to improve your workshop and protect your health without sacrificing convenience or effectiveness.
Frequently Asked Questions
Can the Dust Separator Be Used With All Shop Vac Models?
You might wonder if your shop vac can use a dust separator. Most separators are designed for common vacuum compatibility, but you should check your model’s size and hose fittings. You may need separator modifications to fit certain vacuums. Generally, with minor adjustments, you can make a dust separator work with various shop vac models, helping you keep your workspace cleaner and your vacuum functioning efficiently.
What Safety Precautions Should I Take During Assembly?
During assembly, you should prioritize safety by wearing appropriate safety gear like gloves and eye protection to prevent injuries. Make certain your workspace is well-ventilated to avoid dust inhalation and keep the area clear of clutter. Carefully follow instructions to prevent accidents or damage to parts. Remember, proper dust collection setup keeps your workspace cleaner and safer, reducing exposure to dust and debris. Always double-check connections before use for safe operation.
How Often Should the Dust Container Be Emptied?
Imagine the mess you’d face if you ignore dust disposal and container maintenance. To keep your shop clean and safe, empty the dust container regularly—at least after each use or when it’s half full. Frequent dust disposal prevents overflows and maintains suction power. Staying on top of container maintenance not only prolongs your vacuum’s lifespan but also ensures a safer, healthier workspace, free from airborne dust hazards.
Is the Separator Effective With Fine Dust Particles?
You might wonder if the separator works well with fine dust particles. It can be quite effective if you include fine dust filtration features, like a fine mesh or filter within the separator. Proper design improves separator efficiency, ensuring even tiny particles are captured. Regularly emptying the dust container also helps maintain its effectiveness. With these steps, your separator will perform well at filtering fine dust, keeping your workspace cleaner and healthier.
Can I Customize the Size of the Separator for Different Tasks?
You can definitely customize the separator dimensions to suit different tasks. By adjusting the size of the container or the inlet and outlet ports, you create customization options that fit your specific needs. Larger separator dimensions can handle more debris, while smaller ones are ideal for lighter tasks. Just make certain your modifications maintain proper airflow and separation efficiency, so your dust collection system remains effective across various projects.
Conclusion
Building this shop-vac dust separator costs less than a loaf of bread and keeps your workspace tidy. With just a bit of elbow grease and some common parts, you’ll have a cleaner, safer shop faster than you can say “hunky-dory.” Imagine yourself as a modern-day craftsman, wielding your dust separator like a knight’s shield against clutter. So, roll up your sleeves, and turn your workshop into a spotless haven — it’s easier than you might think!