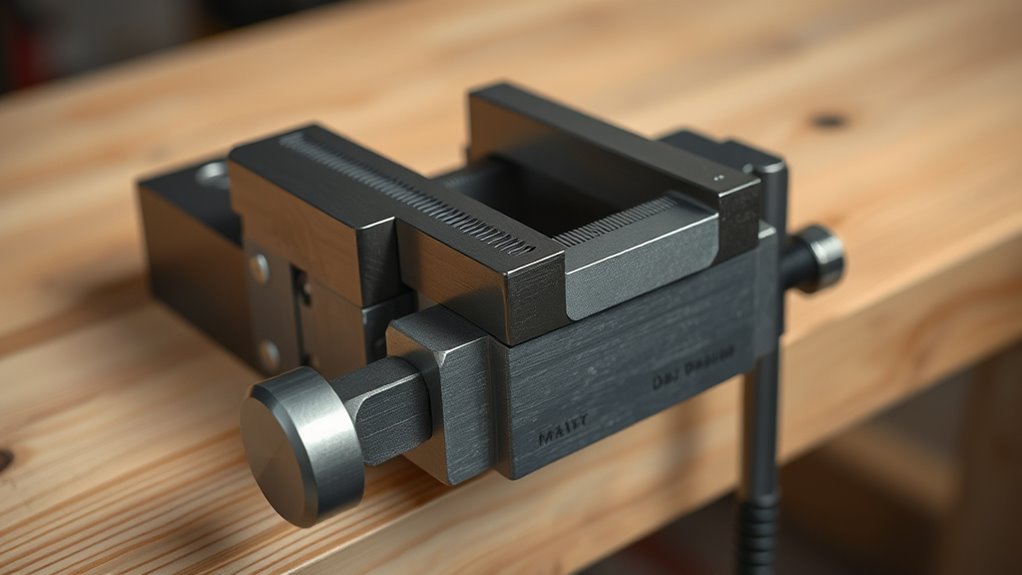

You can install a quick-release vise without drilling into your workbench by using clamp-on or portable mounting systems. These vises come with sturdy clamp mechanisms that attach securely to the edge or surface of your bench, often with protective pads to avoid damage. Simply open the clamp, position it where you want, and tighten until it’s stable. For more tips on securing your vise safely and effectively, keep exploring your options.
Key Takeaways
- Use clamp-on vises with rubber pads for secure, non-permanent attachment to the workbench surface.
- Select a clamp system that allows easy installation and removal without drilling.
- Position the vise for optimal access and stability, ensuring it doesn’t obstruct workspace.
- Tighten the clamps sufficiently to prevent movement during use, checking regularly.
- Consider mounting on a temporary plate or jig that can be clamped without damaging the bench.

Installing a quick-release vise is a straightforward process that can save you time and effort in your workshop. You don’t need to drill through your workbench to set it up, which makes it ideal if you want a non-permanent or easily removable solution. The key to a secure and functional installation lies in proper clamp positioning and exploring mounting alternatives that suit your workspace.
First, consider where you want your vise to sit on your workbench. Think about the tasks you’ll perform most often and the space needed for comfortable operation. Clamp positioning is vital; you want the vise positioned where it can handle your projects without obstructing other tools or workspace. Most quick-release vises come with mounting plates or bases designed for clamp-on installation, so you can easily attach them to the edge of your workbench without permanent modifications. When positioning the clamp, ensure it’s tight enough to prevent any movement but not so tight that it damages the bench surface or restricts the vise’s operation.
Position your vise for easy access and unobstructed workspace.
Next, explore mounting alternatives that don’t involve drilling. Many quick-release vises are compatible with clamp-on systems, which use a strong, adjustable clamp mechanism to secure the vise to your workbench. These clamps typically feature rubber pads to protect your surface and provide a firm grip. To install, simply open the clamp, position it on the edge of your bench, and tighten until secure. This method allows for quick setup and removal, giving you flexibility to move the vise as needed. If you prefer a more stable setup, some models allow you to attach the vise to a temporary mounting plate or a work-holding jig that can be clamped or bolted to the bench without drilling.
Additionally, understanding the importance of clamp positioning can help you optimize stability and safety during use. For added stability, ensure the clamp positioning provides enough leverage and grip to handle forceful work. You might also consider using additional clamps or supports to prevent slipping during heavy-duty tasks. Always double-check the tightness before applying pressure, and periodically re-tighten during use. If you’re working on delicate or high-precision projects, make sure the mounting alternative you choose won’t shift or wobble.
Frequently Asked Questions
Can I Install a Quick-Release Vise on a Curved Bench?
Yes, you can install a quick-release vise on a curved bench, but you need to take into account clamping techniques and bench stability. Use adjustable mounting options or custom pads to guarantee a secure fit on the curve. Proper clamping techniques will help stabilize your workpiece, but make sure the vise is firmly attached to avoid slipping. With careful setup, you can achieve effective clamping even on a curved surface.
What Tools Are Needed for Non-Drilling Installation?
Imagine wielding the precision of a master craftsman—no drills needed. For non-drilling installation, you’ll need basic tools like clamps, a level, and possibly a wrench. These tools help you secure the vise firmly, ensuring proper clamping methods and perfect vise positioning. With patience and the right tools, you can achieve a stable setup that rivals professional workshops, all without making a single drill hole.
Will This Method Damage My Workbench Surface?
You might worry about damaging your bench surface with this method, but it’s unlikely if you take proper precautions. The installation doesn’t require drilling, so it won’t harm the finish protection or leave permanent marks. Just make certain the clamp pressure isn’t excessive, and use padding if needed. This approach helps preserve your workbench’s surface, keeping it intact and looking great while securely holding your work.
Is This Installation Suitable for Heavy-Duty Woodworking?
Think of your workbench as the backbone of your woodworking projects. For heavy-duty tasks, guarantee the bench is stable and the vise is built to last. This installation method can support substantial work, but if your work involves large forces, check that the bench’s stability and vise durability are up to the challenge. If these are solid, this setup can handle serious work without compromising your craftsmanship.
How Secure Is the Vise Without Drilling Into the Bench?
You might wonder how secure the vise is without drilling into your bench. With proper clamping strength, it stays firmly in place during work, offering good installation stability. The design guarantees the vise grips tightly without damaging your work surface. While it may not match the stability of a bolted-down vise for heavy-duty tasks, it’s reliable for most woodworking projects, giving you confidence without permanent modifications.
Conclusion
So, who knew installing a vise could be so painless, right? No need to drill holes or turn your bench into Swiss cheese—just a few simple steps and you’re all set. It’s almost funny how easy it is to upgrade your workspace without the usual chaos. Now, you can finally focus on your projects instead of fixing your mistakes. Who knew a quick-release vise could make your life so much easier? Happy working!