
To make precise 60-degree cuts with a miter saw, set the saw at 15°, subtracting 45° from 60°, and confirm the angle with a protractor or scale. Create a custom jig from scrap wood by making two 45° cuts in opposite directions to guide larger cuts. Secure your workpiece with clamps, and perform test cuts to guarantee accuracy. Following these steps helps you achieve perfect joints; continue with care to master this technique.
Key Takeaways
- Subtract 45° from 60°, set the saw to 15°, and verify the angle using the built-in scale or a protractor.
- Create a custom jig from scrap wood by making two 45° cuts in opposite directions to guide larger or complex angles.
- Secure the workpiece firmly against the jig and fence with clamps before making the cut for accuracy.
- Perform a test cut on scrap wood to confirm the setup, then proceed with the actual 60° cut smoothly.
- Verify the final cut angle with a protractor or square, ensuring it matches the intended 60° precision.

VEVOR Sliding Compound Miter Saw, 10-Inch Blade, 15 Amp Motor, 60-Tooth, Corded Double Bevel Sliding Miter Saw, LED Precision Alignment, Angle Adjustable, for Wood, Composite Decking, Laminates
- LED Precision Alignment: Projects clear, accurate cutting lines
- Adjustable Cutting Angles: Easy to set and lock angles
- Axial Sliding System: Smooth forward and backward slides
As an affiliate, we earn on qualifying purchases.
As an affiliate, we earn on qualifying purchases.
Understanding the Basics of Miter and Bevel Angles

To make accurate 60-degree cuts, it is vital to understand the basics of miter and bevel angles. A miter angle involves rotating the saw table to cut across the face of the wood, typically up to 45° or 55°. This adjustment allows you to create precise corner joints, essential for projects like frames or molding. Bevel angles, on the other hand, tilt the saw head to cut through the thickness of the material, resulting in beveled edges. Combining miter and bevel adjustments enables you to make complex, compound cuts for intricate woodworking designs. Knowing how to set the miter angle accurately ensures your cuts align perfectly, producing clean, professional-looking joints. Mastering these fundamentals is key to achieving accurate 60-degree cuts with your miter saw. Additionally, understanding angle measurement techniques can improve your cutting precision and efficiency during the cutting process. Developing a measurement method tailored to your tools and project requirements can further enhance your accuracy.
Essential Tools and Materials Needed for Precise Cuts

Making precise 60-degree cuts requires the right tools and materials to guarantee accuracy and safety. Your main tool should be a reliable miter saw, ideally one that allows for precise angle adjustments or custom setups. You’ll also need a sturdy square or protractor to double-check angles, scrap wood to create custom jigs for non-standard cuts, clamps to secure your workpieces firmly, and safety gear like goggles and ear protection to stay safe during cutting. Using the saw’s built-in angle scales and verifying with a digital angle finder ensures accuracy. Remember, for larger angles like 60°, subtract 45° to determine the correct setting when using custom jigs or setups. Proper preparation minimizes errors and enhances safety. Additionally, understanding the importance of safety standards can help prevent accidents and ensure your tools meet quality requirements. Incorporating accurate measurement techniques is crucial for achieving precise cuts consistently. Being aware of headphone compatibility options can also be useful if you need to listen to instructions or music while working. Using proper calibration of your saw before each project can further improve cutting precision.
Setting the Miter Saw to 60 Degrees
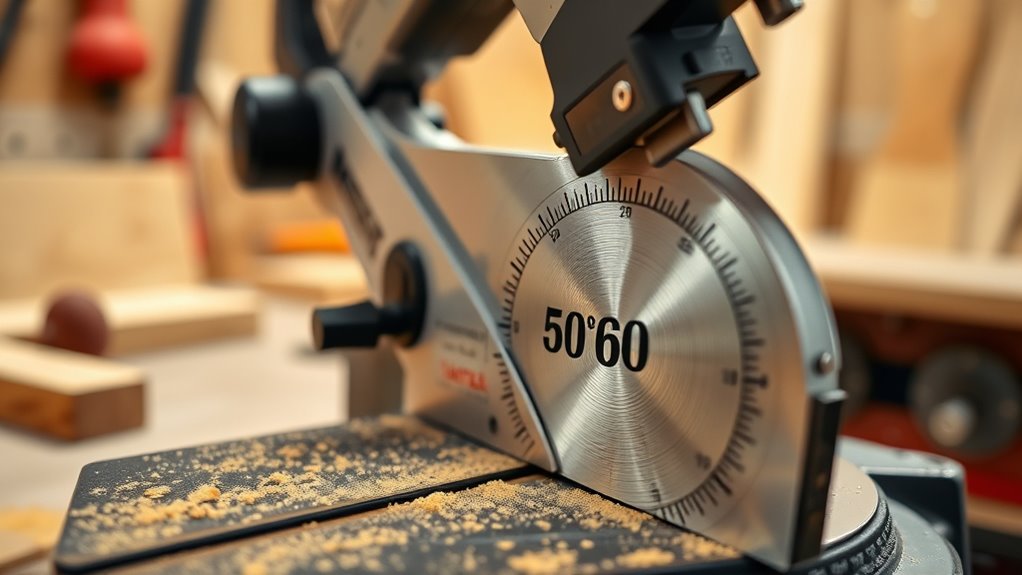
Begin by setting your miter saw to the correct angle for a 60-degree cut. Since most saws only measure up to 45°, you’ll need to subtract 45° from 60°, so set the saw at 15°. Use the built-in scale or a protractor to verify the miter angle indicator is accurately aligned at 15°. Once set, lock the saw securely in this position to prevent any movement during the cut. Double-check the angle with a digital or manual gauge to confirm you’re at the precise 60° setting. Properly setting the saw ensures your cuts are accurate and clean. Additionally, understanding the self watering plant pots system can help you plan your gardening projects more effectively. Taking the time to familiarize yourself with the miter saw’s features and measurements can greatly improve your accuracy and efficiency. This careful preparation can also help prevent issues like toilet clogs caused by improper cuts or measurements in other projects. It’s important to remember that accurate measurement is key to achieving perfect results, especially when working with detailed angles. For example, sound healing science reveals that precise frequencies can influence cellular regeneration, emphasizing the importance of accuracy in technical tasks. Take your time to verify the angle before making any cuts to avoid mistakes and ensure perfect results.
Creating and Using a Custom Angle Jig for Larger Cuts
Creating a custom angle jig allows you to cut larger or more complex angles that exceed your saw’s default range. To make one, attach a scrap piece of wood (at least 3.5″ wide and 18″ long) to the saw fence with hot glue or screws, forming a guide for larger angles. When using the jig, cut two 45° angles in opposite directions to create a V-shaped guide for precise, bigger miter angles. Set the saw to an angle that subtracts 45° from your desired cut (e.g., 15° for a 60° angle). This method effectively extends the miter saw’s range, ensuring accurate angled cuts. Always wear hearing protection and safety glasses, and keep your hands away from the blade. Use a speed square to verify your angles on the miter or circular saw. Additionally, understanding the horsepower of electric dirt bikes can help you select the right model for your needs. Properly tool maintenance ensures your saw remains accurate and safe for these custom cuts.
Step-by-Step Procedure for Making a 60-Degree Cut
To make a precise 60-degree cut, set your saw to 15°, which is 45° less than the desired angle. Prepare a custom jig from scrap wood to guide your workpiece accurately at this angle. Once everything is set, position your piece against the jig and make the cut carefully. Remember, practicing dynamic communication exercises can improve your ability to follow precise instructions and achieve better results. Additionally, understanding payment security measures can help protect your tools and setup from potential disruptions during your project. Incorporating digital literacy strategies at home can also enhance your understanding of tools and safety practices involved in woodworking projects, especially when utilizing advanced AI technology to improve project accuracy and efficiency.
Adjust Saw to 15
Before making your 60-degree cut, you need to set your miter saw to 15°. To do this, make sure the saw’s miter angle is accurately adjusted to 15° using the miter scale. Lock it securely in place before proceeding. Use a square or angle gauge to double-check that the blade is precisely at 15°, ensuring your cut will be accurate.
- Verify the miter angle before locking in position
- Make sure the saw’s scale aligns perfectly with 15°
- Double-check with an angle gauge for precision
- Support your workpiece firmly against the fence and table
Make sure all adjustments are tight and correct. Proper setup is key to making a clean 60-degree cut.
Prepare Custom Jig Setup
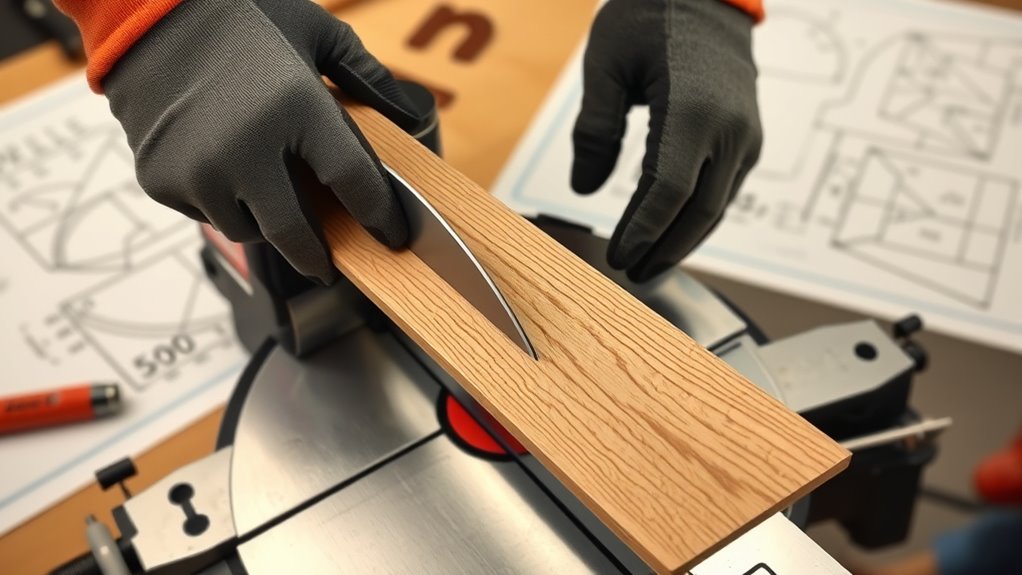
Begin by selecting a scrap piece of wood at least 3.5 inches wide and 18 inches long. Attach it securely to the saw fence using hot glue or screws, making sure the saw is properly aligned before fastening. Next, make two 45° cuts in opposite directions on the scrap, creating a V-shaped notch. Carefully remove the cut-out section, leaving a custom angled guide. This forms your jig, which will help verify consistent, precise cuts. Proper jig setup is essential for achieving precise angles and ensuring safety during the cutting process. Additionally, regularly checking the jig’s alignment can prevent errors and improve the accuracy of your cuts. Position the jig on your workpiece, aligning it carefully to your desired cut line. Set the miter saw to 15°, which is 60° minus 45°, to produce an accurate 60° angle. With your custom jig in place, you’re prepared to make consistent, accurate cuts.
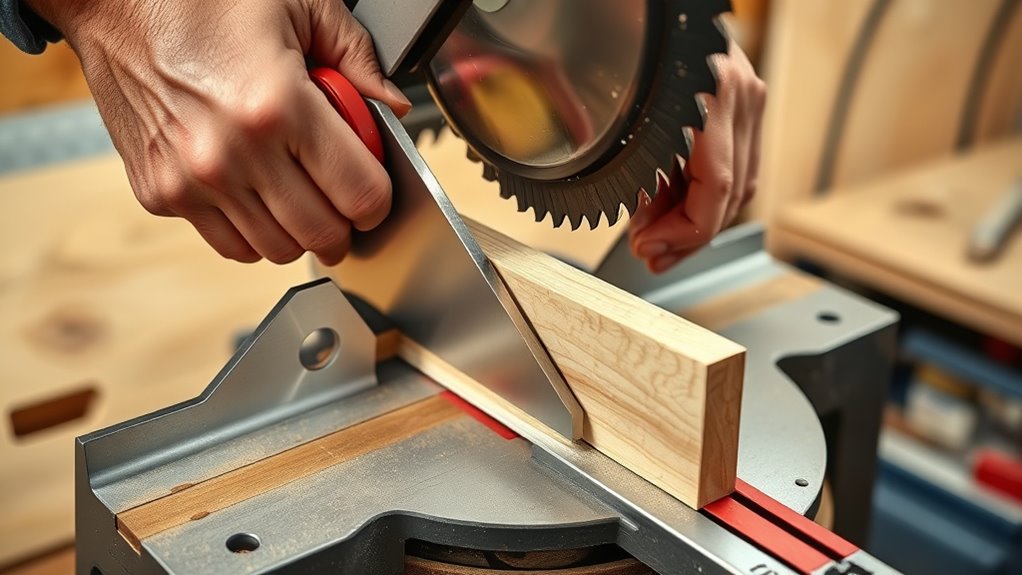
Make the Precise Cut
Once your miter saw is set to 15°, secure your workpiece firmly against the fence and double-check that the saw is properly aligned. This guarantees an accurate 60-degree cut. Before cutting, support the material with clamps or extra supports to prevent movement and maintain precision. Keep your hands at least 6 inches from the blade, and wear safety glasses and ear protection. To confirm your setup, perform a test cut on scrap wood and verify the angle. If needed, adjust your setup until you achieve the desired precision. When ready, slowly lower the blade onto the workpiece, making a smooth, controlled cut. Proper setup procedures can help ensure consistent cuts and improve overall accuracy. Additionally, understanding the accuracy of miter cuts can help you achieve better results in your projects. Consistent pressure and steady motion produce the clean, accurate 60-degree angle you’re aiming for.
Verifying the Accuracy of Your Cut
After making your cut, it’s crucial to verify its accuracy. Use a protractor or digital angle finder to measure the actual angle, and compare the piece against a square or straight edge. Confirm your results with a checkered square or a digital gauge to guarantee your cut is precise.
Measure the Cut Angle
To verify the accuracy of your 60-degree cut, start by using a protractor or an angle finder to measure the finished angle directly. Place the protractor’s baseline along the cut edge, then read the angle where the two pieces meet. For better accuracy, align the cut piece against a square and check for gaps or misalignments at the joint. Double-check your miter saw’s setting before cutting, especially if you used a custom jig or made complex adjustments. Record your measurements and compare them to your intended 60°. If the angle isn’t exact, make small adjustments to your saw’s settings and re-measure. This process ensures your cuts are precise and your project stays on track.
Use a Checkered Square
Using a checkered square is an effective way to verify that your cut is at a precise 60° angle. Place the checkered square firmly against the cut surface, ensuring the grid lines are aligned with the edges of your workpiece. This helps you confirm whether the cut followed the intended angle. After making the cut, use the square to measure directly, checking if the grid lines match the cut face. If there’s any misalignment, it indicates the saw may need adjustment. Regularly verifying with a checkered square during your project improves accuracy and catches deviations early. This method is especially helpful when making multiple cuts for frames or moldings, ensuring each remains consistent and precise throughout your work.
Confirm With Protractor
A digital or manual protractor is essential for accurately verifying your cut angle. To guarantee your miter saw is precise, place the protractor directly against the cut surface or on the face of the workpiece. Make sure the workpiece is stable and securely clamped to prevent movement during measurement. Carefully read the angle measurement and compare it to your target of 60°. If there’s a discrepancy, note the difference and re-cut if necessary to match the desired angle. Regularly verifying your cut ensures accuracy and a clean fit in your project. Using a protractor helps you catch small errors early, saving time and material. Confirming with this tool guarantees your work stays consistent and professional-looking.
Tips for Safe and Clean Cutting Practices

Ensuring safety and cleanliness during cutting requires careful attention to your equipment and techniques. Always wear safety glasses, ear protection, and a dust mask to shield yourself from debris and noise. Keep your hands at least six inches away from the blade, avoiding reaching over or near the cutting area. Securely clamp the workpiece to prevent movement that could lead to inaccurate cuts or kickback. Double-check the saw’s angle and fence alignment before each cut to maintain precision and safety. Wait for the blade to fully stop before removing scrap or adjusting the workpiece to prevent accidental injuries. Staying attentive and following these practices helps create a safer environment while ensuring clean, accurate cuts every time.
Applying the Technique to Complex Angles and Projects
Applying the technique of adjusting your saw angle with custom jigs allows you to cut complex angles beyond the standard 45°, opening up new possibilities for intricate projects. By creating a reusable jig that cuts two 45° angles in opposite directions on a scrap piece, you can extend your saw’s capabilities. This method makes precise cuts at larger angles like 60°, 70°, or even 85°, which are essential for custom moldings and complex joints. When using this approach, remember to:
Using custom jigs to cut complex angles expands your woodworking possibilities beyond standard 45° cuts.
- Support and clamp your workpiece securely
- Wear appropriate safety gear
- Double-check your jig setup before cutting
- Adjust the saw to the correct angle based on the subtraction method (e.g., 15° for a 60° cut)
This technique enhances your versatility for detailed woodworking projects.
Frequently Asked Questions
How to Make a 60 Degree Cut With a Miter Saw?
To make a 60-degree cut with your miter saw, recognize that standard saws may not cut directly at that angle. Instead, set the saw to 15°, which is 45° minus 30°, to attain the correct cut. Use a custom jig if needed to support larger angles. Always clamp your workpiece securely, double-check your settings, and wear safety gear to guarantee precise and safe cuts.
How Do You Make Precise Miter Cuts?
To make precise miter cuts, you need to set your saw to the correct angle, locking it securely in place. Always verify the angle with a protractor or square for accuracy. Keep your workpiece firmly against the fence, ensuring it’s supported properly. Use safety gear, make slow, controlled cuts, and double-check your setup before cutting. This way, you’ll achieve clean, accurate miter joints every time.
How Do You Make a 60 Degree Angle?
To make a 60-degree angle cut, you set your miter saw to 15°, because it’s based on subtracting 45° from the desired 60°. Secure your workpiece, align the saw accurately, and use a jig if needed for consistency. Remember, flipping the board doesn’t change the angle—you only need to adjust the saw to 15°. Always wear safety gear and clamp your material for precise, safe cuts.
How Do You Adjust a Miter Saw for Accurate Cuts?
Did you know that a slight misalignment can lead to up to 5% material waste? To adjust your miter saw accurately, first loosen the miter lock. Rotate the saw table to your desired angle, then tighten the lock securely. Use a digital gauge or carpenter’s square to verify the angle. Make slow, incremental adjustments, then test on scrap material to guarantee precision before making your final cut.
Conclusion
Mastering precise 60-degree cuts with your miter saw takes patience and attention to detail. By understanding angles, setting up your saw correctly, and verifying your work, you guarantee clean, accurate results. Remember, practice makes perfect—don’t rush the process. As the saying goes, “A stitch in time saves nine.” Take your time, double-check your measurements, and you’ll craft perfect cuts every time.