To mortise with a drill press and chisels, start by choosing the right bit, like a Forstner bit, for clean, flat-bottomed holes. Clamp your workpiece securely and set the drill press to the proper depth. Drill overlapping holes to remove material, then chisel out the waste carefully from outside inward. Keep your tools sharp and practice steady technique for cleaner, more professional results—if you continue, you’ll discover tips to perfect your mortising process even further.
Key Takeaways
- Choose flat-bottomed drill bits like Forstner bits for clean, flat-bottomed mortises.
- Set the drill press to the correct depth and drill overlapping holes, avoiding complete through cuts initially.
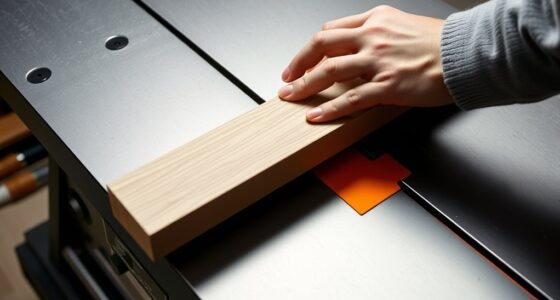
- Secure the workpiece firmly and drill with steady pressure, maintaining proper alignment for accuracy.
- Use sharp chisels to remove waste, working from outside edges inward, and make small adjustments for a snug fit.
- Keep chisels sharp and practice on scrap wood to develop precise technique and achieve professional-quality mortises.

Mortising with a drill press and chisels is an effective way to create precise, clean mortises for woodworking projects. To get started, you need to understand the different drill bit types available and how they influence your mortising process. For creating mortises, for example, flat-bottomed bits like Forstner bits work well because they produce clean, flat-bottomed holes, making it easier to chisel out the remaining material. Spiral or twist drill bits are common but may leave a slight radius at the bottom, requiring more chisel work to achieve a perfect mortise. Choosing the right drill bit type helps minimize chisel work and results in a cleaner joint.
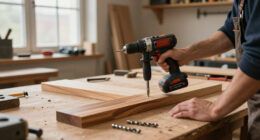
Once you’ve selected your drill bit, set the drill press to the appropriate depth. Drill a series of overlapping holes within the mortise area, being careful not to drill all the way through the wood initially. This approach reduces the amount of material you’ll need to chisel out later. Use a clamp to secure your workpiece firmly, preventing any movement that could affect precision. As you drill, keep the drill bit straight and steady, applying even pressure for a clean, accurate hole. Adding the correct drill bit alignment techniques can further improve the accuracy of your mortise.
Set drill depth, drill overlapping holes carefully, secure workpiece firmly, and maintain steady pressure for precision.
After drilling, it’s time for chiseling techniques. Start by removing the bulk of the waste material with a sharp chisel, working from the outside edges toward the center. Keep the chisel beveled side down and work with controlled, deliberate taps to avoid splitting the wood. Use a mallet if necessary, but avoid excessive force that can cause rough surfaces or damage. As you chisel, periodically check the fit of your joint, making small adjustments as needed. For fine-tuning, pare away small shavings with the chisel, ensuring a snug fit without gaps.
Throughout the process, maintaining sharp chisels is essential. Dull tools make precise work difficult and can ruin the mortise. Use a honing stone or sharpening system regularly to keep your chisels in top condition. Practice your chiseling techniques on scrap wood before working on your actual project. This helps you develop a steady hand and a feel for how much material to remove with each tap.
Combining the right drill bit types with effective chiseling techniques allows you to produce mortises that are both accurate and professional-looking. With patience and attention to detail, you’ll find this method not only efficient but also rewarding, giving your woodworking projects a solid, well-crafted joinery foundation.

IRWIN Marples Forstner Bit Set, Wood Drill Bits, Made of Carbon Steel, Ideal for Fine Woodworking, Cabinet-Making and More, 14 Pieces (1966893)
- Drills Flat-Bottomed and Pocket Holes: Easily create precise holes
- Ultra-Sharp Cutting Teeth: Engineered for smooth cuts in wood
- Reduces Cutting Time: Speeds up woodworking projects
As an affiliate, we earn on qualifying purchases.
As an affiliate, we earn on qualifying purchases.
Frequently Asked Questions
Can I Use a Handheld Drill Instead of a Drill Press?
You can use a handheld drill instead of a drill press, but it’s not ideal for mortising. A drill press provides stability, precision, and consistent depth, which are essential for clean mortises. With a handheld drill, you’ll struggle to maintain accuracy and might risk uneven cuts or slipping. If you must use a handheld drill, go slow, secure your workpiece firmly, and consider using a guide to improve precision.
What Safety Gear Is Recommended for Mortising?
Did you know that proper safety gear can reduce injuries by up to 70%? When mortising, always wear protective eyewear to shield your eyes from flying chips, dust masks to prevent inhaling sawdust, and gloves for hand protection. Use wood clamps to secure your workpiece firmly, minimizing slips. Prioritizing safety gear guarantees you stay protected and work confidently, making your mortising projects safer and more enjoyable.
How Do I Maintain Chisels for Best Results?
To keep your chisels performing their best, regularly sharpen them through chisel sharpening to maintain a keen edge. After use, store your chisels properly in a protective case or tool rack to prevent damage and rust. Keep the blades clean and dry, and avoid dropping them. Proper maintenance guarantees precise mortising and extends your chisels’ lifespan, making your woodworking projects safer and more efficient.
What Types of Wood Are Best for Mortising?
You should choose soft woods like pine or cedar for mortising, as their lower hardness makes chisel work easier. Hardwoods like oak or maple can be more challenging due to their density. Pay attention to grain orientation; working with straight, parallel grain reduces splitting and makes mortising cleaner. Selecting the right wood based on hardness and grain orientation guarantees smoother mortises and easier chiseling, leading to better results.
How Do I Prevent Tear-Out During Mortising?
To prevent tear-out during mortising, stay one step ahead by paying close attention to grain direction. Always work with the grain, not against it, to keep cuts clean. Keep your chisel sharp, like a razor blade, to make precise cuts without tearing wood fibers. Using a sacrificial backer board can also help support the wood and reduce tear-out, ensuring your mortise turns out crisp and professional.
Conclusion
Now that you’ve mastered mortising with a drill press and chisels, you hold the key to transforming raw wood into precise craftsmanship. With each cut, you’re carving a path through your project’s future, turning simple materials into a work of art. Embrace the process like sculpting a masterpiece—your tools are your chisel, and your hands are the artist’s brush. Keep honing your skills, and watch your woodworking dreams carve their way into reality.