
To master dado and groove techniques, you need to understand stopped and through cuts. Stopped dadoes create partial-depth channels ideal for shelves or decorative features, while through cuts run the full width of the material for framing or boxes. Precise setup and control of your saw, fence, and workpiece are key to ensuring tight-fitting, strong joints. Proper technique minimizes waste and enhances your craftsmanship, so if you keep exploring, you’ll gain even more confidence and skill in these essential woodworking skills.
Key Takeaways
- Stopped dado cuts are partial channels that do not extend across the entire workpiece, ideal for shelving and decorative joints.
- Through dado cuts run fully across the board, providing strong, full-depth joints for framing and box construction.
- Precise fence adjustments and blade setup are essential to prevent overcutting in both stopped and through dado techniques.
- Using a dado blade on a table saw ensures consistent width and depth for tight-fitting, stable joints.
- Proper control during cutting minimizes splintering and ensures clean, accurate dados for professional-quality woodworking.
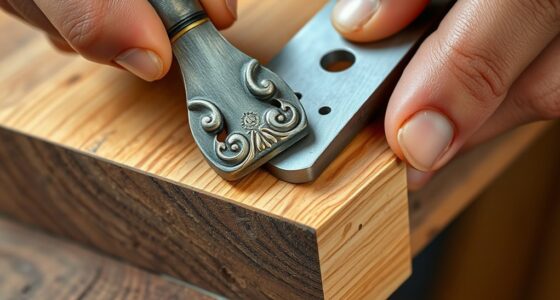
Have you ever wondered how skilled woodworkers achieve seamless joints and clean edges? It all comes down to understanding and mastering techniques like dado and groove cuts. These methods are fundamental for creating strong, precise connections in woodworking projects. When you cut a dado or groove, you’re establishing a channel that allows two pieces of wood to fit snugly together. This not only enhances the joint’s stability but also provides excellent motion control, preventing unwanted shifting or wobbling over time. The key to a successful dado or groove is guaranteeing the cut is clean, accurate, and properly sized for the mating piece.
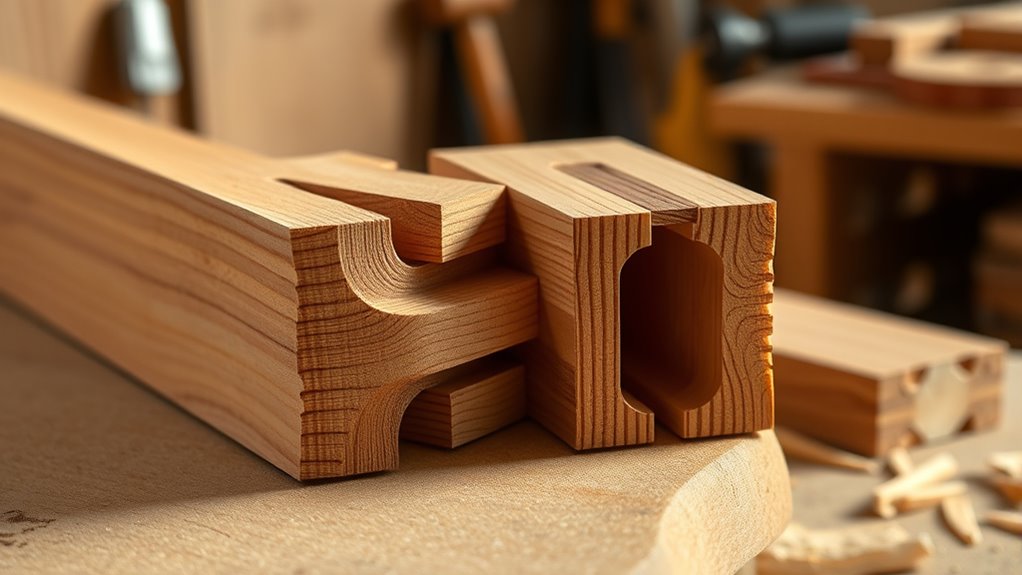
Using a dado blade on your table saw makes quick work of these cuts, allowing you to achieve consistent widths and depths. Whether you’re making stopped or through cuts, the goal remains the same: secure, stable joints that hold together under stress. A stopped dado, which doesn’t run all the way through the wood, is ideal for situations where you want a partial cavity—like for shelving or decorative inlays. It requires precise setup and careful measurement to prevent the cut from extending beyond your intended stop point. On the other hand, a through dado runs completely across the width of the board, creating a full-depth channel suitable for framing or box construction.
Using a dado blade ensures precise, stable cuts for both stopped and through dado joints.
Maintaining joint stability is essential, and that starts with mastering the techniques for clean, accurate cuts. When you cut a groove or dado, you control the motion of the blade and workpiece to prevent splintering or uneven edges. Proper clamping and fence adjustments are crucial to ensure the cut is precise, which in turn guarantees that the joint fits tightly. This tight fit enhances the overall stability of the assembly, reducing potential weaknesses and increasing durability. The smoother and cleaner the cut, the better the joint will perform over time.
In addition to stability, good control over the cut motion reduces waste and minimizes the need for rework. When you understand how to execute stopped and through dado cuts properly, you’re able to produce joints that are not only strong but also visually appealing. Clean edges mean less sanding and finishing, saving you time and effort. Whether you’re creating cabinetry, furniture, or decorative accents, mastering these dado and groove techniques will elevate your craftsmanship, ensuring your projects are both functional and aesthetically pleasing. With practice, you’ll gain confidence in your ability to control the motion of your tools, leading to consistently high-quality, seamless joints every time.

The Mibro Group 416381 Carbide Stacking Dado Blade Set – 14 Pieces, Silver, 8"
Cuts smooth and precise grooves with clean edges, square shoulders and flat bottoms
As an affiliate, we earn on qualifying purchases.
As an affiliate, we earn on qualifying purchases.
Frequently Asked Questions
How Do I Choose Between Stopped and Through Dado Techniques?
You should choose between stopped and through dado techniques based on the joint type and wood grain. For a clean look where the joint isn’t visible, go with a stopped dado, especially with delicate or fine-grain wood. If you want a stronger joint that’s fully visible, a through dado works better. Consider how the wood grain flows—matching it can make your joint look seamless, regardless of the technique.
What Safety Precautions Are Necessary When Using Dado Blades?
Think of using dado blades like sailing a ship; safety gear is your sturdy life jacket, and blade guards are your protective hull. Always wear safety goggles, ear protection, and a dust mask. Make sure blade guards are securely in place before starting to prevent accidental contact. Keep hands clear of the blades, and double-check that the saw is unplugged during adjustments. Safety precautions keep your work smooth and accident-free.
Can I Use These Techniques on Different Types of Wood?
Yes, you can use these techniques on different types of wood, but you should consider the wood grain to guarantee clean cuts. Always check tool compatibility since some blades work better with certain woods. Hardwoods may require sharper blades or different settings, while softer woods are easier to cut. Adjust your technique accordingly, and test on scrap pieces first to avoid damage and achieve the best results.
How Do I Maintain and Sharpen Dado Blades Properly?
Think of your dado blades as a finely tuned orchestra—every part must perform in harmony. To keep them sharp and effective, regularly clean and inspect for damage. For maintenance, use a sharpening stone or file dedicated to dado blades, ensuring the teeth are even and crisp. Proper sharpening dado blades restores their cutting power, preventing rough cuts and prolonging their life. Treat your blades like a trusted instrument, and they’ll serve you beautifully.
Are There Specialized Tools for Creating Grooves Without Dado Blades?
Yes, you can use specialized tools like router bits, plow planes, or dado jigs for groove customization without dado blades. These alternative tools offer precise control and can create various groove sizes and depths. Routers are especially versatile, allowing you to easily adjust the groove dimensions. Using these tools not only simplifies the process but also expands your options for customizing woodworking projects without relying solely on dado blades.

Bora Router Dado Jig, The Woodworking Router Guide That Allows for Precise, Straight Dados, Rabbets, and Mortises | 542005, Orange
MAKE STRAIGHT, ACCURATE DADOS AND RABBETS – Woodworkers asked us for a router guide / router jig that…
As an affiliate, we earn on qualifying purchases.
As an affiliate, we earn on qualifying purchases.
Conclusion
Mastering dado and groove techniques is like discovering hidden pathways in woodworking, guiding your projects with precision and confidence. By understanding when to stop a cut or go through, you shape your work like a skilled artist carving a masterpiece. Keep experimenting, and soon these techniques will become second nature, opening doors to endless creative possibilities. Remember, each cut you make is a brushstroke—your craftsmanship painting a beautiful, sturdy design you’ll be proud of.

FOXBC 8" Carbide Stacking Dado Blade Set for SawStop, Jet, Dewalt, Bosch Saw – 14 Pieces
stacked dado blades set cuts smooth and precise grooves with clean edges, square shoulders and flat bottoms
As an affiliate, we earn on qualifying purchases.
As an affiliate, we earn on qualifying purchases.

Amana Tool 3-Wing Tongue and Groove Reversible Stile and Rail Shaper Cutter, SC577, 2-13/32 x 3/4 x 1/2 and 3/4 Bore for 3/4 Inch Material
CARBIDE TIPPED: High-grade carbide tipped shaper cutters for cutting-edge tool performance and blade life
As an affiliate, we earn on qualifying purchases.
As an affiliate, we earn on qualifying purchases.