To bring out the natural figure using the wet-sanding oil technique, start by applying a generous coat of oil like linseed or tung onto your wood surface. Keep it moist with the oil as you gently sand in the grain using fine grit (400 or 600). This process smooths the surface, deepens the color, and highlights the grain’s richness. Continuing with proper technique will reveal stunning, vibrant details you might have overlooked. Keep going to uncover the full potential of your woodwork.
Key Takeaways
- Apply generous oil to the surface to keep it moist during wet-sanding, enhancing grain visibility.
- Use fine-grit abrasives (400-600 grit) to gently sand while the oil remains wet, refining the wood’s figure.
- Sand in the direction of the grain to prevent scratches and highlight natural patterns.
- Consistently maintain the surface with oil to deepen color and enhance the wood’s natural figure.
- Wipe away excess oil after finishing and allow proper drying to reveal a luminous, figure-rich surface.

Wet-sanding with oil is an effective technique for achieving a smooth, polished finish on wood surfaces. When you want to enhance the natural figure of your wood, understanding proper surface preparation and finishing methods is essential. Before starting, confirm you’ve thoroughly prepared the surface. This means sanding the wood to remove rough spots, scratches, and imperfections. Use progressively finer grits, starting with a medium grit to smooth out major flaws, then moving to finer grits to create an even, refined surface. Proper surface preparation sets the foundation for a flawless finish, allowing the wet-sanding process to bring out the wood’s natural beauty.
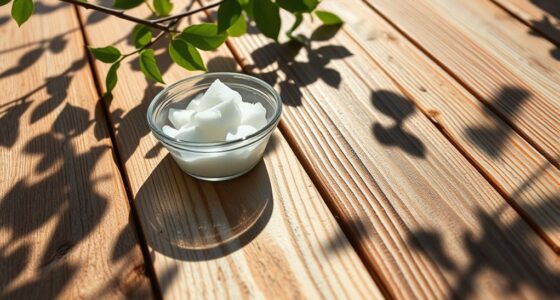
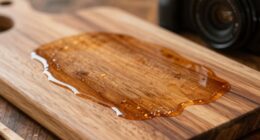
Once your surface is well-prepared, you can move on to the wet-sanding with oil process. This method involves applying a generous amount of oil—such as linseed, tung, or Danish oil—over the surface and then gently sanding it while it remains wet. The key here is to use a fine-grit abrasive, like 400 or 600 grit, to carefully remove a thin layer of the oil and the surface’s imperfections simultaneously. As you sand, you’ll notice the surface becoming smoother and the grain pattern more pronounced. Wet-sanding with oil not only refines the finish but also helps to deepen the wood’s natural figure, making the grain more vibrant and visually appealing. Additionally, maintaining proper wood surface preparation is crucial for achieving a professional-looking result.
Apply oil and gently sand with 400 or 600 grit to enhance grain and refine your finish.
During this process, keep the surface consistently moist with oil to prevent uneven sanding or scratches. Use a soft, damp cloth or a sanding pad, moving in the direction of the grain. This technique allows the oil to seep into the wood fibers, enhancing their depth and luster. It’s important to work patiently, checking your progress frequently. Sand until the surface feels consistently smooth and the grain pattern is vividly highlighted, but avoid over-sanding, which can weaken the finish.
After achieving the desired smoothness, wipe away excess oil and let the surface dry thoroughly. Often, multiple coats of oil with light sanding in between will produce the best results. The final finish should feel silky and look luminous, showcasing the wood’s natural figure beautifully. Remember, the secret to a stunning result lies in meticulous surface preparation and careful application of finishing methods. Wet-sanding with oil is a timeless technique that, when done properly, reveals the rich character of your wood, transforming a plain surface into a work of art.
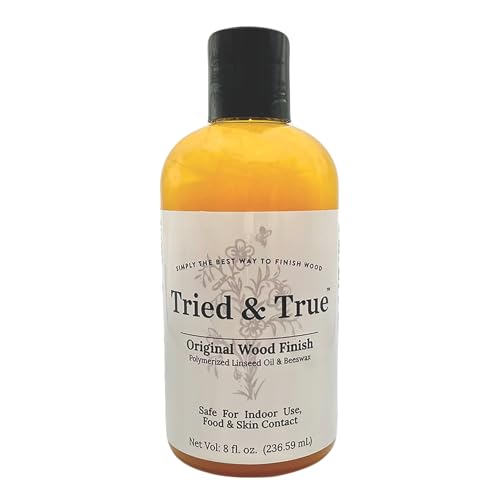
Tried & True Original Wood Finish, 8 oz. – Linseed Oil & Beeswax Blend, Ideal for All Woodwork, Long-Lasting Durability, Food Safe Sealer, Non-Toxic Wood Finish
SUPERIOR BLEND OF LINSEED OIL & BEESWAX: Tried and True wood finish is a superior blend of linseed…
As an affiliate, we earn on qualifying purchases.
As an affiliate, we earn on qualifying purchases.
Frequently Asked Questions
Can the Wet-Sanding Oil Technique Be Used on All Wood Types?
You wonder if the wet-sanding oil technique works on all wood types. While it generally enhances finish durability and highlights wood’s natural figure, wood compatibility varies. Softwoods like pine may absorb oil unevenly, affecting results, whereas hardwoods like oak or walnut respond better. Test a small area first to verify the technique suits your wood, guaranteeing a beautiful finish without compromising durability.
How Long Does It Take to See Results With This Method?
You’ll notice results relatively quickly with this method, though drying time varies depending on the wood type and environment. Typically, you’ll see the visibility period of the natural figure begin within a few hours after application. For ideal results, allow at least 24 hours for the oil to dry fully. Patience ensures you enjoy the full effect, and the natural beauty of your wood becomes more prominent over time.
Is Special Equipment Necessary for Wet-Sanding Oil Application?
Think of wet-sanding oil application as tending a delicate garden—you need the right tools to nurture growth. You don’t require fancy equipment, just basic supplies like quality sandpaper and safety gear. Focus on safety precautions—wear gloves and eye protection—and guarantee your workspace is well-ventilated. With proper equipment and precautions, you’ll achieve smooth, natural-looking results, revealing the true beauty beneath the surface without unnecessary hassle.
Can This Technique Be Combined With Other Finishing Methods?
You can definitely combine the wet-sanding oil technique with other finishing methods. Focus on proper surface preparation first, ensuring the wood is smooth and clean. Layering techniques, like applying multiple coats of oil or sealant, enhance the finish’s depth and durability. Just be sure to let each layer dry thoroughly before adding the next. Mixing methods allows you to achieve a richer, more natural figure while maintaining a high-quality, professional look.
How Often Should I Reapply the Oil for Maintenance?
Ever wondered how to keep your piece glowing like new? Reapplication frequency depends on use and environment, but generally, you should reapply oil every 4-6 months as part of your maintenance tips. Keep an eye out for dullness or dryness, which signal it’s time for a fresh coat. Regular reapplication preserves that natural figure and ensures your project stays protected and beautiful over time.

Luomorgo Sanding Sponge Sanding Blocks Polished Elastic Sanding Block Extra Fine (400-600 Grit) 8pcs
Dry or wet grinding, can be cleaned and reusable.
As an affiliate, we earn on qualifying purchases.
As an affiliate, we earn on qualifying purchases.
Conclusion
Think of the wet-sanding oil technique as a sculptor chiseling away the rough edges of a marble block. With patience and precision, you reveal the natural beauty hidden beneath, transforming a plain surface into a stunning masterpiece. Just like an artist shapes their work, your careful strokes and oil application bring out your figure’s true essence. Embrace this process, and watch as your natural beauty emerges, radiant and refined, waiting patiently to be uncovered.

Furniture Clinic Boiled Linseed Oil | 250ml / 8.5 Fl Oz | Refined Oil for Wood Furniture, Stone & Metal | Fast Drying Glossy Finish | Restore & Protect | for Tables, Cabinets, Handles, & More
GOOD HOUSEKEEPING SEAL: This product was evaluated by the Good Housekeeping institute and after rigorous testing by their…
As an affiliate, we earn on qualifying purchases.
As an affiliate, we earn on qualifying purchases.

HOPE'S 100% Pure Tung Oil, Food Safe, Premium Waterproof Natural Wood Finish and Sealer for Indoor and Outdoor Projects,16 Fl Oz, 1 Pack
Easy to Use – Tung oil is a natural oil recognized by craftsmen to offer the ultimate hand-rubbed…
As an affiliate, we earn on qualifying purchases.
As an affiliate, we earn on qualifying purchases.