
To achieve a glass-smooth Danish oil finish, you need to prep the surface well by sanding evenly through fine grits and removing all dust. Use a clean cloth or soft brush to apply thin, even coats along the grain, building up layers gradually. Let each coat soak in for 15–20 minutes, then wipe off excess. Repeating this process and lightly sanding between coats results in a deep, lustrous, natural-looking shine. Keep going to reveal the full potential of your project.
Key Takeaways
- Properly sand and clean the wood surface for a flawless application base.
- Apply thin, even coats along the wood grain to ensure deep penetration and uniform coverage.
- Wipe off excess oil immediately to prevent blotchiness and sticky finishes.
- Allow sufficient drying time between coats and lightly sand with 320 grit for smoothness.
- Reapply multiple coats to build depth, enhance the grain, and achieve a glass-like, durable sheen.
Ever wondered how to achieve that stunning, rich glow on your wood surfaces? The secret lies in mastering the right application techniques and understanding how Danish oil interacts with the wood grain. Danish oil is renowned for enhancing the natural beauty of wood, providing a smooth, lustrous finish that highlights its unique character. To get that glass‑smooth look, you need to pay close attention to how you apply it, ensuring you work with the wood grain rather than against it.
Start by preparing your surface thoroughly. Sand the wood evenly, working your way up through finer grits to create a smooth, clean surface. This step is essential because any imperfections or rough patches will show through the finish, detracting from the final appearance. Once sanded, wipe away all dust with a tack cloth or a damp rag to make certain no debris remains. Cleanliness is key to achieving an even, professional-looking finish.
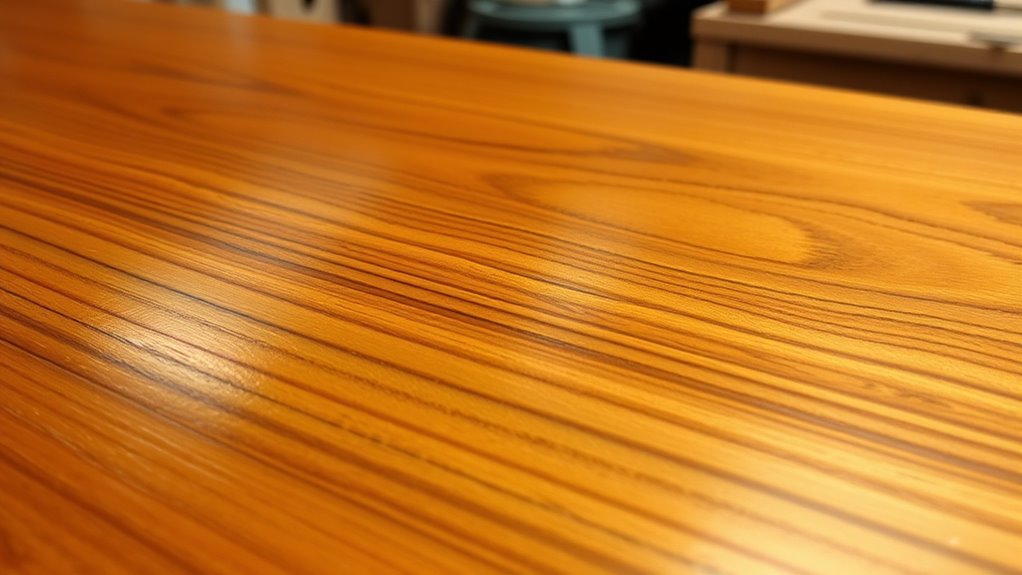
Proper surface preparation and sanding ensure a flawless Danish oil finish.
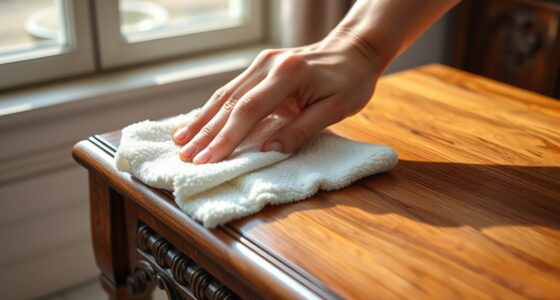
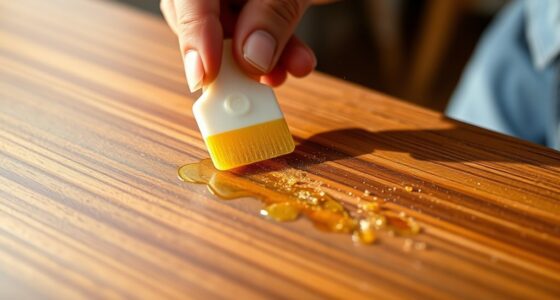
When applying Danish oil, your application techniques make a big difference. Use a clean, lint-free cloth or a soft brush to apply the oil, always following the direction of the wood grain. Working with the grain allows the oil to penetrate deeply into the wood fibers, ensuring a more uniform and durable finish. Start with a generous amount of oil, spreading it evenly across the surface in thin coats. Avoid overloading the cloth or brush; too much oil can lead to uneven absorption or a sticky residue.
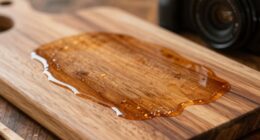
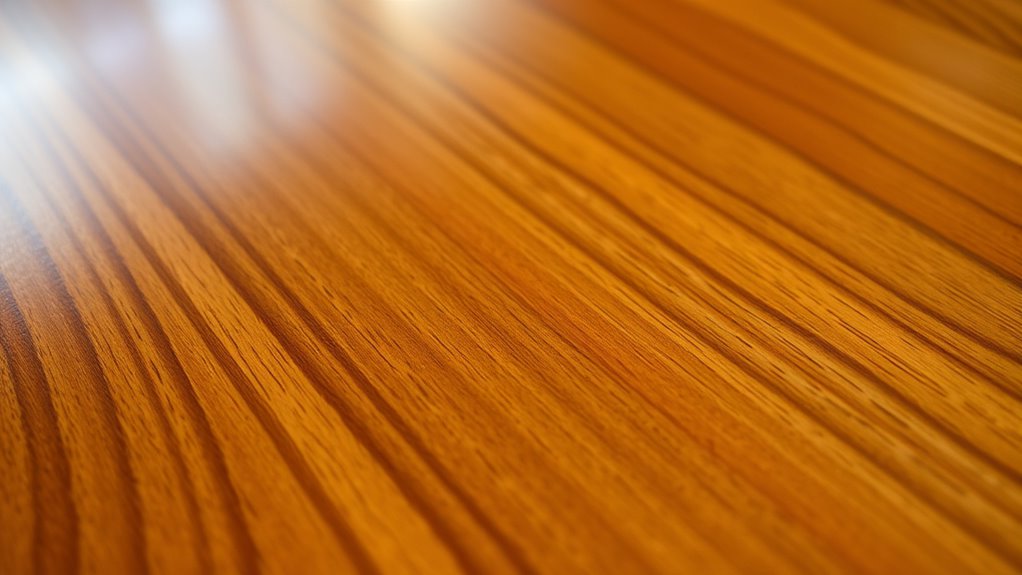
Allow the oil to sit for about 15–20 minutes after application, giving it time to soak into the wood grain. Then, wipe off any excess with a clean cloth, again following the grain. This step is indispensable because excess oil left on the surface can create a blotchy or sticky finish. For a glass‑smooth appearance, repeat the process—apply, wait, and wipe—several times. Each additional coat builds depth and richness, accentuating the wood grain and giving you that coveted, luxurious glow.
Patience is necessary. Let each coat cure fully before applying the next. Usually, waiting 4–6 hours between coats ensures proper absorption and drying. Lightly sanding between coats with fine grit paper (around 320 grit) can further refine the surface, eliminating any tiny imperfections and helping subsequent layers adhere better. Additionally, understanding the interaction between Danish oil and wood grain can help you achieve a more consistent finish. The result will be a stunning, even finish that beautifully showcases the wood grain and provides that glass‑like smoothness. When done right, your wood surface will not only look exquisite but also gain a protective, durable layer that highlights its natural beauty for years to come.

O'SKOOL Router Lift Systems for 3-1/2" Diameter Motors, 9-1/4'' x 11-3/4'' Plate 5-Piece Insert Ring Kit, RTS05
This router lift features a 3.5" diameter carriage and is compatible with popular 3-1/2” router models such as...
As an affiliate, we earn on qualifying purchases.
Frequently Asked Questions
Can Danish Oil Be Used on Outdoor Furniture?
Yes, you can use Danish oil on outdoor furniture, but keep in mind its outdoor durability varies. It offers a nice finish, but may require frequent reapplication to safeguard against weather elements. Consider its environmental impact, as some formulations contain solvents that might not be eco-friendly. For better outdoor durability, look for Danish oils specifically designed for exterior use to ensure your furniture stays protected and looks great longer.
How Long Does the Finish Last Before Reapplication?
The lifespan of your finish depends on exposure and maintenance, but typically, you’ll need to reapply Danish oil every 6 to 12 months. Keep an eye on how the surface looks and feels—if it starts to look dull or dry, it’s time for a fresh coat. Regular reapplication helps maintain the protective layer and keeps your furniture looking beautiful, ensuring you enjoy a durable, glass-smooth finish longer.
Is Danish Oil Suitable for All Wood Types?
Ever wondered if Danish oil suits every wood type? You might be surprised. While it enhances the wood grain beautifully, its finish durability varies. It works well on most soft and hardwoods, but some dense or oily woods could resist absorption, affecting the finish’s longevity. For ideal results, test on a small area first. Knowing your wood’s characteristics helps you decide if Danish oil is the right choice for your project.
Can I Apply Danish Oil Over an Existing Finish?
You can apply Danish oil over an existing finish, but you’ll need to prepare the surface first. Clean and lightly sand the area to guarantee good adhesion. Use proper application techniques, such as wiping on thin coats and allowing adequate drying times between layers. This will help the oil penetrate well and achieve a smooth, even finish. Always test in a small area first to see how the old finish reacts.
What Safety Precautions Should I Take During Application?
You should prioritize safety during application by wearing appropriate safety gear, like gloves and goggles, to protect your skin and eyes from fumes and spills. Make certain good ventilation precautions are in place, such as working outdoors or near open windows, to avoid inhaling harmful vapors. Always follow the manufacturer’s instructions, and work in a well-ventilated area to keep the fumes from building up and causing health issues.
Manhattan Comfort Fortress 30" Floating Garage Storage Cabinet Set of 2, Lockable, Adjustable Shelves, Recessed Handles, Steel Wall Mounted Utility Cabinet for Workshop, Garage, Basement in Black/Grey
STURDY CONSTRUCTION: Made from durable 24-gauge metal, this garage storage cabinet ensures long-lasting use and reliability for all...
As an affiliate, we earn on qualifying purchases.
Conclusion
Achieving a glass-smooth Danish oil finish is easier than you think when you follow the right secret formula. Remember, applying multiple thin coats and allowing proper drying time can make all the difference. Did you know that with just three coats, your furniture could be twice as durable and stunning? So, don’t rush—trust the process, and you’ll enjoy a flawless, long-lasting finish that truly highlights your craftsmanship.
Amazon Product B01I1YI09O
As an affiliate, we earn on qualifying purchases.

Bofoho Paint Spray Booth Tent - Portable and Foldable Spray Paint Booth Tool with Vents, Tool for Small DIY Painting, Pop-up, Windproof, Easy-to-Clean Paint Station (Orange)
Perfect DIY Size & Versatile Projects – 35in(L) x 34in(W) x 30.8in(H) interior fits miniatures, small furniture, crafts,...
As an affiliate, we earn on qualifying purchases.