
To create beautiful Easter wooden egg decorations, start by painting them with thin, vibrant coats of acrylic or chalk paint, and add detailed patterns with brushes or stencils. Incorporate floral transfers, natural elements like dried flowers, or bark for rustic charm. You can personalize eggs with names or messages or transform them into charming characters like bunnies or chicks. Using stands, arrange your decorations for stunning displays. Keep exploring for more creative ideas to make your eggs truly special.
Key Takeaways
- Use fine brushes, stencils, and layered paints for detailed and vibrant painted wooden eggs.
- Apply floral transfers, dried flowers, and natural embellishments like twine or bark for rustic charm.
- Seal finished eggs with clear varnish to protect artwork and natural materials from damage.
- Display eggs on wooden stands, personalize with engraving or decals, and create themed characters or scenes.
- Incorporate natural elements such as moss, twine, and dried flowers to enhance woodland-inspired Easter decorations.
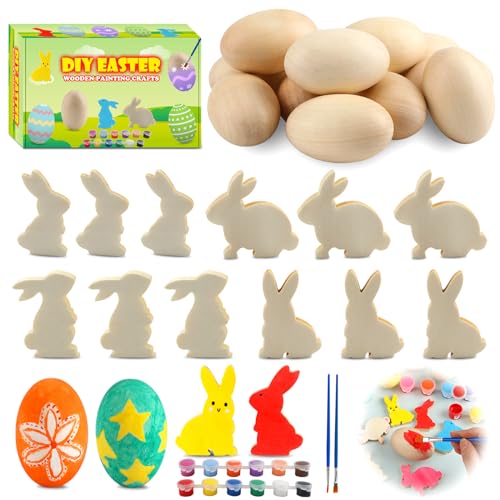
Worgree Easter Egg Painting Kit, 24pcs Wooden Eggs and Bunny for Easter Crafts Basket Stuffers Gifts for Kids Toddlers Boys Girls Ages 4-8 8-12 Birthday Party Favors Classroom Prizes DIY Decor
Easter Egg Decorating Kit: You will get 12 unfinished wooden eggs and 12 wooden bunny cutouts (the Easter…
As an affiliate, we earn on qualifying purchases.
As an affiliate, we earn on qualifying purchases.
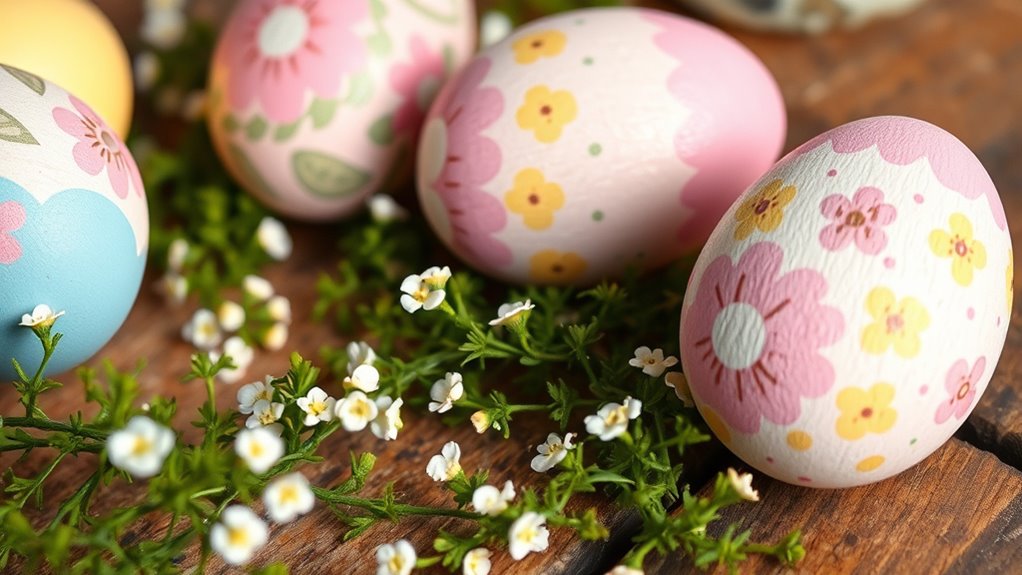
Hand-Painting Techniques for Wooden Eggs
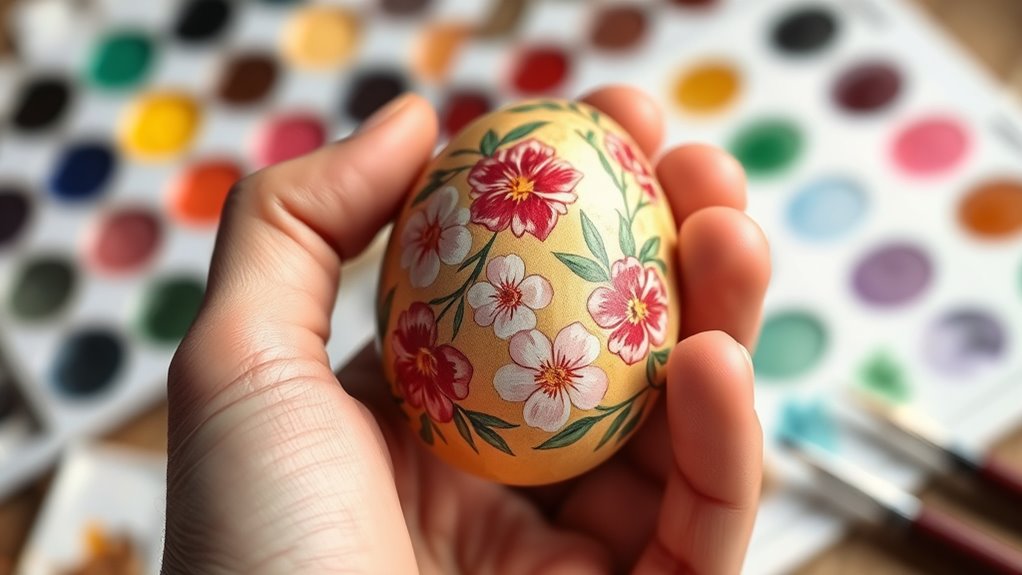
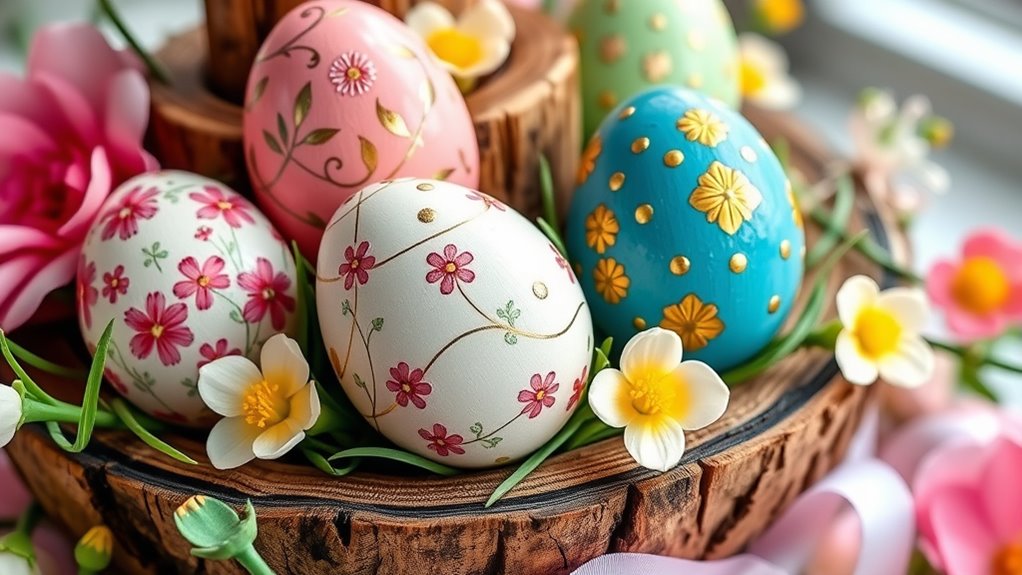
To create detailed and vibrant designs on wooden eggs, start by choosing fine-tipped brushes or paint markers, which allow for precise control. Hand-painted wooden eggs are a beautiful addition to your Easter Crafts collection and make stunning Wooden Egg Decorations. Use multiple thin coats of acrylic or chalk paint to guarantee smooth, even coverage and vibrant colors. Incorporate traditional hand-painting techniques for added charm, such as layering wax or resist methods like Pysanky or batik before dyeing or painting. For accuracy, sketch your motifs lightly with a pencil or use stencils beforehand. Once your design is complete, seal the eggs with a clear matte or gloss varnish to protect your artwork and increase durability, making sure your hand-painted wooden eggs stay beautiful for years. Additionally, understanding decorative painting techniques can help enhance your craftsmanship and add intricate details to your designs, especially when applying regional styles that reflect local traditions and artistic influences. Exploring interior decorating ideas can also inspire creative themes and motifs for your painted eggs, blending art and seasonal celebration seamlessly. Incorporating grocery savings strategies into your craft supply shopping can help you acquire paints and brushes at discounted prices, making your projects more affordable.

BBTO 12 Sheets Rub on Transfers for Crafts and Furniture Rub on Transfer Stickers Decals for Wood DIY Paper Home Decor, 5.5 x 5.7 Inch(Fresh Flowers)
Enough for Using: you will receive 12 sheets of transfer stickers of Christmas flower theme, each sticker has…
As an affiliate, we earn on qualifying purchases.
As an affiliate, we earn on qualifying purchases.
Creative Ways to Decorate With Floral Transfers
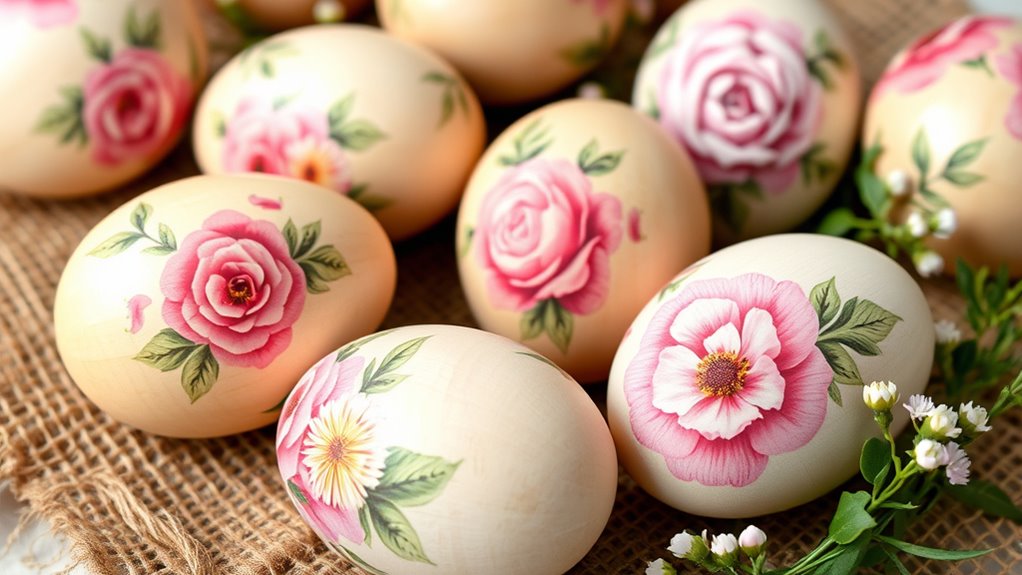
Floral transfers offer an effortless way to add intricate, colorful designs to your wooden eggs. You can transform unfinished wooden eggs into stunning Easter craft pieces by applying transfers from brands like Dixie Belle or Cherry Blossom. Here are four creative ideas:
Floral transfers effortlessly transform plain wooden eggs into colorful, intricate Easter decorations.
- Create realistic Ukrainian Easter eggs (pysanky eggs) by adding delicate floral patterns that highlight the natural wood grain. Incorporating vintage decor elements can enhance the traditional look.
- Decorate wooden Easter eggs for children’s toys or egg cups, making them vibrant keepsakes or playful decor.
- Combine transfers with stains or chalk paints to achieve a hand-painted wooden look, perfect for flat bottom wood eggs.
- Use floral transfers on wooden Easter eggs to craft unique, detailed designs that celebrate Easter and add charm to your wood Easter display.
These transfers make decorating simple and elegant, elevating your wooden craft!
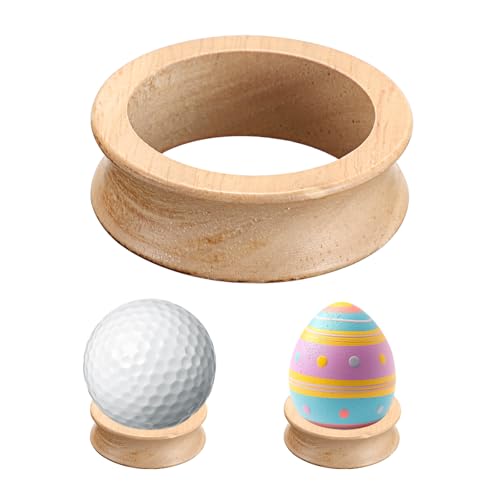
JUXYES Wooden Sphere Holder Display Stand, 6 Pack Small Wood Crystal Ball Stand, Simple Round Display Easel Stands for Decorative Eggs, Crystal Balls, Golf Ball, Stones, Gemstones, Collections, 32mm
Vintage Wooden Sphere Display Stand is good for basketballs, footballs, volleyballs, soccer balls, golf balls, baseballs, tennis balls,…
As an affiliate, we earn on qualifying purchases.
As an affiliate, we earn on qualifying purchases.
Using Markers and Stencils for Detailed Designs

To create detailed Easter egg designs, you need to choose the right markers, like fine-tipped acrylic or paint pens, for precision and vibrant colors. Applying stencils carefully with spray adhesive or painter’s tape helps you achieve crisp, clean patterns. When you combine precise markers with well-adhered stencils, you can layer intricate designs that look professional and eye-catching.
Choosing the Right Markers
Choosing the right markers can make a big difference in achieving professional-looking Easter decorations. When selecting markers, focus on fine-tip permanent markers like Sharpies for crisp, vibrant lines that bring your designs to life. Always test your markers on a small, hidden area of the wood first to prevent bleeding or smudging. Incorporate stencils for uniform patterns or intricate images, securing them firmly before coloring. For special effects, opt for paint markers or metallic markers to add shimmer, accents, or detailed lettering. Remember to let the marker ink fully dry before handling or adding more decorations, ensuring your artwork stays pristine. With the right markers, your wooden eggs will look stunning and polished, making your Easter crafts truly stand out.
Creating Crisp Stencil Patterns
Creating crisp stencil patterns on wooden eggs is all about precision and preparation. Start by securing the stencil firmly on the egg’s surface to prevent slipping, which helps you achieve clean, sharp edges. Use fine-tipped markers or reusable stencils designed for detailed work, ensuring your lines stay precise. When tracing, apply gentle, even pressure to maintain uniform line thickness and avoid smudging. For the sharpest results, consider using paint pens or alcohol-based markers, which deliver cleaner lines than standard markers. Once your design is complete, let the ink dry completely before handling or adding more layers. This step preserves the crispness of your stencil pattern, ensuring your Easter eggs look beautifully detailed and professionally finished. Additionally, choosing high-quality markers can make a significant difference in achieving crisp, professional-looking designs. Incorporating proper surface preparation can further enhance the clarity of your stencil patterns, leading to a more polished final product. Using stencil adhesive can also help keep your design in place and prevent shifting during tracing, resulting in more precise patterns. Being aware of support hours and scheduling your craft time accordingly can help you avoid rushed mistakes and ensure a relaxing creative process.

The Eggmazing Egg Decorator White Wooden Eggs – for Easter Egg Decorating, Arts and Crafts – Matte White Eggs Specifically Designed to be Used with All Eggmazing Egg Decorators (6 Pack), Ages 3 and Up
LONG LASTING KEEPSAKES AND PRETEND PLAY: These white wooden eggs with matte finish help decrease drying time and…
As an affiliate, we earn on qualifying purchases.
As an affiliate, we earn on qualifying purchases.
Incorporating Natural Elements and Embellishments
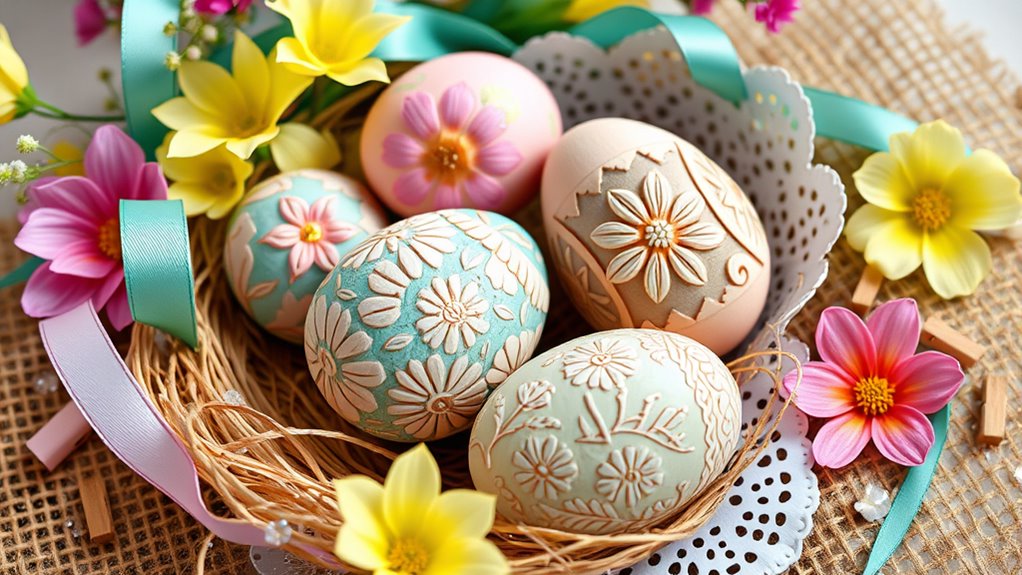
You can add texture and visual interest by attaching dried flowers, leaves, or small twigs to your wooden eggs. Wrapping them with natural twine or raffia enhances the rustic look and ties everything together. Incorporating wood bark accents creates a charming, organic feel perfect for your Easter decorations. Using natural materials can further elevate the authenticity and aesthetic appeal of your decorations. Additionally, considering security systems can help you understand how to manage your website’s user experience and privacy preferences effectively. Being mindful of emotional distance and avoidance of intimacy in your crafting process can also foster more meaningful connections with loved ones as you share your creative projects. Exploring textile art techniques may inspire innovative ways to embellish your decorations and add unique textures.
Using Dried Flowers and Leaves
Incorporating dried flowers and leaves into Easter wooden eggs adds a natural, textured touch that enhances their visual appeal. You can glue dried botanicals with craft glue or decoupage medium for a lovely, layered effect. Using pressed or air-dried flowers prevents mold or decay, keeping your decorations beautiful over time. To make your designs stand out, combine dried florals with paints or stains, creating vibrant, multi-dimensional patterns. Once arranged, secure everything with a clear sealant or varnish to protect against moisture and handling. Natural preservation techniques can help ensure your natural elements stay beautiful longer. Consider these ideas: 1. Create intricate floral patterns before attaching for a personalized touch. 2. Use vibrant colors to make botanicals pop against the wood. 3. Experiment with different leaf shapes for varied textures. 4. Seal the finished design to preserve your natural masterpiece. Additionally, understanding electricity production from bike generators can inspire eco-friendly ways to power small craft tools or lights for your Easter projects.
Adding Natural Twine or Raffia
Adding natural twine or raffia to wooden eggs instantly brings a rustic charm and textured dimension to your Easter decorations. Wrap the fibers securely using hot glue or craft adhesive, ensuring even coverage for a neat, polished look. Incorporating raffia or twine adds organic warmth that pairs beautifully with painted or decorated eggs, creating a cohesive spring aesthetic. You can also loop small sections of the fibers to form decorative bows or hangers, transforming your eggs into charming ornaments or gift tags. For a personalized touch, combine the twine or raffia with beads, dried flowers, or feathers. This natural embellishment enhances the rustic feel and allows you to customize your wooden eggs for a charming, handmade Easter display. Using the right filtration system helps keep your crafting area clean and free of dust or debris during your project. Additionally, integrating sound healing techniques into your crafting routine can promote relaxation and inspire creativity while you work. Incorporating quality materials ensures durability and a beautiful finish for your decorations.
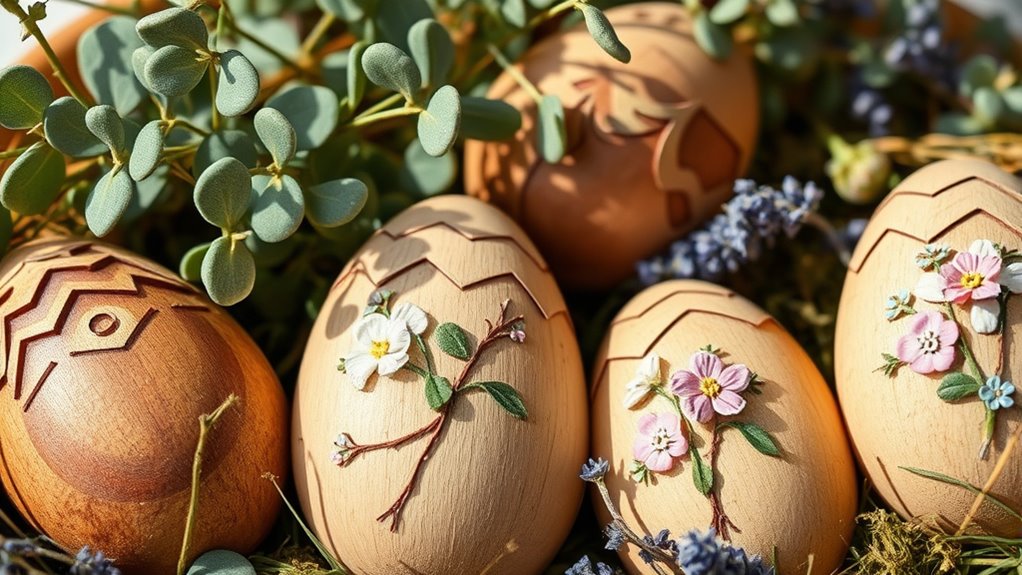
Incorporating Wood Bark Accents
To achieve a charming, rustic Easter egg display, consider attaching wood bark accents that highlight the natural beauty of the material. Using thin slices or strips of bark around your eggs creates textured borders and decorative bands that showcase the wood grain. Keep the paint minimal or stain lightly so the bark’s natural texture remains the focal point. To add durability, attach small bark pieces with non-toxic craft glue, ensuring they stay in place for display or handling. Incorporate additional natural elements like twine, dried flowers, or moss to craft cohesive, woodland-inspired centerpieces. These accents evoke warmth and authenticity, transforming simple wooden eggs into stunning, nature-inspired decorations that celebrate the season’s rustic charm.
- Feel connected to nature with each textured detail.
- Let the natural bark bring warmth and authenticity.
- Create a cozy, woodland atmosphere effortlessly.
- Showcase the beauty of natural materials in your decor.
Crafting Festive Easter Egg Stand Displays
Creating festive Easter egg stand displays is a fun way to showcase your holiday decorations. Wooden egg stands come in various sizes, like 2-1/2 inches, with specially designed cups that keep your eggs secure. Decorate your wooden eggs with transfers, paint, or embellishments to make eye-catching centerpiece pieces. Use display kits or garden scene setups to arrange multiple eggs, adding depth and interest to your table. Incorporate natural materials like crinkled music sheet Easter grass to enhance the vintage charm of your display. Arrange your decorated wooden eggs on stands or in creative groupings to craft attractive, durable Easter displays. These arrangements not only highlight your craftsmanship but also bring a festive touch to your holiday celebrations. Understanding alimony laws can help in planning any related financial aspects of your celebrations.
Personalizing Wooden Eggs With Names and Messages

Personalizing wooden eggs with names and messages transforms simple decorations into meaningful keepsakes. You can do this using engraving, paint, markers, or decals, giving each egg a special touch. Engraving offers precise, durable customization that won’t smudge or fade, making your keepsakes last for years. Hand-painting or vinyl decals provide flexibility, allowing you to add heartfelt messages, names, or decorative designs perfect for any occasion. Some suppliers even offer pre-made personalized eggs, ideal for gifts or party favors. Personalization adds sentimental value, turning a simple wooden egg into a cherished memento. Incorporating safe and non-toxic materials ensures that your personalized eggs are suitable for children and long-lasting. Additionally, choosing appropriate sealing techniques can help preserve the artwork and protect it from wear over time. Using specialized engraving tools can also enhance the precision and detail of your designs, ensuring a professional finish. To make your creations truly stand out, consider adding literary humor or clever quotes that can bring an extra layer of meaning and charm to your personalized eggs.
Reimagining Wooden Eggs as Holiday-Themed Characters

Transforming wooden eggs into holiday-themed characters offers a fun and creative way to celebrate Easter and spring festivities. You can paint or add transfers to turn plain eggs into adorable bunnies, cheerful chicks, or blooming flowers. Using detailed hand-painting or floral transfers from Dixie Belle helps you craft realistic or whimsical characters that stand out. Wooden egg cups or sliced eggs make excellent bases for creating three-dimensional figures, adding depth to your decorations. Personalize your characters with googly eyes, felt ears, or tiny accessories to give them personality. You can also incorporate cultural or festive themes, like Ukrainian Pysanky or folk patterns, to make your decorations unique and meaningful. These techniques make your holiday decor lively and memorable.
Combining Wooden Eggs With Other Craft Materials
Combining wooden eggs with other craft materials opens up a world of creative possibilities for Easter decorations. You can transform plain wooden eggs into stunning pieces by adding floral transfers, paint, or decoupage for detailed Easter scenes. Incorporating natural elements like twine, burlap, or moss gives your crafts a charming rustic or farmhouse feel. Using craft glue or Mod Podge, you can attach fabric, paper, glitter, or stickers to create personalized designs that reflect your style. Wooden eggs also serve as sturdy bases for attaching miniature bunnies, chicks, or seasonal charms, adding layers to your holiday displays. Plus, combining them with felt, clay, or recycled materials offers endless options for textured, innovative Easter crafts.
Frequently Asked Questions
How Durable Are Painted or Decorated Wooden Eggs for Outdoor Displays?
You’re wondering how well painted or decorated wooden eggs hold up outdoors. Generally, they’re quite durable if you use weatherproof paints and sealants. Applying a clear protective coat helps prevent damage from rain, sun, and wind. Keep in mind, over time, exposure might cause some fading or chipping, so it’s best to place them in sheltered spots or bring them inside during harsh weather for lasting beauty.
What Are the Best Sealing Techniques to Preserve Decorated Wooden Eggs?
Imagine your beautifully decorated wooden eggs outdoors—sealing is key. You should start with a clear, water-based polyurethane or a spray sealant for even coverage. Apply multiple thin coats, letting each dry thoroughly. For extra protection, consider a glossy finish that repels moisture and UV rays. This combination guarantees your artwork remains vibrant and intact, turning your outdoor display into a lasting masterpiece.
Can Wooden Eggs Be Safely Used With Children During Crafting Activities?
When considering safety during crafting, you wonder if wooden eggs are safe for children. Yes, they are generally safe, especially if you choose smooth, untreated wood. Always supervise kids to prevent choking hazards, and verify all paints and sealants are non-toxic and child-friendly. With proper supervision and safe materials, children can enjoy decorating wooden eggs creatively and safely, making the activity fun and engaging for everyone.
How Can I Customize Wooden Eggs for Different Holiday Themes Beyond Easter?
Think of wooden eggs as blank canvases waiting to be transformed. You can customize them for various holidays by choosing themed paints, stickers, and embellishments. For Christmas, add glittery snowflakes and jolly Santas; for Halloween, carve tiny faces or paint spooky designs. Personalize them with messages or symbols that match the occasion. These versatile decorations can turn into keepsakes, making every holiday celebration uniquely memorable.
Are There Eco-Friendly or Non-Toxic Paints Suitable for Decorating Wooden Eggs?
You’re wondering if eco-friendly or non-toxic paints are suitable for decorating wooden eggs. Luckily, many options are available, such as water-based acrylics, natural mineral paints, and plant-based dyes that are safe and environmentally friendly. These paints provide vibrant colors without harmful chemicals, making them perfect for craft projects, especially if kids are involved. Always check labels to confirm the products are non-toxic and appropriate for indoor use.
Conclusion
Now that you’ve explored these creative ways to decorate wooden eggs, your Easter crafts will surely stand out like a blooming garden. Whether you paint, add natural touches, or turn them into festive characters, you’re turning simple eggs into works of art that tell your unique story. So, pick up your supplies and let your imagination run wild—because with a little creativity, your Easter decorations will shine brighter than a spring sunrise.