
To replace broken tenons and loose mortises, start by evaluating the damage to determine if you can disassemble the joint without causing more harm. Carefully remove any damaged tenons and clean out the mortise. Cut a new matching tenon from suitable wood that fits snugly into the original mortise. Reinforce the joint with glue and pegs if needed. For long-lasting results, focus on preserving original material and craftsmanship; you’ll find more detailed steps ahead.
Key Takeaways
- Carefully assess the extent of damage to determine if disassembly is possible without further harm.
- Create precise replacements by matching original wood type, grain, and dimensions for a seamless fit.
- Remove damaged tenons or enlarge loose mortises minimally to insert new, well-fitted components.
- Secure joints with high-quality wood glue, pegs, or dowels, and clamp until fully cured for stability.
- Maintain original craftsmanship and material to preserve the piece’s integrity while ensuring durability.

When you notice a broken tenon or a loose mortise in your woodworking project, it can compromise the stability and strength of the piece. These wooden joints are vital for maintaining the integrity of furniture, frames, and other wooden structures. Addressing these issues promptly is necessary, especially if you’re working on historic repairs where authenticity and precision matter. Replacing a damaged tenon or tightening a loose mortise isn’t just about fixing a weak spot; it’s about restoring the piece’s original strength and appearance.
Broken tenons and loose mortises threaten furniture stability and must be carefully repaired to preserve strength and authenticity.
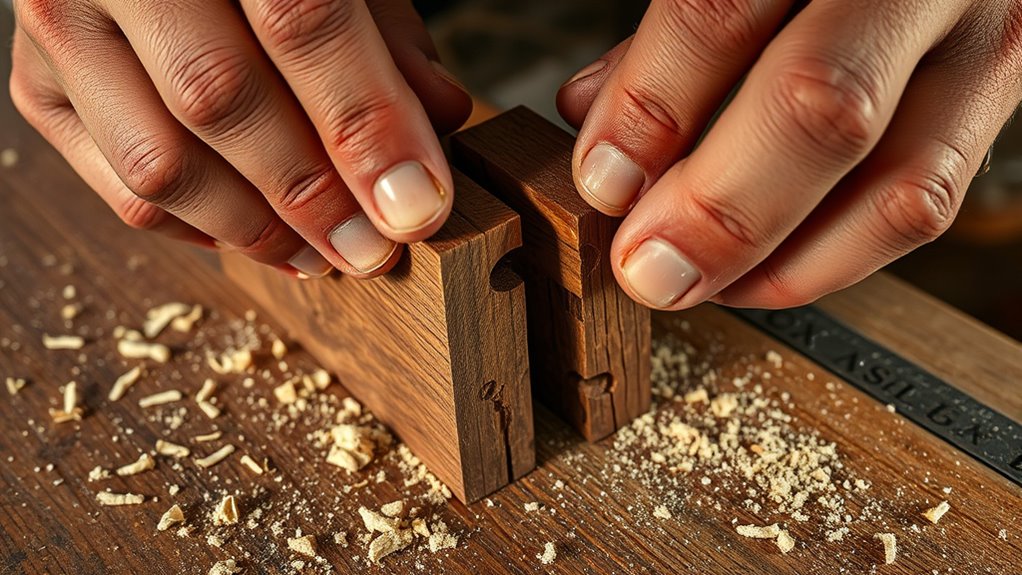
To begin, assess the extent of the damage. If the tenon is cracked or broken, you need to carefully remove it without damaging the surrounding wood. For loose mortises, check whether the socket has widened or if the tenon no longer fits snugly. When working with historic repairs, you’ll want to preserve as much of the original material as possible, so take extra care not to cause unnecessary damage. With older furniture, the joints might have been glued or pegged, so you’ll need to carefully disassemble the joint if possible.
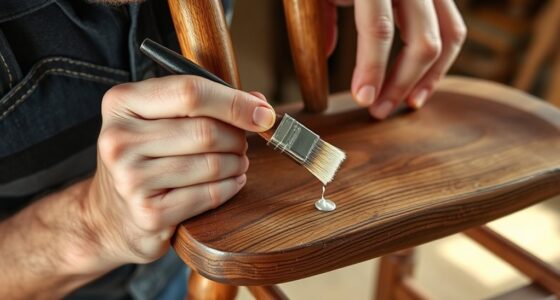
Once you’ve assessed the damage, you can decide whether to repair or replace the tenon and mortise. For minor cracks or looseness, sometimes tightening the joint with additional glue or inserting wooden pegs can suffice. Use a high-quality wood glue designed for furniture repair, and clamp the joint until it cures fully. If the tenon is severely damaged or missing altogether, you’ll need to create a new one. When making a replacement, match the wood type and grain orientation to the original to maintain authenticity, especially in historic repairs. Cut the new tenon carefully, ensuring it fits tightly into the mortise without forcing it, which could cause further damage.
If the mortise itself has become too loose, you can tighten it by inserting wood shims or filling the socket with a wood filler that can be shaped and sanded to fit the original dimensions. In some cases, drilling a small hole and inserting a wooden dowel or pin can reinforce the joint. For a more permanent fix, you might consider enlarging the mortise slightly and making a corresponding tenon, but this should be done with precision to preserve the piece’s original design. Additionally, understanding the importance of joint stability can help guide effective repairs and ensure long-term durability.
Throughout the process, pay attention to detail, especially in historic repairs where the goal is to maintain as much of the original craftsmanship as possible. Properly replacing broken tenons and securing loose mortises restores strength and ensures the longevity of your project. It’s a delicate task, but with patience and precision, you can achieve a strong, durable joint that respects the piece’s history while enhancing its stability.
Frequently Asked Questions
What Tools Are Best for Removing Old Tenons and Mortises?
You should use chisels and saws to carefully remove old tenons and mortises, as they give you control and precision. A chisel helps carve out stubborn wood, while a saw can cut through larger sections. Screws and screwdrivers are handy if you need to disassemble parts or remove fasteners. Hammers assist in loosening and tapping tools into place. Combining these tools guarantees a smooth and efficient removal process.
How Long Does It Typically Take to Replace a Tenon?
Replacing a tenon typically takes a few hours, but timing considerations depend on project complexity and your skill level. If the joint is straightforward, you might finish quickly, but more intricate or damaged joints require extra care and time. You should allocate enough time to carefully remove the old tenon, prepare the mortise, and fit the new piece. Patience guarantees a secure, lasting repair, especially on complex projects.
Can I Repair Broken Tenons Without Replacing the Entire Piece?
Yes, you can repair broken tenons without replacing the entire piece using DIY methods or professional repair. For minor breaks, you might glue and clamp the broken parts, then reinforce with wood filler or dowels. If the damage is extensive, consulting a professional guarantees a sturdy fix. Properly evaluating the damage helps determine whether a simple DIY repair suffices or if expert intervention is needed for long-term durability.
What Types of Wood Are Most Suitable for Mortise and Tenon Repairs?
Think of wood compatibility as a dance where harmony guarantees a strong connection. For repairs, choose hardwoods like oak, maple, or cherry for their durability and stability. These woods match well with the original material, ensure your repair materials blend seamlessly and hold tight over time. Avoid softwoods like pine or cedar, which can be too delicate. Using suitable wood for your mortise and tenon repairs guarantees a sturdy, long-lasting fix that feels just right.
How Do I Prevent Future Damage to Mortises and Tenons?
To prevent future damage to mortises and tenons, you should focus on regular wood preservation and maintenance tips. Keep the joints dry and avoid excessive moisture, which can weaken the wood. Use appropriate sealants or finishes to protect against environmental factors. Additionally, inspect the joints periodically for signs of wear or damage, and address issues promptly to maintain the integrity of your woodworking. Proper care extends the life of your joints considerably.
Conclusion
Now that you know how to replace broken tenons and tighten loose mortises, you’re well on your way to restoring your furniture’s strength. Just remember, even in this modern age of power tools and CAD software, a good old-fashioned chisel and patience still work wonders—kind of like fixing a vintage clock. With a little effort, your piece will be as sturdy as a medieval fortress, ready to impress your friends at the next Renaissance fair!