To fix surface scratches, start by gently sanding the area with fine-grit sandpaper, following the wood grain to smooth out the scratch without damaging the finish. Then, apply a matching stain to restore color, wiping away excess for an even look. Finish by polishing with a high-quality furniture wax or polish to blend the repair and protect the surface. For more detailed tips, you’ll discover how to achieve seamless results that restore your furniture’s beauty.
Key Takeaways
- Light surface scratches can be minimized with furniture touch-up pens or wax sticks that match the finish color.
- For deeper scratches, lightly sand the area with fine-grit sandpaper, following the wood grain to prevent damage.
- Apply stain carefully over the repaired area to restore color, ensuring even coverage that blends with the surrounding surface.
- Allow stain to dry completely before polishing to achieve a seamless repair and maintain surface durability.
- Finish with a high-quality furniture polish or wax to protect and enhance the repaired surface’s shine.
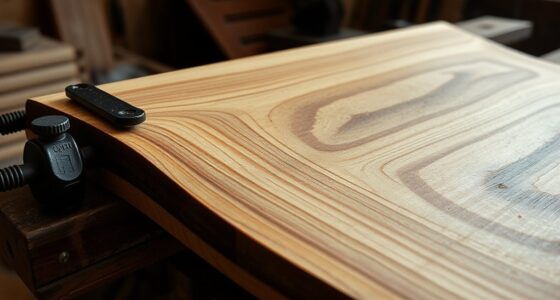
Surface scratches can be frustrating, but many minor imperfections are easy to fix with the right techniques. When dealing with scratches on wood furniture or surfaces, understanding how the wood grain and finish durability interact is essential. The grain of the wood influences how deeply scratches penetrate and how well repairs will blend in. If you’ve got a clear finish with high durability, you’ll want to choose repair methods that preserve that protective layer while restoring the surface’s appearance. Conversely, softer finishes might require gentler approaches to avoid causing further damage.
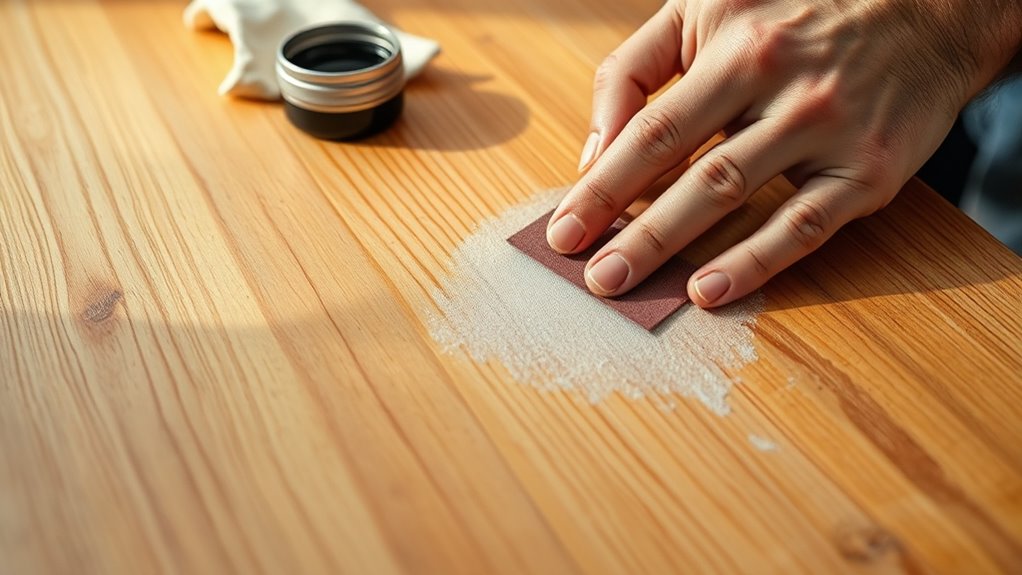
To start, assess the depth of the scratch. Light surface scratches usually only affect the top layer of the finish. For these, a simple touch-up with a furniture touch-up pen or a wax stick can work wonders. Match the color carefully to the existing finish, and gently fill in the scratch, following the direction of the wood grain. This helps the repair blend seamlessly and maintains the finish’s resilience. If the scratch is more noticeable or has penetrated deeper into the wood, you might need to sand lightly around the area. Use fine-grit sandpaper—around 220 grit—to gently buff the scratch, always following the grain. Sanding in the direction of the wood grain minimizes the risk of creating new scratches or damaging the finish, preserving the surface’s integrity and resilience.
After sanding, you’ll want to refinish the area to match the original look. Staining can help restore color that was lost or affected by the scratch. Choose a stain that matches your furniture’s color, and apply it with a small brush or cloth, again following the wood grain. Wipe away excess stain to prevent uneven coloration, and allow it to dry thoroughly. Once the stain is set, you can move on to polishing. Using a high-quality furniture polish or wax will help protect the surface and enhance the finish’s durability. Apply in a thin layer, buffing with a soft cloth to bring out the shine. This step not only conceals minor scratches but also provides an additional protective coating, prolonging the life of your furniture. Incorporating proper surface preparation techniques can further improve the repair’s effectiveness and longevity.

Furniture Repair Kit Wood Markers – Set of 13 – Markers and Wax Sticks with Sharpener Kit, for Stains, Scratches, Wood Floors, Tables, Desks, Carpenters, Bedposts, Touch Ups, and Cover Ups
PRODUCT DETAILS – This 13 piece kit includes 6 Repair Markers, 6 paper wrapped wax sticks and 1…
As an affiliate, we earn on qualifying purchases.
As an affiliate, we earn on qualifying purchases.
Frequently Asked Questions
Can Deep Scratches Be Completely Removed With These Techniques?
Deep scratch removal with surface restoration techniques can often improve the appearance, but it might not completely erase very deep scratches. You may need professional help or specialized tools for thorough repair. Sanding, staining, and polishing can minimize visible damage, but extremely deep scratches may leave permanent marks. For best results, assess the depth carefully and consider whether these techniques will sufficiently restore your surface.
What Safety Precautions Should I Take While Sanding and Polishing?
Think of sanding and polishing as a dance with dust and fumes. You should always wear protective gear like goggles, masks, and gloves to shield your eyes and skin. Keep the area well-ventilated to avoid inhaling harmful particles. By taking these precautions, you guarantee your safety while achieving a smooth finish. Remember, a safe workspace helps you work confidently and effectively on your project.
How Long Does the Repair Process Typically Take?
The repair process usually takes a few hours to a day, depending on the extent of the scratches and drying times. You should consider timing considerations like drying times between sanding, staining, and polishing steps to guarantee a smooth finish. If you work efficiently and follow instructions, you can complete the repair within a day. Patience with drying times also helps achieve the best results, avoiding rushed or incomplete repairs.
Are There Specific Products Recommended for Different Surfaces?
Did you know that using the right product can reduce scratch repair time by up to 50%? For different surfaces, there are specific solutions you should choose. For example, use a wood repair crayon for furniture and a scratch remover designed for glass. Always look for product recommendations tailored to your surface type to guarantee effective results. Picking the correct product makes your repair smoother and more durable.
Will These Methods Affect the Durability of the Surface?
These methods can affect your surface finish and material compatibility, but if you follow proper techniques, they shouldn’t compromise durability. Sanding smooths the surface without damaging it, and using compatible stains and polishes preserves the material’s integrity. Be cautious with abrasive products and avoid over-sanding, as improper technique or incompatible materials can weaken the surface, reducing its longevity. Always choose products suited for your specific surface to maintain durability.

3M Sandpaper, 220 Grit, 5 Sheets, 9 in x 11 in, Sands Paint, Wood & Metal, Great For General Purpose Sanding, Very Fine Aluminum Oxide Sand Paper (9000NA-20)
General purpose sandpaper
As an affiliate, we earn on qualifying purchases.
As an affiliate, we earn on qualifying purchases.
Conclusion
Now that you know how to fix surface scratches with sanding, staining, and polishing, you can restore your furniture’s beauty easily. Did you know that properly maintained wood surfaces can last up to 50 years or more? Regular care and quick repairs like these not only save you money but also preserve your pieces for generations. So go ahead—tackle those scratches confidently and keep your furniture looking brand new for years to come!
Furniture Repair Kit Wood Markers – Set of 13 – Markers and Wax Sticks with Sharpener Kit, for Stains, Scratches, Wood Floors, Tables, Desks, Carpenters, Bedposts, Touch Ups, and Cover Ups
PRODUCT DETAILS – This 13 piece kit includes 6 Repair Markers, 6 paper wrapped wax sticks and 1…
As an affiliate, we earn on qualifying purchases.
As an affiliate, we earn on qualifying purchases.

Howard Products Beeswax Wood Polish & Conditioner, Feed-N-Wax, Beeswax Furniture Polish For Wood, 16 Oz, Orange
Polishes all wood surfaces to a soft luster with a protective coating of Carnauba Wax and Beeswax
As an affiliate, we earn on qualifying purchases.
As an affiliate, we earn on qualifying purchases.