
When fixing shattered porcelain, choose an adhesive suited to your repair needs. Epoxy works best for strong, long-lasting bonds and structural fixes, while super glue offers quick, easy fixes for small pieces. Before applying, verify the surface is clean, dry, and sanded lightly for better adhesion. Use clamps or supports during curing for seamless results. For more tips on achieving a flawless repair—and avoiding future damage—keep exploring these helpful techniques.
Key Takeaways
- Epoxy adhesives offer strong, durable, and long-lasting bonds ideal for restoring shattered porcelain.
- Proper surface cleaning, drying, and roughening improve adhesion and invisibility of the repair.
- Use fine applicators and precise alignment to apply minimal glue for a seamless, invisible fix.
- Support pieces with clamps, tape, or foam during curing to ensure proper bonding and prevent shifting.
- Follow thorough preparation and curing instructions to maximize strength and achieve a professional, durable repair.

Ceramic Glue, Best Super Clear Glue for Porcelain, Pottery and China Repair, Food Safe Adhesive Kit for Mugs and Dishes, Also Effortlessly Bonds Wood, Glass, Plastic, Shoe, Crafts DIY and More
- Ideal for Ceramic and Porcelain Repair: Strong, undetectable, food-safe adhesive
- High-Strength Bonding: Ensures durable, permanent repairs
- Weatherproof and Heat-Resistant: Maintains bond in harsh conditions
As an affiliate, we earn on qualifying purchases.
As an affiliate, we earn on qualifying purchases.
Understanding the Different Types of Adhesives for Porcelain
When repairing shattered porcelain, choosing the right adhesive is essential for a durable and seamless fix. Epoxy is a popular choice because it’s a two-part system with resin and hardener that, once mixed, forms a very strong, long-lasting bond. Epoxies are especially useful for demanding repairs because they have high gap-filling ability and can be formulated for heat resistance and structural strength. Unlike super glues, which harden quickly and are best for small, tight-fitting pieces, epoxy can handle larger gaps and uneven surfaces. It creates a thicker, more durable bond suitable for both aesthetic and structural repairs. Understanding the different types of adhesives helps you select the best option for your porcelain repair needs, ensuring a secure and lasting fix. Epoxy’s versatility makes it ideal for both delicate and heavy-duty porcelain repairs, providing a reliable solution where other adhesives may fall short. Additionally, some epoxy formulations are designed to be water-resistant, making them suitable for porcelain items that may be exposed to moisture or cleaning. For added strength, selecting an epoxy with UV resistance can prevent discoloration and degradation over time. Moreover, choosing an adhesive with flexibility can be beneficial for porcelain items that may experience slight movements or temperature fluctuations.
Selecting the Right Glue Based on Repair Needs

Choosing the right glue depends on your repair’s material compatibility and the level of bond strength you need. If durability is key, epoxy offers a strong, lasting fix, while super glue works best for quick, small repairs. Consider whether you want a seamless look or a more resilient bond to determine the best adhesive for your project. Additionally, understanding the father and daughter bond can inspire patience and care in delicate repairs. For skin-related concerns, such as those involving glycolic acid treatments, understanding the skin benefits can help you choose products that promote healing and improved texture. Being aware of personal debt forgiveness bills can also inform your financial decisions, especially when considering long-term repairs or investments. If you need assistance in choosing or applying your glue, some entertainment venues offer guidance on maintenance and repairs for their facilities. To ensure a proper bond, selecting an adhesive compatible with the specific material of the object is essential for a secure and lasting fix.
Repair Material Compatibility
Selecting the right adhesive for porcelain repairs depends on understanding the material’s compatibility with different glues. Not all adhesives work equally well with porcelain, so choose based on your specific needs. Epoxy adhesives offer high strength, excellent gap-filling, and durability, making them ideal for load-bearing or visible repairs. Super glues bond quickly and suit small, tight-fitting pieces but lack flexibility and gap-filling capacity. Consider the repair’s purpose, exposure to temperature or moisture, and surface unevenness. Here’s a quick comparison:
| Adhesive Type | Best For |
|---|---|
| Epoxy | Structural repairs, gap filling, moisture resistance |
| Super Glue | Minor fixes, small pieces, quick repairs |
| Both | Use based on repair material compatibility |
Additionally, selecting an adhesive that is safe for Mother Baby Kids products ensures non-toxicity and safety for delicate porcelain items used in nursery settings. Understanding porcelain material properties can help you choose the most suitable adhesive for your repair needs. Knowing the types of adhesives and their specific features can further aid in making an informed choice.
Bond Strength and Durability
The bond strength and durability of your porcelain repair directly depend on the adhesive you choose. For high-stress, load-bearing, or outdoor repairs, epoxy offers superior bond strength and long-term durability. It creates stronger, more durable bonds suitable for structural fixes and can withstand extreme temperatures up to 2000°F. Super glues cure quickly and are ideal for small, non-porous ceramic repairs, but they lack the long-term bond strength needed for exposed or stressed items. Epoxies often leave a thicker, gap-filling bond that can be colored or clear, while super glues leave a thin, less noticeable line. When selecting your adhesive, consider the repair’s purpose to ensure you get the right bond strength and durability for lasting results. Additionally, understanding adhesive selection can help in choosing the best adhesive for repairs involving optical components or delicate surfaces. Moreover, choosing an adhesive with skincare ingredients that promote adhesion can sometimes improve bond performance in specialized applications. Being aware of environmental factors such as temperature and humidity can also influence the longevity of your porcelain repair.
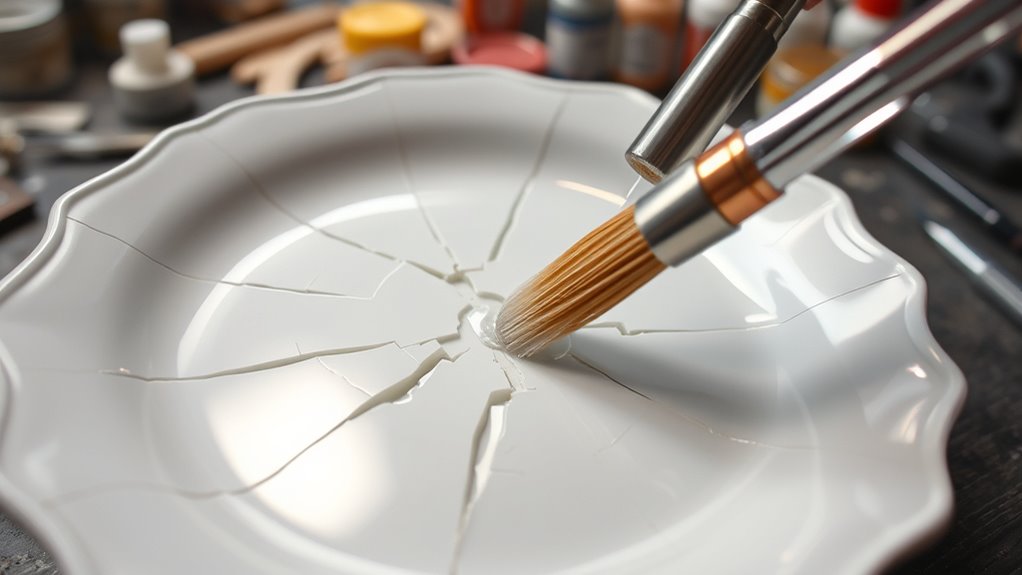
Preparing Porcelain Surfaces for Optimal Bonding
Before gluing, make sure to clean the porcelain surface thoroughly with isopropyl alcohol or warm soapy water to remove oils and dirt. Dry the surface completely, as moisture can weaken the bond, and remove any old adhesive or jagged edges for a smooth, even area. Proper preparation guarantees the adhesive sticks firmly and the repair lasts. Additionally, inspecting for any residual dust or airborne particles can help ensure a stronger, more durable bond, especially when considering filter replacement indicators and proper airflow during the repair process. Ensuring optimal air purifier maintenance dos and don’ts can further improve the environment for a successful repair. Incorporating insights from automation in business can also streamline the process, making repairs more efficient and reliable. Being aware of adhesive types suitable for porcelain can help select the most effective glue for your specific repair. Paying attention to remote work productivity habits can also encourage a focused approach during the repair process, minimizing distractions and ensuring thorough work completion.
Clean Surfaces Thoroughly
To guarantee a strong bond when repairing porcelain, it’s essential to start by thoroughly cleaning the surfaces. This step removes dust, dirt, grease, and old glue residues that can weaken adhesion. Use isopropyl alcohol or warm soapy water to clean all broken pieces, ensuring no contaminants remain. After cleaning, dry the surfaces completely with a lint-free cloth or paper towel to prevent moisture from affecting the bond. Lightly roughen smooth or glazed areas with fine-grit sandpaper or a nail file to increase surface texture and improve adhesion. Before applying glue, remove any loose fragments or debris for a precise fit. Always test fit the pieces first to verify proper alignment, making sure the surfaces are clean and ready for bonding. Additionally, understanding the role of maintenance in the process can help maintain focus and prolong the repair’s durability. Proper cleaning techniques are essential to achieve a lasting repair and prevent future issues.
Dry Before Bonding
Once you’ve thoroughly cleaned the porcelain surfaces with alcohol or warm soapy water, it’s essential to let them dry completely before applying glue. This step guarantees the surfaces are free of moisture, which can weaken the bond. You should allow the porcelain to dry for at least 30 minutes, especially in humid environments. Avoid touching or handling the surfaces afterward, as oils or dirt from your hands can transfer and reduce adhesion. If the porcelain is porous or has old adhesive residues, gently sand or scrape the area to create a smooth, clean surface. Always confirm that the porcelain is completely dry and dust-free before applying the glue. Dry before bonding to maximize the strength and durability of your repair.
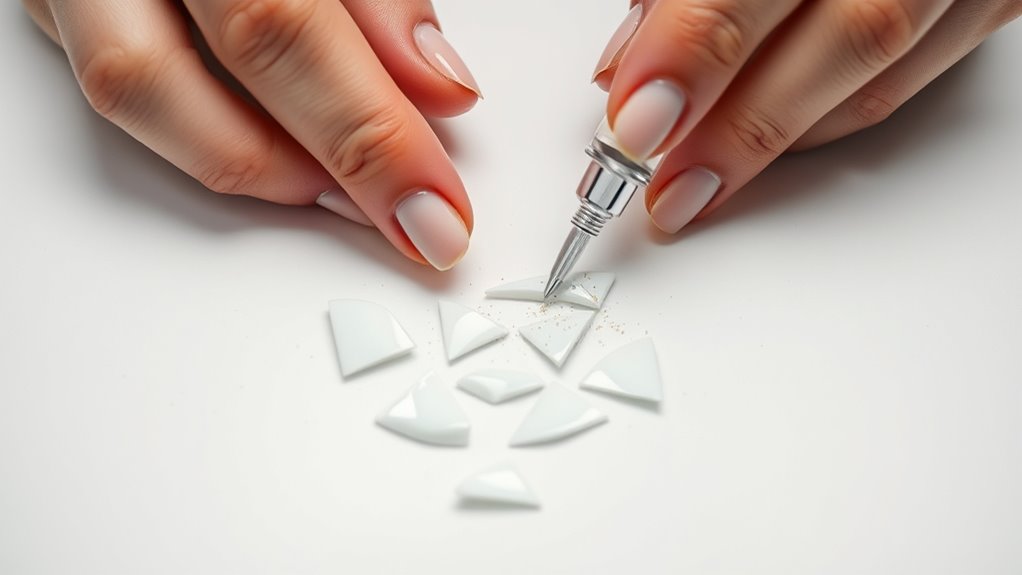
Remove Old Adhesives
After your porcelain surfaces are clean and dry, inspect them closely for any remaining old adhesive or loose fragments. Removing the excess adhesive is vital for a strong, seamless bond. Use a gentle scraper or fine sandpaper to carefully eliminate any residual glue or debris, ensuring the surface is smooth and even. Be thorough—leaving traces of old adhesive can weaken the repair or cause uneven bonding. Avoid applying new glue over cracked or uneven old spots; instead, remove all traces to create a clean, solid foundation. Proper removal prevents bonding issues and ensures your repair lasts. Remember, a well-prepared surface sets the stage for successful bonding and a durable fix. Taking the time to remove the excess is essential for a professional-looking repair.
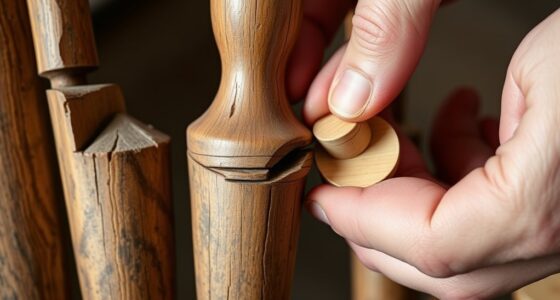
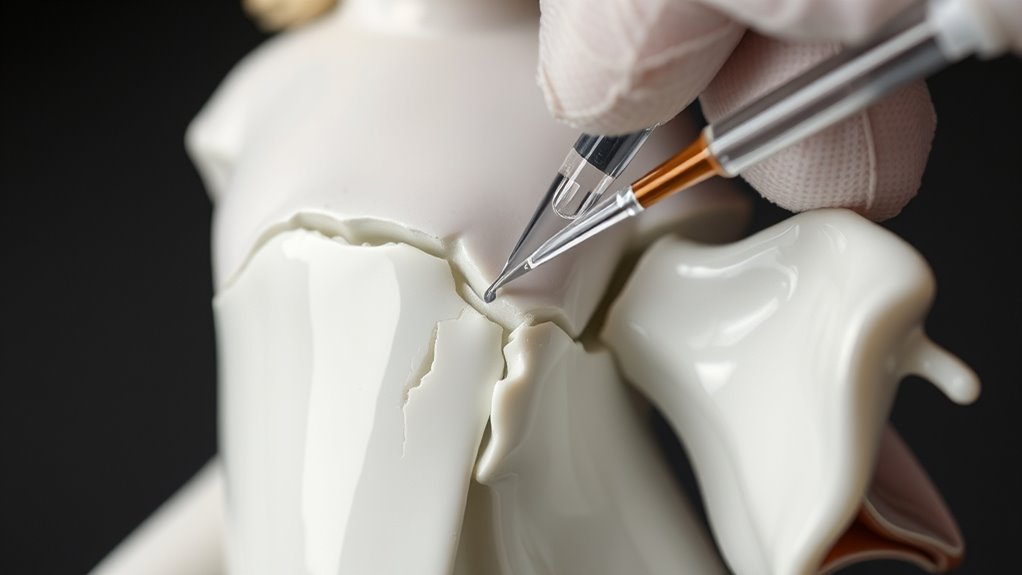
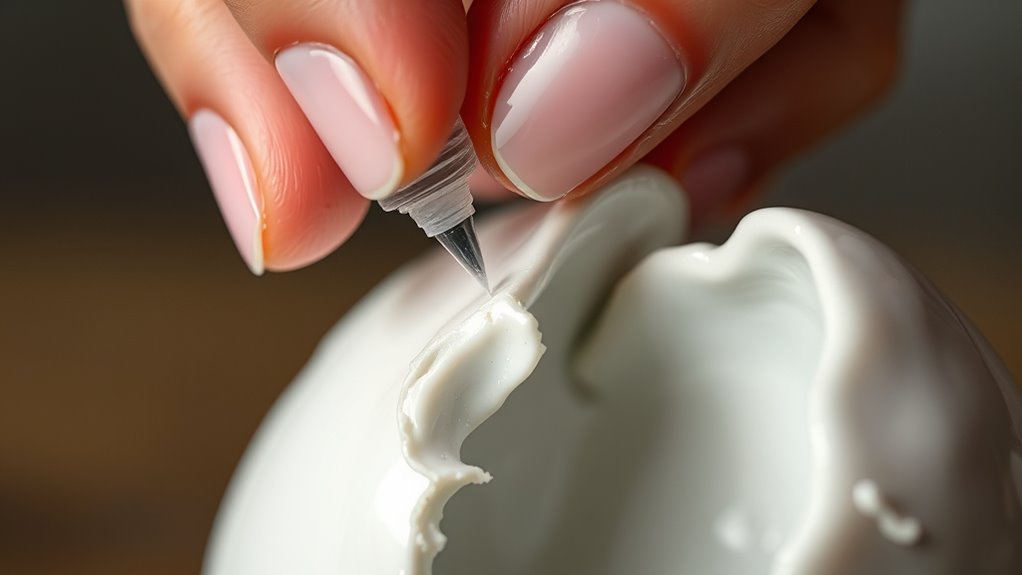
Applying Glue for Precise and Invisible Repairs
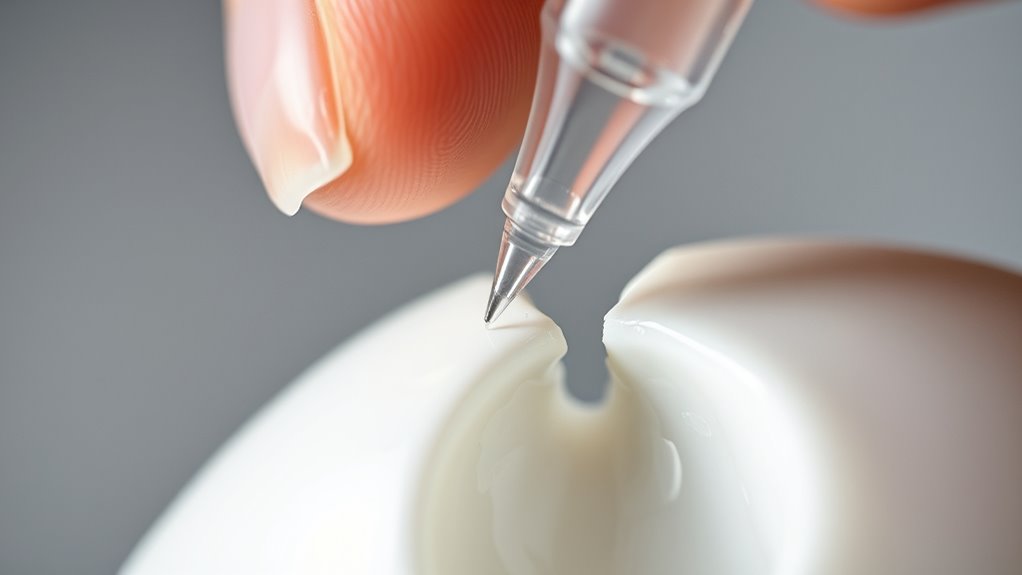
When applying glue for precise and invisible repairs, using a fine-tip applicator or small nozzle helps you control the amount of adhesive and target the exact spots that need bonding. Carefully apply a little bit of Super Glue or clear epoxy to the broken pieces, ensuring you don’t use too much, which might find its way out and create residue. For small repairs, a precise application prevents excess from oozing out and keeps the bond discreet. Press the broken pieces together firmly, ensuring the pieces stay in place. Once aligned, let the epoxy cure undisturbed for at least 24 hours. This careful approach guarantees a seamless, invisible repair, restoring the porcelain’s original look and strength while maintaining a clean, polished appearance.
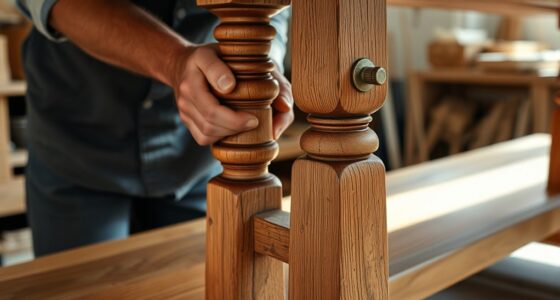
Clamping and Holding Techniques to Ensure a Strong Bond
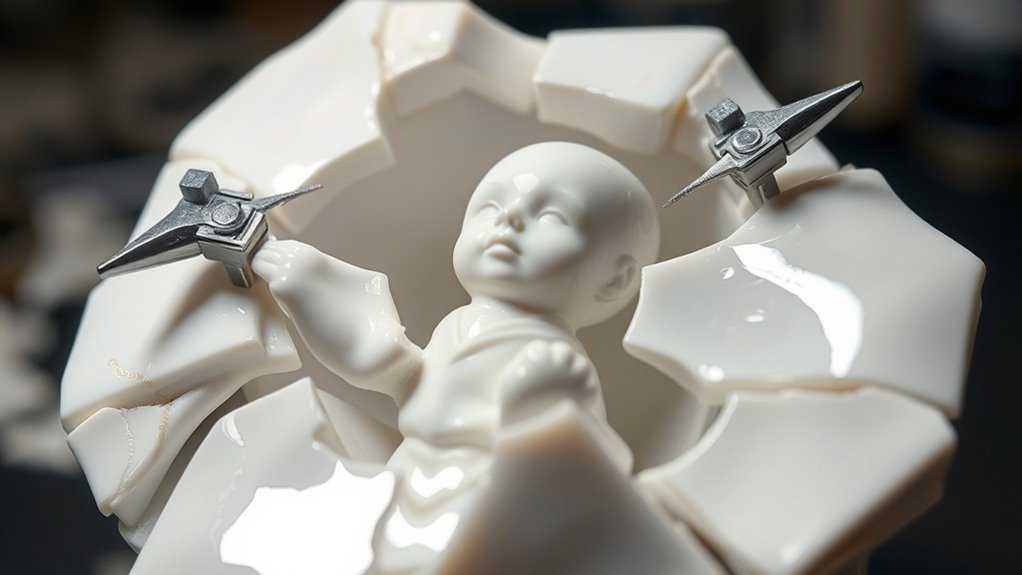
To guarantee a strong bond when repairing porcelain, it’s essential to use the right clamping and holding techniques during curing. Proper support prevents shifting and ensures proper alignment, maximizing adhesion. Use pre-made clamps, rubber bands, or masking tape to hold pieces firmly in place. Support fragile or irregularly shaped items with modeling clay or foam to reduce stress on the repair site. Prepare your clamps or supports before mixing epoxy, so you’re ready to secure immediately after applying adhesive. Employ gravity by placing the object on a stable surface and supporting it from beneath or sides. For small or delicate parts, secure them with temporary fixtures like toothpicks, pins, or custom jigs to prevent shifting during curing.
- Use clamps, rubber bands, or masking tape for firm hold
- Support fragile items with modeling clay or foam
- Prepare supports before applying epoxy
- Employ gravity and temporary fixtures for stability
Rebuilding Broken or Missing Pieces Effectively

Rebuilding broken or missing porcelain pieces requires careful shaping and support to guarantee a seamless repair. Start by creating a wax mold using melted paraffin, matching the original shape and size of the missing parts. Lightly oil the intact porcelain to ease removal later. Gently place the broken pieces into the mold, aligning them precisely to keep the correct angles. When ready, pour epoxy glue inside the mold, working from the center outward for a strong bond. Allow the epoxy to cure fully before removing the wax mold. To visualize the process:
| Step | Action | Result |
|---|---|---|
| Create wax mold | Use melted paraffin | Accurate shape of missing piece |
| Oil porcelain | Lightly coat the surface | Easy removal of mold |
| Reassemble parts | Position broken pieces | Correct alignment |
| Pour epoxy | Inside the mold | Secure bond |
| Cure epoxy | Fully set before mold removal | Seamless repair |
Long-Term Care and Maintenance of Repaired Porcelain
Maintaining the integrity of your repaired porcelain requires ongoing attention and proper care. To ensure your repair lasts, avoid exposing it to high temperatures, which can weaken the epoxy bonds over time. Regularly inspect the area for cracks or separation so you can catch issues early. Applying a clear, protective sealant helps prevent moisture and environmental damage, extending the repair’s lifespan. Use a damp cloth for gentle cleaning, steering clear of abrasive cleaners that could compromise the adhesive. Storing your porcelain in a stable, climate-controlled environment reduces stress on the repair, keeping it durable longer.
- Avoid sudden temperature changes
- Check for cracks periodically
- Use gentle cleaning methods
- Store in a stable environment
Tips for Avoiding Future Breakages and Damage

Preventing future damage to your porcelain starts with mindful handling and proper storage. Always handle your items with clean, dry hands to reduce slips and accidental fractures. When moving or placing porcelain, use protective padding or felt pads on the bottoms to prevent chipping and cracking. Avoid exposing porcelain to sudden temperature changes; pouring hot liquids into cold dishes can cause thermal shock and shatter the piece. Store fragile items in padded, stable containers to minimize movement and impact, especially during transportation. Regularly inspect your porcelain for small cracks or chips, and repair them promptly to prevent further damage. By being cautious and attentive, you can considerably extend the life of your porcelain and keep it looking beautiful for years to come.
Frequently Asked Questions
What Is the Best Glue for Broken Porcelain?
When you wonder what the best glue for broken porcelain is, epoxy adhesives stand out. They offer high strength, excellent gap-filling abilities, and durability, making your repair long-lasting. You should prepare the surface properly and mix the epoxy carefully for a seamless fix. Unlike super glues, epoxy resists cracking, temperature changes, and water, ensuring your porcelain piece stays intact and looks good for years.
What Is the Best Glue for Figurine Repair?
Imagine your figurine as a tiny masterpiece needing love. For small, clean breaks, super glue is your quick fix—bonding fast and nearly invisible. But if you’re repairing larger cracks or gaps, epoxy is your hero, filling in seamlessly and lasting longer. Think about your priorities: do you want a quick, discreet repair or a durable, hidden fix? Your choice depends on the figurine’s material and the repair’s size.
How Do You Fix a Broken Porcelain With Missing Pieces?
To fix broken porcelain with missing pieces, you need to recreate the absent parts first. Use wax or plaster molds to shape the missing sections. Apply epoxy inside the edges and fit the reconstructed pieces carefully. Secure them with clamps or a jig while it cures. Once set, sand or polish to blend everything seamlessly. This method restores both strength and appearance effectively.
What Is the Best Glue to Repair a Porcelain Sink?
Imagine your porcelain sink, once shining and pristine, now cracked and longing for renewal. To restore its beauty and strength, you should use a high-quality two-part epoxy adhesive. It’s waterproof, durable, and fills gaps seamlessly, ensuring your sink can withstand daily use. Before applying, clean and roughen the surface for better adhesion. This choice offers a long-lasting, nearly invisible repair, bringing your sink back to life with confidence.
Conclusion
With the right adhesive and proper techniques, you can restore your porcelain pieces seamlessly, saving money and preserving sentimental value. Some worry that repairs won’t last—trust me, choosing quality glue and following these steps guarantees durability. Just remember, patience is key; don’t rush the process. With care and attention, your repaired porcelain will look good as new, standing the test of time without the need for replacement or further damage.