To protect painted surfaces, applying a topcoat like polyurethane, varnish, or wax can greatly improve durability and appearance. Before applying, verify the surface is clean, dry, and smooth, then follow proper techniques like thin coats and light sanding between layers. Use quality tools and work in a well-ventilated area for the best results. Continuing will help you understand specific tips for each type of topcoat to achieve a professional finish.
Key Takeaways
- Properly clean and dry the painted surface before applying poly, varnish, or wax for optimal adhesion.
- Lightly sand the surface after cleaning to enhance grip and ensure a smooth, even finish.
- Apply thin, even coats of poly or varnish, following manufacturer’s drying instructions for best results.
- For wax, use a soft cloth to apply a thin layer and buff to achieve a protective, glossy surface.
- Maintain safety precautions and proper technique to ensure durability and an attractive, long-lasting finish.
Applying a protective topcoat over paint is a crucial step to guarantee your surface stays durable and visually appealing. Before you even think about applying the topcoat, you need to focus on surface preparation. Proper surface preparation ensures the topcoat adheres well and provides the protection you want. Start by cleaning the surface thoroughly to remove dirt, dust, grease, or any loose paint. Use a mild detergent or a suitable cleaning solution, and let the surface dry completely before moving forward. If there are any imperfections like cracks or holes, fill them with appropriate filler and sand smooth. Sanding the surface lightly creates a better grip for the topcoat, so don’t skip this step. Remember, applying the topcoat on a clean, smooth surface helps you achieve an even finish and maximizes the protective qualities of the coating. surface preparation is essential for achieving a lasting and professional-looking finish.
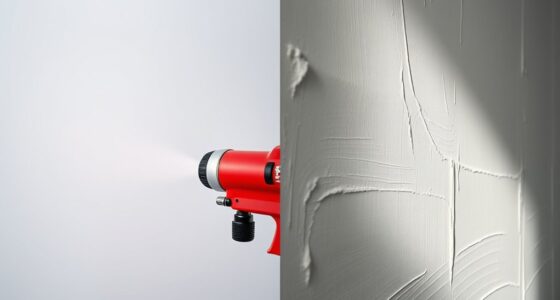
When it comes to application techniques, your approach can make a significant difference in the final result. Use quality brushes, rollers, or sprayers suited for the type of topcoat you’re applying—whether it’s polyurethane, varnish, or wax. For polyurethanes and varnishes, thin layers work best; apply each coat evenly and avoid pooling or drips. Follow the manufacturer’s instructions for drying times between coats, and lightly sand between layers to improve adhesion and smoothness. If you’re using a spray, maintain a consistent distance from the surface and keep the spray moving to prevent uneven coverage. Waxing, on the other hand, often involves applying a thin layer with a soft cloth, then buffing to a shine. Regardless of the product, work in a well-ventilated area and wear appropriate safety gear. Proper application techniques not only enhance the appearance but also extend the lifespan of your protective topcoat.
Frequently Asked Questions
How Long Does Each Protective Coat Typically Last?
Polyurethane typically lasts 2-5 years, depending on wear and maintenance. Varnish can endure 3-10 years, influenced by exposure and quality, while wax offers a shorter lifespan of 1-3 months with regular use. Durability expectations vary based on factors like foot traffic, environmental conditions, and application thickness. To maximize lifespan, reapply coats as needed and maintain your surfaces properly.
Can I Apply Multiple Protective Layers at Once?
Sure, you can apply multiple protective layers at once, but you should proceed cautiously. Carefully consider layer adhesion—each coat needs to stick well without trapping bubbles. Be mindful of drying time; rushing can cause uneven finishes or peeling. Patience is key, so wait until the first layer is adequately dry before adding the next. Proper preparation and timing guarantee a smooth, durable, and decorative finish that lasts longer.
Are There Eco-Friendly Protective Topcoats Available?
Yes, eco-friendly protective topcoats are available. You can choose biodegradable coatings or water-based products that reduce environmental impact. These alternatives often have lower VOC emissions and are safer for you and the planet. Look for labels indicating eco-friendliness or biodegradable properties, and always follow application instructions to guarantee proper protection. Switching to these options helps you maintain your surfaces while being environmentally responsible.
How Do I Remove a Protective Coat if Needed?
If you need to remove a protective coat, don’t panic—think of it as peeling away layers of a mystery! Use proper removal techniques like gentle sanding or specialized solvent options such as mineral spirits or acetone. Carefully follow safety instructions, work in a well-ventilated area, and test a small spot first. This way, you’ll restore your surface without causing damage, making the process smooth and stress-free.
What Are the Best Storage Practices for Leftover Topcoats?
To store leftover topcoats properly, you should follow these storage tips: keep the containers tightly sealed to prevent air from drying out the product, and store them in a cool, dry place away from direct sunlight or heat sources. Make sure the lids are securely closed after each use, and label the containers clearly. Proper container sealing guarantees the topcoats stay fresh and ready for your next project.
Conclusion
Choosing the right protective topcoat can make all the difference in your painted surfaces’ durability. Polyurethane, varnish, and wax each offer unique benefits, so pick one based on your needs. Did you know that a well-applied topcoat can extend your paint’s lifespan by up to 50%? By investing in the right finish, you’ll enjoy a beautiful, long-lasting result that stands the test of time. Protect your work and keep it looking fresh for years to come.