To apply primer evenly, choose the right tool for the job—use high-quality rollers with the correct nap length for large, flat surfaces, and keep a steady hand with brushes for corners and detail areas. When spraying, maintain consistent distance and smooth, overlapping strokes to avoid drips and streaks. Working methodically and practicing proper technique guarantees a smooth, professional finish. Keep going to discover more tips for mastering your primer application process.
Key Takeaways
- Use high-quality rollers with appropriate nap length and apply with even, overlapping strokes for uniform coverage.
- Choose the right brush for detailed areas and edges, applying primer smoothly and consistently.
- Maintain a steady hand and consistent pressure when spraying, keeping the spray at the correct distance to avoid drips.
- Load tools adequately to prevent uneven application, working methodically across the surface.
- Always work in manageable sections, overlapping each pass slightly to ensure seamless, even primer coats.

Have you ever wondered how professionals achieve flawless paint finishes? The secret often lies in applying primer evenly, which requires the right techniques and a good understanding of surface preparation. Before you even pick up your roller, brush, or spray gun, you need to guarantee the surface is properly prepared. This means cleaning it thoroughly to remove dust, grease, or any loose particles that could interfere with adhesion. Sanding the surface smooth is also vital because it creates tiny abrasions that help the primer stick better. Remember, surface preparation is the foundation of a perfect finish. If the surface isn’t properly prepared, no amount of skill with your painting tools will produce a smooth, durable coat.
Once your surface is ready, you must pay attention to primer compatibility. Not all primers work equally on every surface. For example, oil-based primers are better suited for glossy or stained surfaces, while water-based primers work well on drywall and wood. Choosing the right primer ensures good adhesion and prevents issues like peeling or bubbling later on. If you mix incompatible primers or use one that doesn’t suit your surface, you risk uneven coverage and compromised durability. Always read the label and follow manufacturer recommendations for compatibility. Proper primer selection makes the application process smoother and results in a more even finish.
Choosing the right primer ensures better adhesion and a durable, even finish.
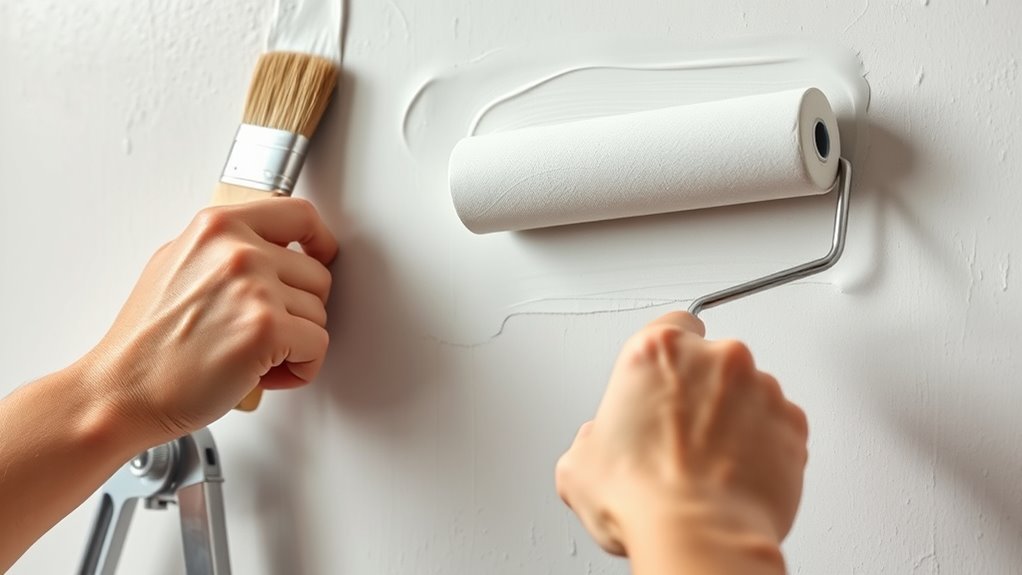
When it’s time to apply the primer, your tools matter just as much as surface prep and primer choice. Rollers are excellent for covering large, flat areas quickly and evenly. Use a high-quality roller with a nap length suitable for your surface texture—short for smooth surfaces, longer for textured areas. Apply the primer with even pressure, overlapping each stroke slightly to avoid streaks or missed spots. Brushes are best for detailed areas, corners, or edges where precision is key. Use a high-quality brush and work in smooth, consistent strokes to prevent streaks or brush marks. Spray techniques are ideal for large projects or when you need a very smooth, uniform coat. Always hold the spray gun at the right distance from the surface and move steadily to avoid drips or uneven coverage.
No matter what application method you choose, the key to a flawless primer coat is consistency. Keep your tools loaded with enough primer, work methodically, and check your progress frequently. Applying primer evenly isn’t just about aesthetics—it’s about creating the perfect foundation for your topcoat. When surface preparation is thorough, primer compatibility is assured, and your tools are used correctly, you set yourself up for a professional-looking finish that lasts.

Remolika 10 – Pack 4 Inches Mini Paint Roller Covers for Smooth and Lint-Free Finish – 1/2 Nap – Made in Italy – Premium Microfiber Roller Naps for All Paints and Stains
Made in Italy
As an affiliate, we earn on qualifying purchases.
As an affiliate, we earn on qualifying purchases.
Frequently Asked Questions
Can Primer Be Applied Over Textured Surfaces Effectively?
Yes, you can apply primer over textured surfaces effectively. To guarantee good primer adhesion, clean the textured area thoroughly to remove dust and debris. Use a brush or roller suited for textured surfaces, applying the primer evenly to reach all crevices. For stubborn textures, spraying can also work well. Proper preparation and choosing the right application method help the primer adhere properly, providing a solid base for your topcoat.
What Are the Best Environmental Conditions for Primer Application?
You should apply primer under ideal environmental conditions to guarantee the best results. Keep the temperature between 50°F and 85°F, and maintain humidity levels below 85%. Avoid applying primer during rain, high humidity, or extreme heat, as these environmental factors can affect adhesion and drying time. Good ventilation also helps, ensuring the primer cures properly and adheres evenly, giving you a smooth, durable finish.
How Do I Prevent Roller Marks When Applying Primer?
Imagine your roller gliding smoothly like a gentle wave across a calm lake. To prevent roller marks and brush strokes, keep your roller loaded with enough primer, and don’t press too hard. Work in overlapping, even strokes, maintaining consistent pressure. Avoid going over the same spot repeatedly, which can leave marks. Practice patience and steady movement, and you’ll achieve a flawless, smooth finish that looks professional and inviting.
Is It Necessary to Sand Between Primer Coats?
Yes, sanding between primer coats is necessary. You should perform sanding preparation to smooth the surface and improve primer adhesion. Lightly sand with fine-grit paper after each coat to remove imperfections and guarantee a better bond for the next layer. This process helps eliminate roller marks, enhances the finish, and ensures your paint adheres properly, resulting in a flawless, durable surface.
How Long Should Primer Dry Before Painting?
Think of primer like a handshake; you want it firm and dry before you start. Usually, you should wait 1 to 4 hours for primer to dry completely, depending on the product and conditions. This drying time is vital for primer adhesion, ensuring a smooth, durable finish. Rushing it can cause peeling or uneven paint. Check the manufacturer’s instructions for the specific drying time, and be patient for the best results.

BOSOBO Paint Brush Set, 10pcs Round Pointed Tip Nylon Hair Artist Detail Paintbrushes, Professional Fine Acrylic Oil Watercolor Brushes for Face Nail Body Art Craft Model Miniature Painting, Blue
10 Various Sizes of Paintbrushes: This acrylic artist paint brushes set includes 10 different sizes: 5/8 8 6…
As an affiliate, we earn on qualifying purchases.
As an affiliate, we earn on qualifying purchases.
Conclusion
So, now that you’ve mastered the art of applying primer with rollers, brushes, and spray guns, remember—it’s not just about a smooth finish. It’s about setting the stage for your masterpiece, or at least pretending you’re a pro. Because if your primer’s uneven, no amount of fancy paint will hide your lack of preparation. So, go ahead, embrace the process, and maybe, just maybe, your walls will forgive your past sins.

ENDOZER Professional HVLP Spray Gun Set Gravity Feed Air Spray Gun with 1.4, 1.7, 2.0mm Nozzles 20oz 600cc with Gauge for Auto Paint, Primer, Clear/Top Coat & Touch-Up (Not Suitable for Latex Paint)
This spray gun is supplied with a 20 oz. (600 ml) gravity feed cup, with 1.4 1.7 2.0mm…
As an affiliate, we earn on qualifying purchases.
As an affiliate, we earn on qualifying purchases.

Krud Kutter GO326 Gloss Off Prepaint Surface Preparation Cleaner, 32 oz
Use to help degloss and prepare hard-to-paint surfaces prior to paint application
As an affiliate, we earn on qualifying purchases.
As an affiliate, we earn on qualifying purchases.