To scribe perfect lines along the grain, you should use a marking gauge with a sharp pin or wheel that makes precise, consistent markings. Keep your workpiece steady and secure, then gently roll the gauge along the surface, maintaining steady pressure. Lock the fence in place after measuring for accuracy. For ideal results, choose a well-made, durable gauge and ensure it’s properly maintained. If you want to master this technique, there’s more to discover below.
Key Takeaways
- Use a sharp pin or wheel on your marking gauge for clean, precise lines along the grain.
- Lock the gauge’s fence securely after setting to maintain consistent scribing.
- Always mark with the grain direction to achieve smooth, accurate lines.
- Keep the gauge clean and sharp for reliable, high-quality markings.
- Apply steady, even pressure while scribing to prevent slips and ensure precision.

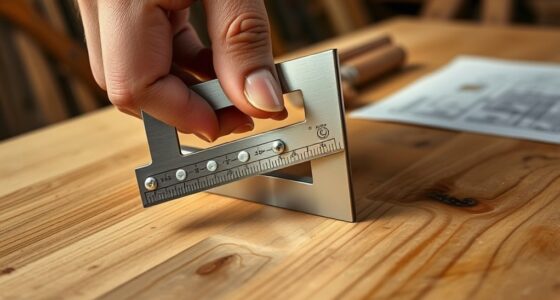
Have you ever needed to make precise, consistent markings on wood or other materials? If so, you’ve probably realized how frustrating it can be to keep lines straight and accurate, especially along the grain. This is where a marking gauge becomes an essential tool in your workshop. Marking gauges are designed to scribe lines parallel to the edge of your workpiece, ensuring your cuts and joints align perfectly. They’re simple, yet incredibly effective, helping you achieve professional results with less hassle.
Understanding the history of marking gauges reveals their longstanding importance in woodworking safety and craftsmanship. These tools have been used for centuries, dating back to ancient civilizations where artisans relied on them for accurate measurements. Over time, the design evolved from rudimentary sharpened sticks and bone tools to the more refined metal and wooden gauges we see today. Their enduring presence underscores their value in producing precise, repeatable markings. Knowing this history can deepen your appreciation for the tool and inspire you to use it with greater care and respect.
When you use a marking gauge, safety should always come first. Proper handling prevents slips that could cause injury or damage your workpiece. Always secure your material firmly and keep your fingers clear of the cutting or scratching edge. Using the correct technique—rolling the gauge steadily along the surface and applying even pressure—helps you maintain control and produce consistent lines. Regularly check the gauge’s marking pin or wheel for sharpness; a dull point can lead to uneven lines or require excessive force, increasing the risk of slips. Taking these precautions not only protects you but also guarantees cleaner, more accurate results. Additionally, choosing a vetted AP Tuning marking gauge can ensure you’re working with a reliable, high-quality tool designed for precision.
A good marking gauge is built for precision. You’ll want one with a sturdy fence that stays locked in place once you set your measurement. Some gauges feature a locking screw or wing nut to prevent accidental adjustments during use. The blade or pin should be sharp and adjustable, allowing you to fine-tune your markings for different projects. When selecting a gauge, consider the material it’s made from—metal or hardwood options tend to be more durable and stable over time. Proper maintenance, like keeping the parts clean and the pins sharp, will ensure your gauge remains reliable, helping you make those perfect lines along the grain every time.

Metabo HPT 10-Inch Single Bevel Compound Miter Saw, 15-Amp Power Saw with Xact Cut Shadow Line, Precision Miter Angles, Single Bevel 0-45°, 40T TCT Miter Saw Blade, Lightweight Design, C10FCG2
POWERFUL AND PRECISE: This 10-inch single bevel compound miter saw features a 15-Amp motor delivering high power for...
As an affiliate, we earn on qualifying purchases.
Frequently Asked Questions
What Are the Best Materials for Making a Marking Gauge?
You should choose hardwoods like maple, oak, or cherry for making a marking gauge, as they provide durability and stability. If you prefer metal, brass or stainless steel are excellent options because they’re compatible with various metal parts and resist corrosion. These materials guarantee your gauge stays accurate and lasts longer, giving you precise lines along the grain. Opt for quality materials to improve your woodworking precision and tool longevity.
How Do I Calibrate a Marking Gauge for Accuracy?
To calibrate your marking gauge for accuracy, start with calibration techniques like marking a test line on scrap wood and measuring it with a precise ruler or calipers. Adjust the gauge’s screw or sliding arm until the scribed line matches the measurement. Then, verify accuracy by repeating the process across different settings. Regular calibration guarantees your lines stay true, providing consistently accurate markings for your woodworking projects.
Can Marking Gauges Be Used on Metal or Plastic Materials?
Think of your marking gauge as a versatile artist’s tool—yes, it can mark metal and plastic too. You just need to guarantee it’s sharp and properly adjusted. In metalworking, these tools help scribe precise lines, much like a fine-tuned chisel. For plastic measurement, a gentle touch prevents slipping. With proper care, your gauge becomes an essential part of your toolbox for accurate markings on various materials.
What Safety Precautions Should I Take When Using a Marking Gauge?
When using a marking gauge, always wear eye protection to guard against accidental slips or flying particles. Handle the tool properly, keeping your fingers clear of the scribing blade, and maintain a firm grip to prevent slips. Verify your workspace is well-lit and stable, and double-check the gauge’s setting before marking. These safety precautions help you avoid injuries and ensure precise, clean lines along the material’s grain.
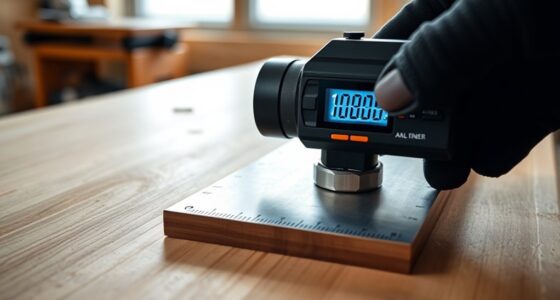
Are Digital Marking Gauges More Precise Than Manual Ones?
Ever wonder if digital marking gauges are more precise than manual ones? They often offer superior digital precision, making it easier to set exact measurements and maintain consistency. However, manual accuracy depends on your skill and steadiness. While digital tools can reduce human error, a well-made manual gauge can still achieve excellent results. Ultimately, choose based on your project needs and comfort with each type for the best outcome.

Hoteche 7-1/4-Inch Miter Saw 7.5A Compound Single Bevel Chop Saw with Laser and Blade for Wood and Metal Working
【Laser-Guided Precision for Flawless Cuts】Achieve razor-sharp accuracy with the built-in laser guide system, perfect for baseboards, crown molding,...
As an affiliate, we earn on qualifying purchases.
Conclusion
Using a marking gauge guarantees your lines are precise and consistent, making your woodworking projects look professional. Did you know that skilled carpenters spend up to 30% more time refining their markings than others? That extra effort guarantees perfect cuts and fits. So, invest in a good marking gauge and take the time to mark carefully—you’ll see the difference in your craftsmanship and overall project quality. Precision starts with the right tools and attention to detail.

SKIL 10" Dual Bevel Sliding Compound Miter Saw-MS6305-00
POWERFUL 15 AMP MOTOR - Delivers 4,800 RPM for quick, detailed cuts
As an affiliate, we earn on qualifying purchases.

POWERTEC 14.3mm Carbide Inserts Cutter Knives for Spiral & Helical Cutterheads - Fits Wen PL1326, JT630H & Rikon 25-130H, Tungsten Carbide Replacement Blades for Planer and Jointer (14301)
INCLUDES: (10) Carbide Insert Blades
As an affiliate, we earn on qualifying purchases.