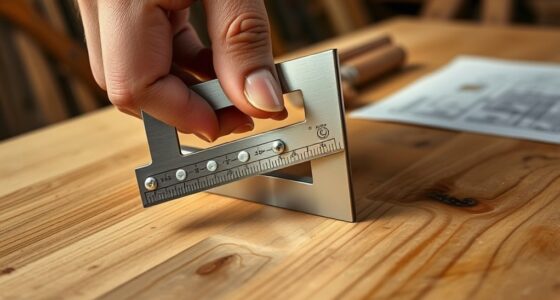
To set and check blade angles with a digital angle finder, first guarantee the device is properly calibrated on a flat, known surface or true 0° reference. Place it firmly against the blade or surface, making sure it’s stable and flat. Use the lock feature if available to hold the measurement during adjustments. Regularly verify the accuracy, especially after impacts or if the readings seem off. Continuing will help you master precise angle calibration for safe, accurate cuts.
Key Takeaways
- Place the digital angle finder firmly against the blade or surface for accurate measurement.
- Calibrate the device on a flat, known surface or true 0° reference before setting or checking angles.
- Use the device’s lock feature to hold the measurement while adjusting the blade.
- Re-verify the blade angle after adjustments to ensure precision.
- Cross-check measurements with a square or protractor for high-accuracy tasks.
Are you tired of guessing angles during your projects? Digital angle finders can be game-changers, offering precise measurements that help you set and check blade angles with confidence. To guarantee you’re getting the most accurate readings, understanding calibration techniques is essential. Proper calibration is the foundation of reliable measurements, so take the time to calibrate your device before each use. Many digital angle finders come with a calibration feature or instructions to set the baseline. Usually, this involves placing the tool on a flat, known surface or aligning it with a true 0° reference. Follow the manufacturer’s guidelines carefully, as improper calibration can lead to skewed results. Regularly verifying calibration, especially after accidental drops or impacts, helps maintain accuracy over time. Additionally, ensuring your digital angle finder is free from debris and dirt is crucial, as cleanliness directly impacts measurement precision.
Calibrate your digital angle finder regularly for accurate, reliable measurements during projects.
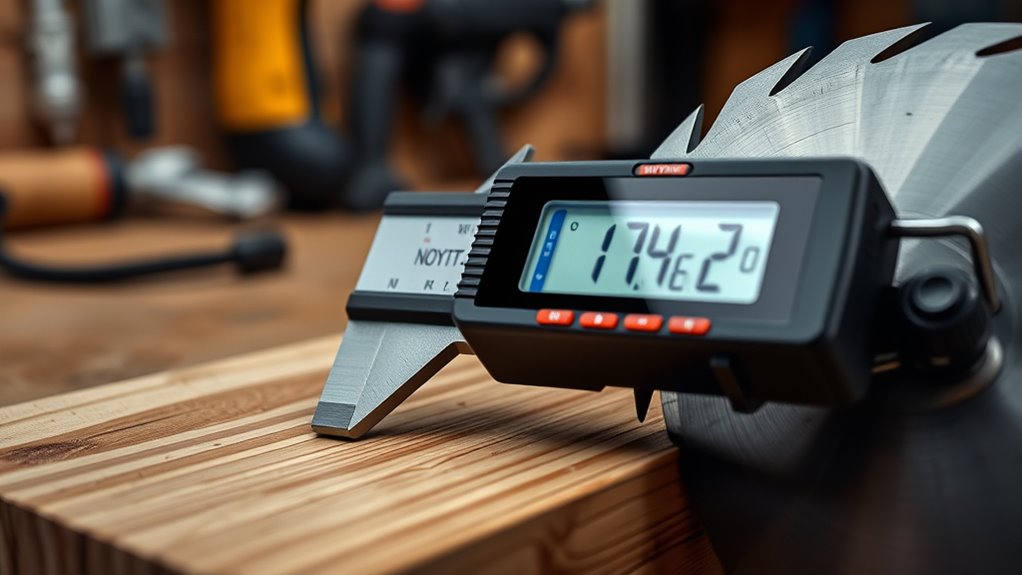
When setting your blade angles, accuracy considerations should be at the forefront. Digital angle finders are designed to provide high precision, but factors like temperature, mechanical wear, or dirt can influence their readings. Always ensure the device is clean and free of debris before measuring. When you’re ready to set your blade, place the digital angle finder firmly against the surface or part of the tool you’re adjusting. Make sure it’s seated flat and stable to avoid false readings caused by tilting or wobbling. Some models allow you to lock in a measurement, which can be useful when transferring angles to your saw or other equipment.
Checking your blade angles periodically is just as important as setting them initially. After making adjustments, use the digital angle finder to verify the new position. If your device has a hold feature, utilize it to keep the measurement visible while you make fine-tuning adjustments. Keep in mind that the device’s accuracy can drift over time, so compare readings with a known standard or another trusted measuring tool periodically. When accuracy considerations are high—such as fine woodworking or precision cuts—double-check your measurements with alternative methods, like a combination square or a protractor, to confirm consistency.
Ultimately, mastering calibration techniques and understanding accuracy considerations with your digital angle finder ensures your projects turn out precise and professional. It’s worth investing a little extra time in calibration and periodic checks because the small steps you take now can save you from costly errors later. With a well-calibrated device and a careful approach, you’ll find setting and checking blade angles becomes a straightforward part of your workflow, making your projects safer and more accurate every time.

GemRed 82305 Digital Angle Finder GemRed Protractor Stainless steel 7inch 200mm (Black Button)
PATENTED MEASURING TECHNOLOGY — Ruler and protractor combination for easy measuring inside and outside angles.
As an affiliate, we earn on qualifying purchases.
As an affiliate, we earn on qualifying purchases.
Frequently Asked Questions
How Do Digital Angle Finders Compare to Traditional Analog Tools?
Digital angle finders offer greater digital accuracy and are easier to use than traditional analog tools. You can quickly get precise readings with a simple display, reducing guesswork and errors. Unlike analog tools, digital finders often have features like zeroing and hold functions, making your tasks more efficient. Overall, they streamline setting and checking blade angles, giving you confidence in your measurements with less effort.
What Features Should I Look for in a High-Precision Digital Angle Finder?
Like a craftsman wielding Excalibur, you need a high-precision digital angle finder with top measurement accuracy to master your cuts. Seek one with an ergonomic design for comfortable, steady use during lengthy projects. Look for features like a clear, easy-to-read display, zero calibration, and durable build quality. These elements guarantee precise, reliable measurements, helping you achieve flawless results every time, much like a legendary sword in skilled hands.
Are Digital Angle Finders Suitable for Woodworking and Metalworking?
Yes, digital angle finders are suitable for woodworking and metalworking. They easily measure and set precise angles, helping you achieve accurate cuts and joints. Check their material compatibility to guarantee durability for your tasks, and consider battery life for extended use without interruptions. With their quick readings and user-friendly interface, digital angle finders streamline your projects, making precise angle measurements effortless in both craftsmanship and metalwork.
How Do I Calibrate a Digital Angle Finder for Accurate Measurements?
To calibrate your digital angle finder for accurate measurements, start with the calibration process by placing it on a known flat surface or a precise angle. Turn it on and follow the device’s instructions to reset or zero the tool. Then, verify accuracy by measuring a known angle or a straight edge. Adjust if necessary, ensuring your readings are consistent and reliable for woodworking or metalworking tasks.
Can Digital Angle Finders Measure Angles on Curved or Irregular Surfaces?
Digital angle finders aren’t ideal for measuring curved surfaces or irregular shape angles. Their flat sensors work best on straight, flat edges. If you need to measure curved surface angles, try using flexible tools like a protractor or a contour gauge to follow the surface’s contours accurately. For irregular shape angles, consider using a combination of measurements and tracing techniques to guarantee precision, as digital finders may give inaccurate readings on uneven surfaces.

Klein Tools 935DAG Digital Electronic Level and Angle Gauge, Measures 0 – 90 and 0 – 180 Degree Ranges, Measures and Sets Angles
VERSATILE DIGITAL ANGLE GAUGE AND LEVEL: Measure angles, check relative angles with zero calibration feature, or use as…
As an affiliate, we earn on qualifying purchases.
As an affiliate, we earn on qualifying purchases.
Conclusion
Digital angle finders make setting and checking blade angles quick and precise, ensuring your projects come out flawless. With their ease of use and accuracy, you might wonder how you ever managed without one. Investing in a good digital angle finder not only saves you time but also boosts your confidence in every cut. So, why settle for guesswork when you can achieve perfect angles effortlessly? Upgrade your toolkit and let technology elevate your craftsmanship.

LEXIVON Aluminum Digital Angle Finder Gauge, 7-inch/180mm Multi-Purpose Protractor, Includes XL Display and Rugged Zippered Pouch (LX-DAF7)
SIMPLE INTERFACE: This digital angle finder features a straightforward 4-button interface for easy operation: ZERO to recalibrate at…
As an affiliate, we earn on qualifying purchases.
As an affiliate, we earn on qualifying purchases.

Precision Angle Finder – Handcrafted Birch Wood Degree Tool, Custom Angles Accurate Degree Tool, Engraved Protractor for Accurate Measurements for Welder Carpentry DIY Projects, Builders. (1pc)
【Instant Accurate Angle Readings】: This Precision Angle Finder uses a simple string-alignment system to deliver precise readings in…
As an affiliate, we earn on qualifying purchases.
As an affiliate, we earn on qualifying purchases.