
To set up a cutting list that plans material yields effectively, start by reviewing your project plans and breaking down each component’s measurements. List all pieces with their specific sizes and quantities, and consider how to cut multiple items from a single raw length to maximize efficiency. Use sketches or software to visualize your cuts, ensuring minimal waste and smooth workflow. Keep reading to discover how to refine your approach for even better results.
Key Takeaways
- Review project plans thoroughly to identify all required components and their dimensions before creating the cutting list.
- Analyze raw material lengths to determine how multiple pieces can be nested efficiently, minimizing waste.
- Use software or sketches to visualize cuts, optimize batch sizes, and plan the most effective cutting sequence.
- Cross-check inventory to utilize existing materials and avoid unnecessary purchases, aligning material yields with stock availability.
- Consider material orientation and cutting techniques to maximize yield and ensure accurate planning of material utilization.
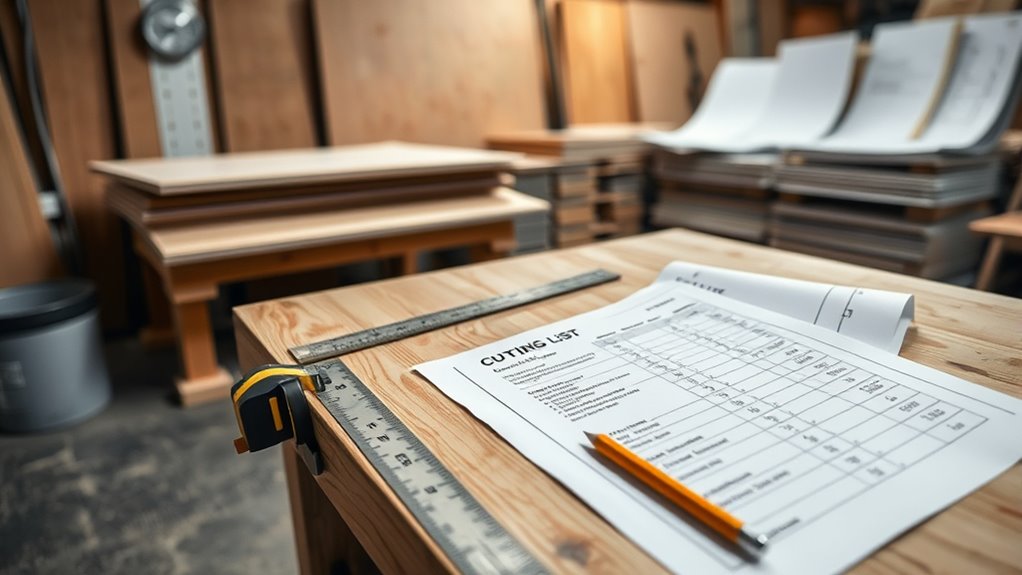
Creating an accurate cutting list is a crucial step in any woodworking or construction project. It acts as your roadmap, guiding you through the process of cutting raw materials efficiently and effectively. When you develop a detailed list, you guarantee that each piece of material is used to its fullest potential, which is essential for material optimization. By planning your cuts carefully, you minimize waste and make the most of your inventory, saving both time and money. This step is especially critical when working with expensive or limited materials, as it helps prevent costly mistakes and surplus leftovers. Additionally, considering the effectiveness of your cuts can lead to better overall project outcomes.
An accurate cutting list maximizes material use, reduces waste, and saves time and money in your project.
To set up an effective cutting list, start by reviewing your project plans thoroughly. Break down each component into specific measurements, and list all the necessary pieces. As you do this, keep a close eye on the dimensions and quantities needed, because accuracy here directly impacts your material optimization. When you know exactly what sizes you require, you can begin to consider how to cut multiple pieces from a single length of material. Think about nesting smaller pieces together in a way that reduces waste. This process not only maximizes the use of each board or sheet but also contributes to better inventory management. You’ll find that by tailoring your cuts to fit multiple parts simultaneously, you reduce the number of raw materials required, which helps keep your stock organized and manageable.
A good cutting list also involves analyzing your stock inventory before you start cutting. Take stock of what you already have on hand, then compare it with your project requirements. This way, you can identify what needs to be purchased and what can be reused, avoiding unnecessary purchases and excess storage. When you plan your cuts with inventory management in mind, you stay aware of your available resources, making your workflow more streamlined and cost-effective. Proper planning allows you to anticipate potential shortages or surplus, giving you the opportunity to adjust your design or sourcing strategy accordingly.
Furthermore, creating a visual or written plan of your cuts can help you spot inefficiencies before you begin. Using software or even simple sketches, map out your cuts to see how well your material is being utilized. This proactive step ensures you make informed decisions about material orientation, cutting order, and batch sizes. The end goal is to balance material optimization with inventory management, reducing waste and ensuring you don’t run out of materials midway through your project. By taking the time upfront to set up a detailed, thoughtful cutting list, you’ll work more efficiently, save resources, and complete your project with precision and confidence.

Genmitsu 10pcs 2-Flute Nano Blue Coat Ball Nose Spiral End Mill, 1/8'' Shank, 0.8mm-2.5mm Cutting Diameter, CNC Router Bits for Wood Working Acrylic MDF PVC ABS, BN10A
High-quality Material: The end mills are made of tungsten carbide steel alloy that can keep continuous machining for…
As an affiliate, we earn on qualifying purchases.
As an affiliate, we earn on qualifying purchases.
Frequently Asked Questions
How Do I Account for Material Waste in My Cuts?
To account for material scrap and waste, you should add a waste factor to your calculations, typically 5-15% depending on the project. Carefully plan your cuts to minimize waste and use waste management strategies like nesting or optimized layouts. Always include extra material in your order to compensate for unforeseen waste, and track scrap to improve future material yields. This approach guarantees efficient use of resources and cost savings.
What Tools Are Best for Creating a Cutting List?
Digital software tools like CutList Plus or SketchUp make creating cutting lists easier and more accurate, especially when accounting for material waste. While manual sketches can be useful for quick planning or initial ideas, digital software streamlines calculations and optimizes material yields. Trusting in these tools often reveals how technology enhances precision and efficiency, proving that smart software combined with manual sketches creates the best results for planning your cuts effectively.
How Can I Optimize Cuts for Complex Shapes?
You can optimize cuts for complex shapes by applying pattern optimization and nesting techniques. Use software that supports nesting, which arranges your patterns efficiently to minimize waste. Adjust your layout to fit intricate shapes closely together, maximizing material use. Experiment with different nesting strategies to find the most efficient arrangement. This approach reduces material costs and waste, ensuring your project is both cost-effective and resource-efficient.
Should I Consider Kerf Width in My Calculations?
You definitely should consider kerf width in your calculations. Ignoring kerf considerations can lead to unexpected shortages or waste, especially with precise cuts. Your saw blade width, or kerf, eats up material, so factoring it in guarantees accurate yields. By accounting for saw blade width early, you optimize material use, reduce waste, and avoid surprises during your project. Don’t overlook this small detail—it makes a big difference.
How Do I Adjust a Cutting List for Different Material Thicknesses?
You adjust your cutting list for different material thicknesses by modifying your measurements to account for the thickness variations. When planning, include material thickness adjustments in your calculations to guarantee accurate cuts and fit. This involves updating your cutting list modifications, such as adding or subtracting the thickness from dimensions where necessary. Doing so helps maintain precision and prevents material waste, ensuring your project fits together perfectly.

CNC Cutting Laser Flame Plasma Cutting nesting software,Automatic nesting, intelligent optimization solution, high utilization rate (StarCAM)
drawing nesting software is composed of three modules: drawing module (StarCAM), nesting module (StarNEST) and numerical control code…
As an affiliate, we earn on qualifying purchases.
As an affiliate, we earn on qualifying purchases.
Conclusion
By carefully planning your cutting list, you guarantee minimal waste and efficient use of materials. For example, imagine you’re building a custom bookshelf and plan your cuts precisely. You’d calculate each shelf and side panel, optimizing the wood you purchase. This approach saves money, reduces leftover scraps, and speeds up your project. With thoughtful planning, you’ll complete your project smoothly and professionally, making the most of your materials from start to finish.
The Newbie's Guide to CNC Routing: Getting started with CNC machining for woodworking and other crafts
As an affiliate, we earn on qualifying purchases.
As an affiliate, we earn on qualifying purchases.
Aluminium Woodwork Measuring and Scribing Tool Set – 9 Piece Precision Kit for Carpentry and DIY Projects with Storage Box(10 Pieces.)
COMPLETE WOODWORKING SET: This 9-piece kit includes angle ruler, dovetail gauge, scriber, and essential marking tools, perfect for…
As an affiliate, we earn on qualifying purchases.
As an affiliate, we earn on qualifying purchases.