Building a Ziploc bag dispenser is simple and helps keep your pantry tidy. Choose a small plastic container or bin with a lid that fits on shelves or counters. Cut a small slot in the lid for easy access, then load the bags fold side down and stack them neatly. Place the dispenser in an accessible spot to streamline your kitchen tasks. Keep going to discover more tips on creating a perfect DIY organizer for your space.
Key Takeaways
- Select a durable container that fits your pantry space and allows easy access for loading and dispensing bags.
- Cut a small, smooth opening in the lid for quick, single-bag retrieval without compromising container integrity.
- Load Ziploc bags with the fold side down, stacking neatly for organized storage and easy grabbing.
- Label the dispenser clearly to identify contents and maintain a tidy, efficient pantry system.
- Position the dispenser within reach on shelves or in drawers to streamline kitchen tasks and reduce clutter.
If you frequently find yourself rummaging through cluttered drawers or cabinets to grab a Ziploc bag, building your own dispenser can save you time and hassle. A custom Ziploc bag dispenser keeps your plastic storage organized and accessible, making kitchen tasks more efficient. Instead of digging through a jumble of plastic bags or stacking dozens in a messy drawer, you’ll have a dedicated spot that streamlines your kitchen organization. This simple project transforms a chaotic space into a tidy, functional area, saving you frustration and giving your pantry a cleaner look.
Start by choosing a suitable container or box that fits comfortably on your shelf or countertop. A small plastic storage bin with a lid works well, especially if it’s sturdy and easy to open. You want something that protects the bags from dust while allowing easy access. Next, measure the opening of the container and cut a small slot or hole in the lid, just wide enough to slide a handful of Ziploc bags through. The goal is to create a dispenser that lets you pull out one bag at a time without the entire stack spilling out. Using a utility knife or a craft blade, carefully cut the opening, ensuring smooth edges to avoid tearing the bags.
Choose a sturdy container and carefully cut a small opening for easy Ziploc bag access.
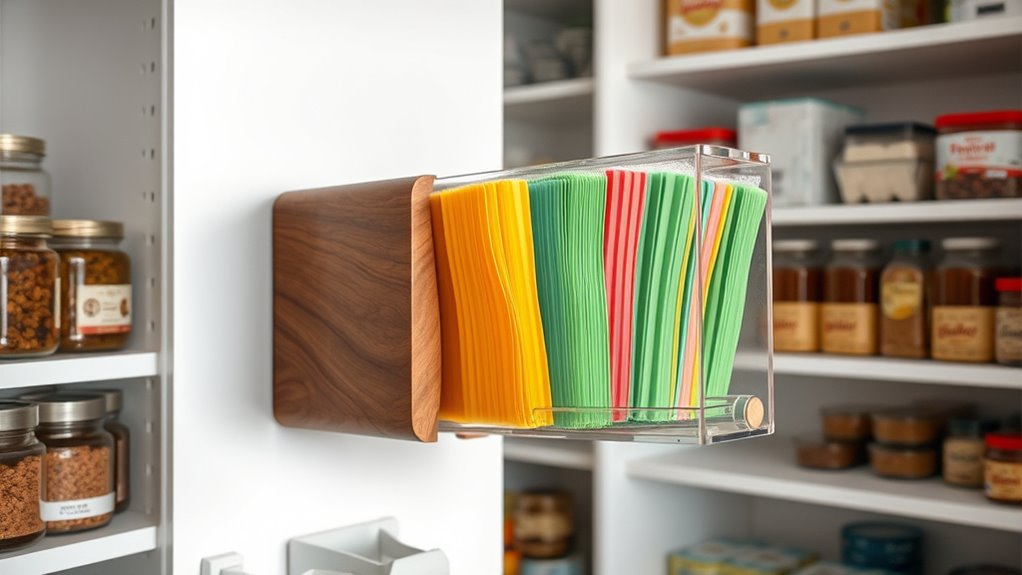
Once the opening is ready, load your Ziploc bags into the container with the fold side down. This setup allows you to easily grab a bag from the top of the stack without disturbing the rest. For added convenience, consider labeling the container as “Plastic Storage” or “Ziploc Bags” to keep your kitchen organization clear and intuitive. Position the dispenser in an accessible spot, such as a pantry shelf or a drawer, and you’ll find it much quicker to grab what you need during meal prep or storage. Incorporating predictive analytics can help you optimize your pantry layout over time based on usage patterns.
This DIY Ziploc bag dispenser not only simplifies your routine but also helps maintain a clutter-free environment. It prevents your plastic storage bags from tumbling out or getting lost behind other items. Plus, it encourages you to keep your kitchen tidy by providing a designated space for these essential storage tools. Over time, this small upgrade can markedly improve your overall kitchen organization, making daily tasks smoother. With minimal effort and materials, you create a practical solution that keeps your plastic storage neat, accessible, and ready for use whenever you need it.
Frequently Asked Questions
What Are Alternative Materials to Use for the Dispenser?
You can use recycling materials like repurposed plastic bottles or cardboard for your dispenser. These options are eco-friendly and budget-friendly. To enhance its look, consider adding decorative finishes such as paint, washi tape, or fabric wraps. These materials not only make your dispenser functional but also stylish, allowing you to customize it to match your pantry decor while reducing waste and creating a unique, sustainable storage solution.
How Do I Clean and Maintain the Dispenser?
Oh, because who wouldn’t love a spotless dispenser? To clean and maintain it, simply remove any leftover debris, wash it with warm soapy water, and dry thoroughly. For dispenser cleaning, avoid harsh chemicals that could damage the material. Maintenance tips include regularly checking for cracks or wear, and ensuring the opening remains unobstructed. Keep it pristine, and your pantry will thank you with perfect organization!
Can This Dispenser Be Customized for Different Bag Sizes?
Yes, you can customize your dispenser for different bag sizes by making it an adjustable dispenser. You can add adjustable dividers or modify the opening to fit various bag sizes, including custom bag sizes. This flexibility allows you to easily switch between different Ziploc bag types without hassle. With a few simple modifications, your dispenser becomes versatile, ensuring it accommodates all your storage needs efficiently.
What Is the Estimated Cost to Build This Dispenser?
You can expect a cost estimate of around $10 to $20 for building this dispenser, making it budget-friendly. Don’t let the initial expense scare you—this project saves you time and keeps your pantry tidy. When budget planning, remember that materials like plastic or wood are inexpensive, and you might already have some tools. Overall, it’s a small investment for a big organizational upgrade.
How Do I Ensure the Dispenser Fits My Pantry Shelves?
To guarantee your dispenser fits your pantry shelves, measure your shelf dimensions carefully, including height, width, and depth. Check the dispenser’s size against your available space to ensure shelf compatibility. Opt for a compact design that allows space for other items and maximizes space optimization. Consider adjustable or customizable components if your shelves vary in size, so your dispenser fits snugly and keeps your pantry organized.
Conclusion
Now that you’ve built your Ziploc bag dispenser, your pantry will stay as tidy as a well-organized bookshelf. No more digging through clutter or juggling bags like a circus act—you’ve created a simple, handy solution that keeps everything in its place. Think of it as a tiny command center, making your kitchen run smoother than ever. With this dispenser, your pantry’s chaos turns into calm, and organization becomes your new best friend.