To avoid bubbles during veneer pressing, guarantee your glue is of medium consistency, like heavy cream, and apply it evenly without puddles. Carefully align the veneer, grain to grain, and use a roller to smooth out air pockets from the center outward. Apply firm, consistent pressure, and gently push excess air and glue toward the edges. Keeping proper pressing techniques in mind will help you achieve a smooth, bubble-free bond—there’s more to mastering this craft as you go along.
Key Takeaways
- Use medium-viscosity glue, evenly spread to prevent dry spots and excess seepage.
- Align grain direction accurately to ensure uniform bonding and reduce bubbles.
- Smooth veneer with a roller, working from center outward to push air and glue outward.
- Apply consistent, moderate pressure during pressing to avoid shifting and air pockets.
- Gently force air and excess glue to edges during pressing to prevent bubbles and weak bonds.
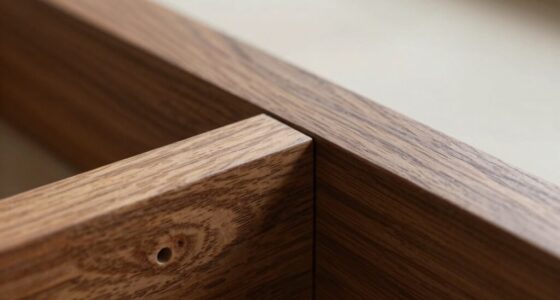
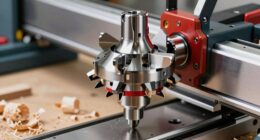
Veneer pressing is an essential step in manufacturing high-quality wood products, guaranteeing thin sheets of veneer bond securely to substrates. To achieve a flawless glue-up, you need to pay close attention to both the grain direction and glue consistency. If you neglect these elements, you risk creating bubbles, gaps, or uneven surfaces that compromise the final product’s appearance and durability. Properly aligning the grain direction is critical because it influences how the veneer reacts under pressure and adhesive. You want the grain running in the same direction as the pressing force, which helps maintain stability and reduces the chance of warping or cracking. When the grain is aligned properly, the veneer bonds more uniformly, resulting in a smoother, more natural look.
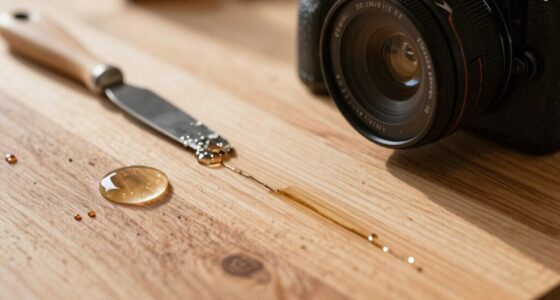
Next, focus on the glue consistency. You should mix your adhesive to the right viscosity—neither too thick nor too runny. If the glue is too thick, it won’t spread evenly, leaving dry spots that can trap air and create bubbles. Conversely, if it’s too thin, it may seep out excessively, making a mess and weakening the bond. Aim for a consistency similar to heavy cream, which allows you to spread a thin, even layer across the veneer surface. This guarantees that the glue fills any microscopic gaps and adheres snugly without excess squeeze-out, which can be problematic during pressing. Using a roller or brush, apply the glue evenly, paying special attention to avoid puddles or dry spots. An even application reduces the likelihood of air pockets being trapped beneath the veneer, thereby preventing bubbles from forming during pressing. Additionally, understanding how wood movement can affect the final bond helps in planning the glue-up process to minimize issues over time.
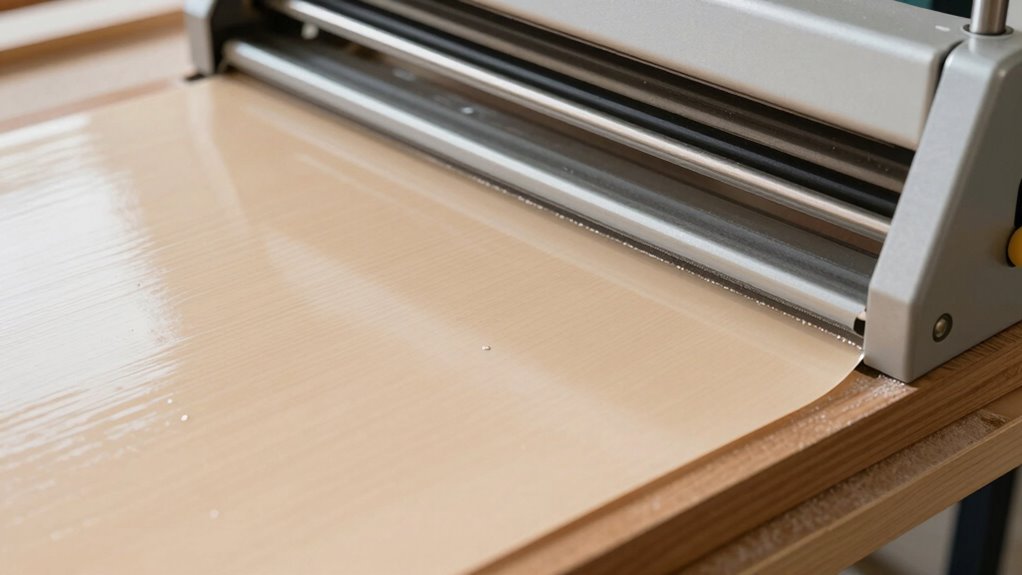
When you position the veneer on the substrate, double-check the grain alignment before applying pressure. Once in place, use a roller or pressure roller to smooth out the veneer and push out any air bubbles. It’s essential to work from the center outward, gently forcing air and excess glue toward the edges. Clamping pressure should be firm but not excessive, as too much pressure can squeeze out too much glue and weaken the bond, while too little may not eliminate air pockets effectively. Maintain consistent pressure and watch the veneer closely as it presses to guarantee there are no shifting or bubbling issues.

Sili Glue Roller with Sili Glue Tray for Arts Crafts Woodworking and Larger Projects
STREAMLINE GLUE-UP PROJECTS – The Sili Glue Roller and Sili Glue Tray are designed to streamline larger glue-up…
As an affiliate, we earn on qualifying purchases.
As an affiliate, we earn on qualifying purchases.
Frequently Asked Questions
Can I Use a Veneer Press for Curved Surfaces?
Yes, you can use a veneer press for curved surfaces by adapting your pressing techniques. To achieve a smooth, curved veneer, use flexible cauls that match the shape and apply even pressure. Carefully clamp or bend the veneer to fit the curve, ensuring the glue spreads evenly. This method helps avoid bubbles and wrinkles, giving you a professional finish on curved veneer projects.
What Types of Glue Are Best for Veneer Pressing?
You should choose a contact cement or PVA glue for veneer pressing, as they offer strong adhesive strength and manageable drying times. Contact cement bonds instantly, reducing bubble risks, while PVA dries more slowly, giving you time to adjust. Both types work well in veneer presses, ensuring a smooth, bubble-free surface. Verify your project’s needs, then select the adhesive that balances strong hold and suitable drying time for your workflow.
How Long Should I Leave the Veneer in the Press?
You should leave the veneer in the press for about 30 to 60 minutes, depending on the glue you’re using. Check the drying time specified on your glue’s instructions, as some adhesives need longer press durations to cure fully. Maintaining consistent pressure during this period guarantees a bubble-free, smooth finish. Once the press duration is complete, carefully remove the veneer and allow it to cure further if needed.
Is It Necessary to Sand the Veneer Before Pressing?
A stitch in time saves nine, so yes, you should sand the veneer before pressing. Proper veneer preparation, including light sanding, removes dust, oils, and rough spots, ensuring ideal surface finishing. This step helps the glue bond better and reduces bubbles and imperfections. Skipping it can lead to uneven adhesion, affecting the final look. Take a few moments to sand lightly for a smooth, professional finish that lasts.
What Safety Precautions Should I Take During Veneer Pressing?
During veneer pressing, you should wear protective gear like gloves and safety glasses to prevent injuries and exposure to fumes. Guarantee proper ventilation measures are in place, such as working in a well-ventilated space or using exhaust fans, to avoid inhaling harmful VOCs from the glue. Always follow safety guidelines, keep your workspace tidy, and handle glue and pressing equipment carefully to stay safe throughout the process.
CA Glue Thin Viscosity Kit, 1.75 oz. Cyanoacrylate Glue, Super Glue for Precision Repairs, Wood, Plastic, Model Building, Crafts, and 3D Printing, Fast-Drying Adhesive for Tight Spaces and Cracks
PACKAGE CONTENTS: 1.75 oz. Cyanoacrylate Glue (Thin), 5 Microtips, 1 Pin, 1 Lid and 1 Extra Cap.
As an affiliate, we earn on qualifying purchases.
As an affiliate, we earn on qualifying purchases.
Conclusion
Think of veneer pressing like tending a delicate garden. With patience and the right routine, you nurture each leaf, ensuring it stays flat and vibrant. By avoiding bubbles and applying even pressure, you’re guiding your project toward a flawless bloom. When you master these simple steps, your work becomes a lush landscape of smooth, beautiful surfaces—proof that careful tending turns raw material into a masterpiece. Keep nurturing your craft, and your projects will flourish.

Veneering Essentials: Simple Techniques & Practical Projects for Today's Woodworker
As an affiliate, we earn on qualifying purchases.
As an affiliate, we earn on qualifying purchases.

Fulton Veneer Scraper with Beveled Edges and Hardwood Handle for Applying Veneer to Substrates and Removing Air Bubbles
GET RID OF AIR BUBBLES – If you have ever applied veneer to any type of substrate material…
As an affiliate, we earn on qualifying purchases.
As an affiliate, we earn on qualifying purchases.