
To build a rustic farmhouse headboard in one weekend, gather reclaimed or distressed wood, a saw, drill, and sandpaper. Measure your space and cut the wood to size, then sand all surfaces for a smooth finish. Assemble the pieces with screws, ensuring everything is level and aligned. Finish with a stain or paint that highlights the wood’s natural imperfections. If you keep going, you’ll discover step-by-step tips for a charming, sturdy headboard that transforms your bedroom effortlessly.
Key Takeaways
- Plan and measure your space to determine the headboard size and design before starting construction.
- Gather essential tools and rustic materials like reclaimed wood or distressed lumber for authentic charm.
- Cut, sand, and assemble pieces carefully, ensuring level alignment and secure fastenings for durability.
- Finish with stain or paint that highlights wood imperfections for a rustic farmhouse look.
- Complete the project within a weekend, adding personal touches for a warm, handcrafted bedroom focal point.

Creating a rustic farmhouse headboard is a rewarding weekend project that transforms your bedroom’s look with minimal hassle. Whether you’re a seasoned DIYer or just looking for a weekend activity, building your own headboard lets you add a personal touch to your space. The key to success lies in choosing the right DIY tools and material choices, so plan ahead to guarantee everything goes smoothly.
Start by gathering your DIY tools. You’ll need a saw—either a circular saw or a hand saw—depending on your comfort level, to cut your wood to size. A drill is essential for making pilot holes and driving screws, while a tape measure helps you get precise measurements. Sandpaper or a power sander will smooth rough edges and surfaces, giving your headboard a polished look. Clamps can hold pieces steady while you work, and a level ensures everything aligns perfectly. Having these tools on hand makes the process easier and safer, allowing you to focus on your design rather than struggling with inadequate equipment.
Gather essential tools like a saw, drill, tape measure, sander, clamps, and level for a smooth DIY headboard project.
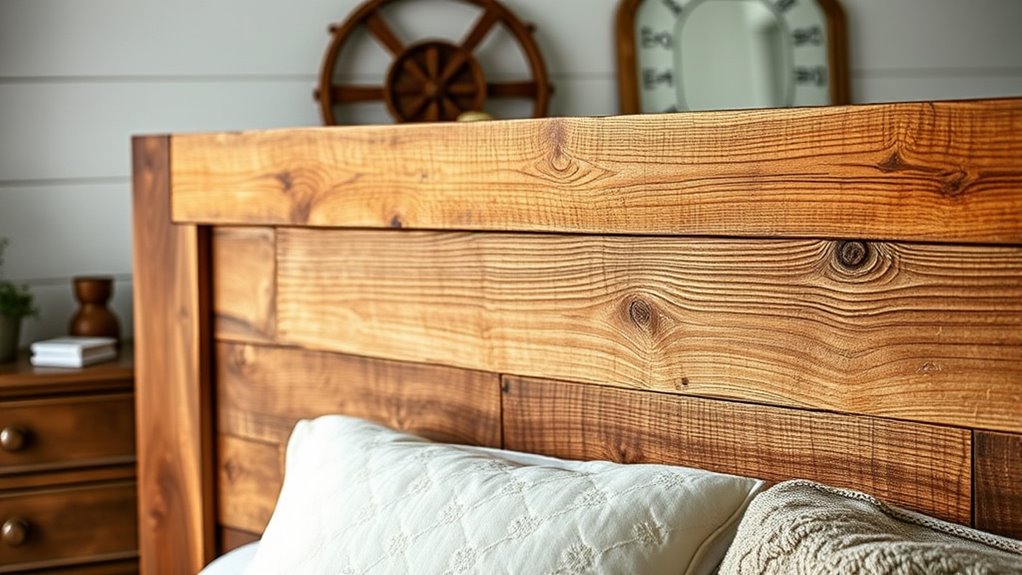
When it comes to material choices, reclaimed wood is a popular option for a rustic farmhouse style. Its weathered, natural appearance adds authenticity and character. If reclaimed wood isn’t available, new lumber like pine or cedar can mimic that rustic look with the right stain or paint. Consider selecting wood with knots, imperfections, or a distressed finish to enhance the farmhouse charm. You might also choose plywood or MDF as a base, then veneer or paint it for a more cost-effective approach. For added durability and aesthetic appeal, opt for a wood finish that highlights the grain and imperfections, giving your headboard that authentic rustic feel.
Once you’ve gathered your tools and selected your materials, measure your space carefully to determine the size of your headboard. Cut your wood pieces accordingly, then sand all surfaces to remove splinters and rough spots. Assemble the pieces using screws and a drill, making sure to keep everything level and aligned. You can add decorative touches such as a reclaimed wood top or beadboard panel for added texture. Finish the project with a coat of stain or paint in a neutral or earthy tone, enhancing the rustic vibe. Remember to consider the overall bedroom design, ensuring your headboard complements other farmhouse elements like vintage decor or wooden accents.
In just a weekend, your DIY skills and thoughtful material choices come together to create a beautiful, sturdy farmhouse headboard. It’s a simple project that rewards your effort with a piece of furniture that’s both functional and full of charm, giving your bedroom a warm, inviting look that’s uniquely yours.
rustic farmhouse headboard kit
As an affiliate, we earn on qualifying purchases.
As an affiliate, we earn on qualifying purchases.
Frequently Asked Questions
What Tools Are Essential for This Project?
For this project, you’ll need essential tools like a measuring tape and square to guarantee precise measurements and proper alignment. A saw helps cut the wood to size, while a drill makes assembly easier. Sandpaper or a sander smooths the surface for a professional finish. Use brushes or spray for applying decorative finishes, giving your headboard a rustic charm. These tools streamline your work and help you achieve a stunning, custom look.
Can I Customize the Headboard Size?
Yes, you can customize the headboard size to fit your space. When planning, consider your desired headboard dimensions to guarantee it complements your bed and room. You have various custom sizing options, so measure carefully and adjust the design accordingly. By tailoring the headboard dimensions, you’ll create a perfect fit that enhances your bedroom’s style and comfort, making your DIY project uniquely yours.
What Type of Wood Is Best for Durability?
Oh, the quest for the most durable wood—because who doesn’t want a headboard that laughs in the face of time? You’ll want hardwoods like oak or maple, known for their tight wood grain and resilience. These woods handle finish options beautifully, ensuring your rustic charm lasts. So, go for something sturdy, with a fine wood grain, and pick a finish that seals the deal on durability and style.
How Do I Prevent Wood From Warping?
To prevent wood from warping, you should focus on wood stabilization and moisture control. Store your wood in a dry, well-ventilated area to minimize moisture exposure. Before building, acclimate the wood by letting it sit in the same environment as your project. Seal the wood with a good finish to protect against humidity changes. These steps help maintain stability and keep your headboard looking great over time.
Is This Project Suitable for Beginners?
Think of this project as a gentle voyage into woodworking, perfect for beginners. It’s straightforward, and with beginner friendly tips, you’ll gain confidence quickly. Just remember safety precautions—wear goggles, handle tools carefully, and work in a well-ventilated space. This project’s simplicity lets you craft a rustic farmhouse headboard in just one weekend, making it an achievable and rewarding experience for anyone new to DIY furniture.
reclaimed wood for headboard
As an affiliate, we earn on qualifying purchases.
As an affiliate, we earn on qualifying purchases.
Conclusion
By Sunday evening, you’ll have crafted a headboard that feels like it’s been part of your home for years—much like a treasured family heirloom. I once watched a friend transform a pile of reclaimed wood into a stunning piece in just a weekend, proving that with patience and a little effort, beautiful things happen quickly. Now, your rustic farmhouse headboard isn’t just a project; it’s a story of creativity, effort, and a cozy space you’re proud to call your own.
power sander for woodworking
As an affiliate, we earn on qualifying purchases.
As an affiliate, we earn on qualifying purchases.
DIY headboard screws and hardware
As an affiliate, we earn on qualifying purchases.
As an affiliate, we earn on qualifying purchases.