
To master shellac, start by properly cutting it with alcohol to achieve the right consistency for your project. De-waxing involves removing excess wax to ensure a smooth, clear finish, which you can do by dissolving the wax with solvent and filtering it out. For a high-gloss look, learn French polishing techniques that involve applying thin coats with gentle, overlapping strokes. Continuing will reveal more detailed steps to perfect your shellac finish.
Key Takeaways
- Shellac is traditionally dissolved from flakes with alcohol, known as “cutting,” to achieve a workable consistency.
- Dewaxing shellac involves removing natural waxes to ensure a smooth, clear finish and better adhesion.
- French polishing uses very thin shellac coats applied with a pad for a high-gloss, mirror-like surface.
- Properly prepared shellac should be strained to remove impurities before application.
- Controlling the shellac-to-alcohol ratio during cutting affects drying time, finish quality, and ease of application.

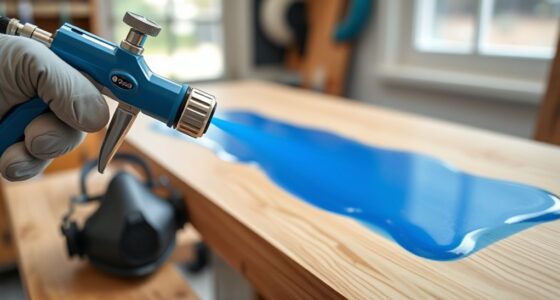
Have you ever wondered what makes shellac a popular choice for finishing wood and other surfaces? The answer lies in its versatility, ease of application, and beautiful finish. When working with shellac, mastering proper brush techniques is essential to achieve a smooth, even coat. You want to keep your brush well-loaded but not dripping, and use long, smooth strokes to spread the shellac evenly across the surface. Avoid overworking the finish, as this can cause streaks or uneven texture. Instead, work quickly and confidently, maintaining a consistent flow to prevent lap marks. As you apply each coat, pay attention to drying times, which are relatively quick with shellac. Typically, shellac dries to the touch within 30 to 45 minutes, but for a thorough cure, it’s best to wait at least an hour before applying another coat. Proper drying times are vital because rushing can lead to a tacky surface or uneven adhesion, compromising the final look and durability. If you’re working in a humid environment, you might notice longer drying times, so adjust your schedule accordingly to make certain each layer is fully set before proceeding.
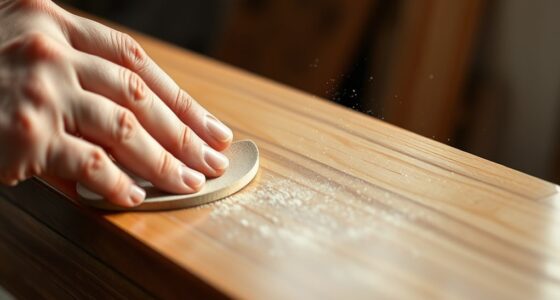
When applying shellac, always consider the temperature and airflow in your workspace. Cooler temperatures and stagnant air can slow down drying, while warm, well-ventilated spaces speed it up. Patience is key—waiting for the shellac to fully dry between coats results in a more polished finish and better adhesion. If you’re aiming for a high-gloss French polish, you’ll need to build up many thin coats, each carefully brushed on with finesse. Using a good-quality brush and proper brush techniques helps prevent bubbles and brush marks, ensuring a smooth surface. Be gentle and consistent, and avoid pressing too hard on the brush, which can create uneven streaks. Once you’ve applied a coat, give it adequate drying time before lightly sanding or adding subsequent layers. This step ensures each coat bonds properly and enhances the depth and richness of the finish.
Understanding the significance of brush techniques and drying times makes your shellac projects much easier and more successful. It allows you to control the finish more precisely, resulting in a smooth, glossy surface that highlights the beauty of the wood or material you’re working on. With practice, you’ll develop a feel for how shellac behaves and how best to work with it, transforming simple projects into professional-looking finishes. Patience, attention to detail, and respecting drying times will always pay off, leaving you with a stunning, durable finish you can be proud of.
Top picks for "shellac fundamental cutt"
Open Amazon search results for this keyword.
As an affiliate, we earn on qualifying purchases.
Frequently Asked Questions
What Are the Best Tools for Shellac Application?
You should choose a high-quality, natural bristle brush for shellac application to guarantee smooth, even coverage. Opt for a well-shaped, flat brush that allows precise control. Focus on proper applicator techniques, like thin coats and even strokes, to avoid streaks or bubbles. Using the right brush selection and mastering your applicator techniques helps achieve a flawless finish, whether you’re working on furniture or nails.
How Long Does Shellac Typically Last?
Your shellac manicure typically lasts around 7 to 14 days, but its durability depends on factors like daily activities and nail health. To extend its lifespan, follow maintenance tips such as avoiding harsh chemicals and wearing gloves during chores. Think of it as a delicate dance—proper care keeps your nails shining brighter longer, ensuring your shellac stays fresh and flawless through life’s busy moments.
Can Shellac Be Applied Over Other Finishes?
Yes, you can apply shellac over other finishes, but you need to guarantee proper layer adhesion and finish compatibility. Sand the existing surface lightly to create a good bond, and clean it thoroughly. If the previous finish is lacquer, shellac adheres well. However, if it’s oil-based or polyurethane, you might need to apply a de-waxed shellac first or test a small area to check for compatibility.
What Safety Precautions Should I Take?
Think of safety precautions as your shield when working with shellac. You should always wear protective gear like masks, gloves, and goggles to prevent skin and eye irritation. Make certain your workspace has good ventilation safety to avoid inhaling fumes. Keep the area well-ventilated, use fans if needed, and work in a well-ventilated space. Following these steps keeps you safe while creating beautiful finishes.
How Do I Remove Shellac Properly?
To remove shellac properly, start by choosing the right solvent options like denatured alcohol or shellac remover. Soak cotton balls in the solvent and place them on each nail, then wrap with aluminum foil. Let it sit for about 10-15 minutes to loosen the shellac. Gently push off the softened polish with a cuticle stick, avoiding any harsh scraping. Always work in a well-ventilated area for safety.
Conclusion
Now that you’ve grasped the essentials of shellac—cutting, dewaxing, and French polishing—you hold the brush to craft surfaces that gleam like a mirror’s reflection. Think of your workspace as a blank canvas waiting for your touch, where each stroke transforms wood into a shimmering jewel. With patience and practice, you’ll turn simple resin into a luminous masterpiece, a shining affirmation to your skill. Let your passion glow brighter than the shellac itself.