To extend lumber seamlessly with a scarf joint, cut both ends at a precise angle, typically around 1:8 or 1:10, to maximize glue surface. Make certain the cuts are tight and align perfectly, then apply strong wood glue and clamp firmly until cured. This creates a nearly invisible, durable connection that maintains both strength and appearance. Mastering these details helps you achieve professional results; keep going to discover more tips for perfect craftsmanship.
Key Takeaways
- Cut the wood ends at a precise 1:8 or 1:10 angle to maximize surface area and ensure a strong bond.
- Fit the scarf joint tightly, avoiding gaps for seamless alignment and better structural integrity.
- Use high-quality wood adhesive and clamp firmly during curing for a durable, nearly invisible connection.
- Reinforce the joint with mechanical fasteners like dowels or biscuits for added strength in high-stress applications.
- Proper craftsmanship in cutting, fitting, and finishing results in a seamless, aesthetically pleasing extension of lumber.

A scarf joint is a woodworking technique used to join two pieces of wood end-to-end, creating a longer, stronger connection. When you want to extend the length of a board without sacrificing strength or appearance, scarf joints are an excellent choice. This method is widely used in woodworking techniques because it allows you to seamlessly blend two pieces, making the joint virtually indistinguishable once finished. The key to a successful scarf joint lies in understanding how to maximize joint strength, ensuring the connection can withstand stress and load over time.
To achieve ideal joint strength, you need to carefully consider the angle and surface area of the cut. Typically, the joint is cut at an angle—around 1:8 or 1:10—to increase the glue surface area, which directly impacts the joint’s durability. The larger the contact area, the better the glue bonds, resulting in a stronger joint that can handle bending and shear forces. When preparing your wood pieces, make sure both ends are cut precisely and fit tightly together. Any gaps or misalignment can weaken the joint and compromise the overall strength of your project.
Cut at a 1:8 or 1:10 angle for maximum glue surface and joint strength.
In terms of woodworking techniques, it’s important to select the right adhesive. High-quality wood glues, like polyvinyl acetate or epoxy, are essential for creating a durable bond. Proper clamping during glue-up is equally critical—apply uniform pressure across the joint to prevent gaps and ensure full contact. Once glued, allow adequate curing time to maximize joint strength. You might also consider reinforcing the scarf joint with mechanical fasteners like dowels, nails, or biscuits for added security, especially if the joint will be subjected to significant stress.
The craftsmanship involved in creating a scarf joint directly affects its strength and appearance. Precision cutting, proper alignment, and careful glue application all contribute to a seamless finish. Additionally, understanding the types of joints used in woodworking can help you choose the best method for your project’s specific needs. When executed correctly, the scarf joint not only enhances the structural integrity of your project but also maintains a clean, professional look. Its versatility makes it suitable for furniture making, boat building, and framing, where extending lumber length without sacrificing strength is necessary. Remember, mastering these woodworking techniques will help you produce joints that are both durable and aesthetically pleasing, ensuring your projects stand the test of time.
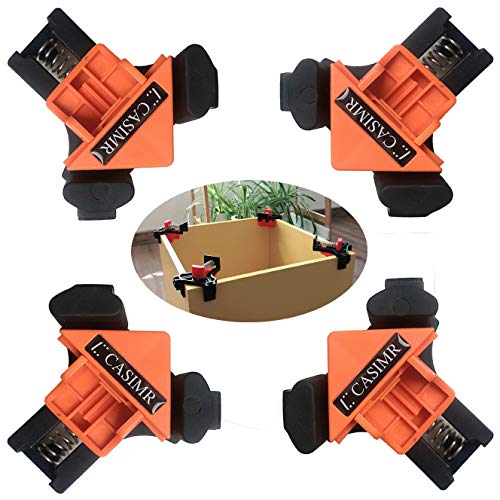
C CASIMR 90 Degree Corner Clamp, 4 Pack Adjustable Single Handle Spring Loaded Right Angle Clamp,Swing Woodworking Clip Clamp Tool
ADJUSTABLE SIZE – Fit boards with a thickness of 3/16" – 3/4" for 90 degree corner and T-joints,…
As an affiliate, we earn on qualifying purchases.
As an affiliate, we earn on qualifying purchases.
Frequently Asked Questions
What Are the Best Types of Wood for Scarf Joints?
You should choose hardwoods like oak, maple, or mahogany for scarf joints because their dense, stable wood selection enhances joint strength. These woods resist splitting and warping, providing a durable, seamless extension. Softwoods like cedar or pine can work, but they may not offer the same joint strength due to their lower density. Always match the wood type to your project’s needs to guarantee longevity and a strong, reliable joint.
How Do Climate Conditions Affect Scarf Joint Durability?
Climate conditions considerably impact your scarf joint’s durability. When exposed to moisture, it can cause climate-induced expansion and contraction, stressing the joint. Humid environments increase moisture-related degradation, weakening the bond over time. Conversely, dry conditions may lead to shrinkage and cracks. Proper sealing and choosing moisture-resistant wood help mitigate these effects, ensuring your scarf joint remains strong and durable despite changing climate conditions.
Can Scarf Joints Be Used in Load-Bearing Structures?
Yes, you can use scarf joints in load-bearing structures if you incorporate reinforcement techniques like dowels or steel rods to strengthen the connection. Make sure to take into account aesthetic aspects, such as neat finish and alignment, to ensure the joint doesn’t compromise visual appeal. Proper design and craftsmanship are essential to maintain structural integrity while blending seamlessly with the overall appearance of the timber.
What Tools Are Essential for Making Precise Scarf Joints?
Imagine the satisfaction of a perfect fit—your tools make it happen. You’ll need a saw (preferably a fine-tooth or crosscut), a square or straightedge for joint alignment, and measuring techniques like a tape measure or calipers for precision. Clamps help hold pieces steady, ensuring accurate joint alignment. These tools work together to create a seamless scarf joint, giving your project strength and beauty.
How Long Do Scarf Joints Typically Last in Outdoor Applications?
You can expect scarf joints to last several decades outdoors if you prioritize weather resistance and joint reinforcement. Properly glued and sealed joints withstand moisture, temperature changes, and UV exposure, ensuring longevity. Using quality adhesives and reinforcing the joint with screws or steel plates further enhances durability. Regular inspections and maintenance help identify any issues early, extending the lifespan of your scarf joint in outdoor environments.

Titebond III Ultimate Wood Glue, 16-Ounces #1414
Provide a much stronger bond than the wood itself
As an affiliate, we earn on qualifying purchases.
As an affiliate, we earn on qualifying purchases.
Conclusion
By mastering scarf joints, you can seamlessly extend your lumber length without sacrificing strength or appearance. Did you know that properly crafted scarf joints can be nearly as strong as the original wood? With just a little practice, you’ll save money and reduce waste while creating longer, more durable projects. So, give it a try—your woodworking skills will thank you, and your projects will stand the test of time.

WEN JN400D 400-Piece Fluted Dowel Pin Variety Bucket with 1/4, 5/16, and 3/8-inch Woodworking Dowels
Great for creating sturdy joints in woodworking projects, furniture repair, and more
As an affiliate, we earn on qualifying purchases.
As an affiliate, we earn on qualifying purchases.

All Sorts of Carpentry Joints – A Guide for the Amateur Carpenter on how to Construct and use Halved, Lapped, Notched, Housed, Edge, Angle, Dowelled, … Scarf, Mitre, Dovetail, Lap and Secret Joints by Anon. (2014-10-24)
As an affiliate, we earn on qualifying purchases.
As an affiliate, we earn on qualifying purchases.