To craft a wooden spoon as a beginner, start by selecting seasoned hardwood like maple or cherry, and sketch your design before carefully cutting and shaping it with basic hand tools. Carve the bowl and handle, smoothing your work with sandpaper and fine finishes like beeswax or mineral oil for food safety. Focus on safety and patience, as steady craftsmanship yields better results. If you keep exploring, you’ll uncover more tips to perfect your spoon-making skills.
Key Takeaways
- Select seasoned hardwood like maple or cherry with straight grain and minimal defects for durability and ease of carving.
- Sketch your spoon design, then cut and rough-shape the wood using saws and carving tools, leaving extra material for refinement.
- Carve the bowl from the center outward, maintaining 1/8 to 3/16-inch thickness for strength and food safety.
- Smooth and refine the surface with progressively finer sandpaper, then seal with food-safe oils like beeswax or mineral oil.
- Hand wash and store in a dry place, reapplying oil periodically to maintain the spoon’s condition and prevent cracking.

GreenForest Folding Desk with Wheels and Storage Shelf, 24.8 Inch Compact Portable Rolling Desk for Small Spaces, Mobile Foldable Computer Table, Easy Assembly, Pure White
Smooth Mobility and Locking Wheels: 6 swivel casters move effortlessly on any floor. Roll portable workstations from bedroom...
As an affiliate, we earn on qualifying purchases.
Essential Tools and Materials Needed
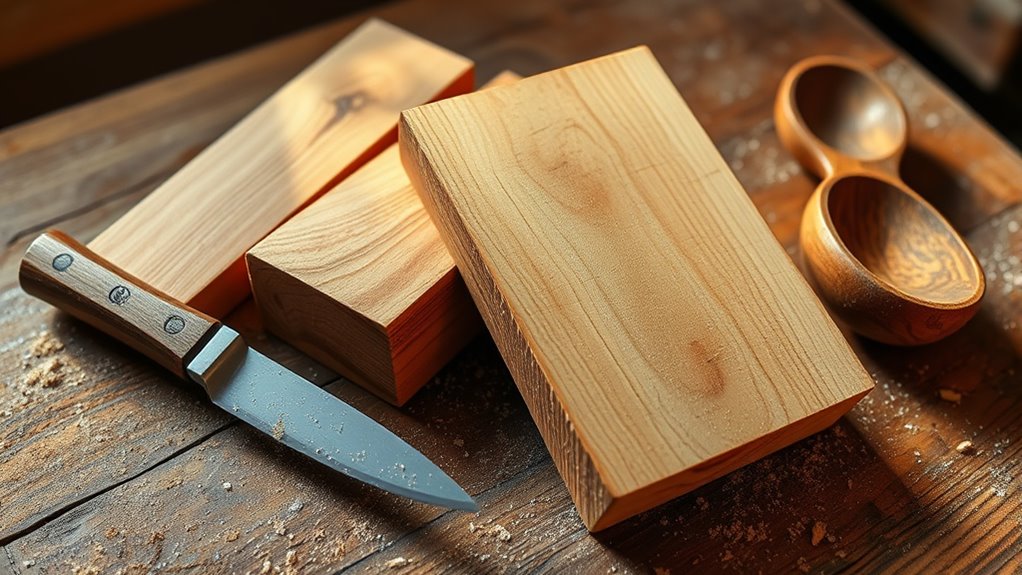
To successfully carve a wooden spoon, you’ll need a few essential tools and materials. A sharp carving knife is vital for shaping the overall form, while a gouge or scoop knife helps create the bowl’s smooth interior. For efficiency, optional power tools like a belt sander or Dremel can speed up the process. Use seasoned hardwood such as maple, cherry, or oak to guarantee durability and minimize cracking. Sandpaper, ranging from 80 to 400 grit, helps achieve a smooth finish. Safety gear like glasses and gloves protect against wood chips and dust. Additional supplies like a pencil for outlining, a small saw for cutting the blank, and food-safe finishes like beeswax or mineral oil round out the essentials. Proper tool maintenance ensures safety and precision during carving. Regularly inspecting and sharpening your tools will enhance carving accuracy and prevent accidents. Maintaining a clean workspace also helps prevent injuries and mishaps, ensuring a safer carving experience. Incorporating design thinking principles, such as iterative testing and user feedback, can further improve your carving techniques and final product. Using quality tools designed specifically for woodcarving can significantly impact the ease and outcome of your project. These tools and materials set the foundation for successful wood carving.

JYLH JOYSEEKER Foldable Mobile Standing Desk, 27 Inch Small Rolling Laptop Cart Height Adjustment, 90° Tiltable Bedside Table, No Assembly Needed Portable Computer Workstation, White
Foldable & Portable Desk:26.8''x15.7''x0.6'' beveled desktop, 0-90° Tiltable sofaside table, provide a comfortable working condition at home. Only...
As an affiliate, we earn on qualifying purchases.
Selecting and Preparing the Perfect Wood
Choosing the right wood makes all the difference in your carving project. Opt for seasoned hardwoods like maple, cherry, or oak to guarantee durability and minimize cracking. Properly season and prepare your wood to make carving smoother and your spoon more lasting. Additionally, selecting wood with a rustic farmhouse aesthetic can enhance the visual appeal of your finished piece. Being aware of allergy risks associated with certain woods can help prevent potential health issues during carving. It’s also helpful to consider digital literacy programs that can provide guidance on safe and effective woodworking techniques, especially for beginners. Ensuring you understand credit card security measures can also protect your purchases if you decide to buy supplies online.
Choosing Suitable Wood Types
Selecting the right wood is vital for a successful carving project, and your choice depends on your skill level and desired outcome. For durability, opt for seasoned hardwoods like maple, cherry, or oak. If you prefer easier carving, softer woods such as basswood or pine work well. Focus on wood with a straight grain and minimal knots or defects to prevent cracking and guarantee smooth carving. The moisture content is fundamental: dry wood (around 6-8%) is less likely to crack, while green wood is easier to carve but may warp or split as it dries. When sourcing wood, look for offcuts from local carpenters, driftwood, or firewood, and avoid older, cracked branches.
- Choose hardwood for durability or softwood for ease
- Prioritize straight grain and minimal knots
- Check moisture content for stability
Proper Wood Seasoning Techniques
Once you’ve picked the right type of wood for your project, preparing it properly guarantees your carving turns out well. Proper seasoning involves reducing the moisture content of the wood, turning green wood into seasoned wood with less than 20% moisture. While green wood is easier to carve initially, it’s prone to cracking during wood drying if not handled carefully. To prevent this, store your wood in a shady, well-ventilated area, and cap the ends with candlewax to slow moisture loss. You can test if your wood is adequately seasoned by checking if it feels cool and doesn’t stick when touched with lips. For best results, allow your carved wood to cure slowly in a shaded environment, wrapping it in plastic if necessary to control moisture loss. Monitoring the moisture content of your wood helps ensure it remains stable and less susceptible to cracking during the drying process. Additionally, paying attention to the type of wood used can influence how well it responds to seasoning and carving. Using proper wood selection techniques from the start can make your carving project much more successful and enjoyable. Regularly checking the wood’s dryness can help you determine the optimal time to start carving, ensuring a smoother experience. Moreover, understanding climate conditions can aid in achieving consistent seasoning results.
Vaunn Medical Pneumatic Adjustable Overbed Bedside Table with Wheels (Hospital and Home Use)
MULTIPURPOSE OVERBED TABLE - Helps disabled and handicapped individuals and anyone with physical limitations or injuries perform their...
As an affiliate, we earn on qualifying purchases.
Designing Your Spoon and Sketching the Outline
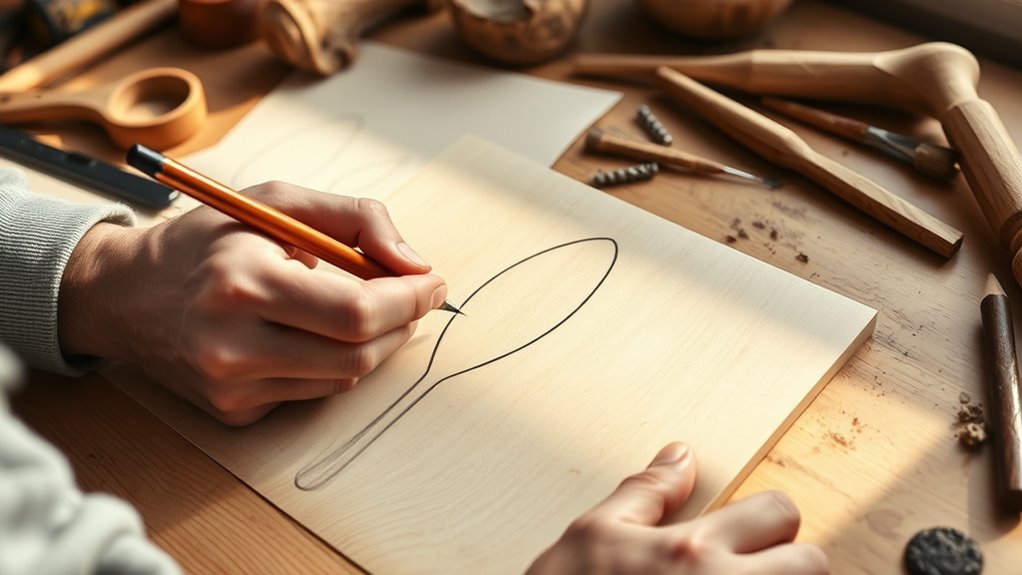
To start designing your spoon and sketching its outline, begin by visualizing both its function and aesthetic appeal. Think about the overall size—whether you want a large serving spoon or a small nibbling one—and incorporate these proportions into your sketch. Select a suitable piece of wood and use a pencil to draw the outline, considering the shape and curvature you desire. Focus on key measurements like the depth of the bowl and the handle’s width, marking them clearly to guide your carving. Experiment with various designs by sketching multiple options, ensuring your final choice suits both purpose and style. Remember, a well-planned outline sets a strong foundation for a beautifully crafted wooden spoon. Additionally, reviewing signs of spoilage in lemon juice can help you ensure your ingredients remain fresh and safe to use in your kitchen projects. Incorporating proper carving techniques and understanding work-life balance issues can greatly improve the quality and safety of your finished spoon. When selecting your wood, consider its grain structure to ensure a smooth carving process and a durable final product.

AMSXNOO Height Adjustable Standing Desk, No Assembly Folding Collapsible Computer Desk, Rolling Laptop Table for Workshop Home Office
【NO INSTALLATION REQUIRED】This standing computer desk does not require installation and can be easily deployed for use. It...
As an affiliate, we earn on qualifying purchases.
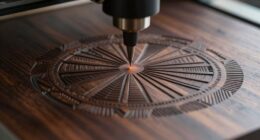
Cutting and Shaping the Spoon Blank
Begin by choosing a piece of seasoned or green hardwood like maple or cherry, and mark the spoon shape with a pencil. This creates your initial carving outline. Use a handsaw or bandsaw to carefully cut out the rough shape of the spoon blank, leaving extra material around the outline for flexibility during carving. Next, use an axe or carving knife to rough carve and round the ends, shaping the spoon head and wooden handle. For larger blocks, wedge a sharp axe into the wood to split it into manageable pieces, ensuring the split runs straight down the middle for even shaping. Once the rough shape is established, remove bark and irregularities with a small knife or chisel. This prepares your spoon blank for detailed carving and refinement. Incorporating proper techniques can also help prevent splitting or damaging the wood during shaping, especially when applying hands-on learning principles that foster skill development. Employing proper tool handling is crucial to achieve smooth, safe cuts and avoid accidents. Ensuring your carving techniques follow safety guidelines is essential for a safe and enjoyable woodworking experience.
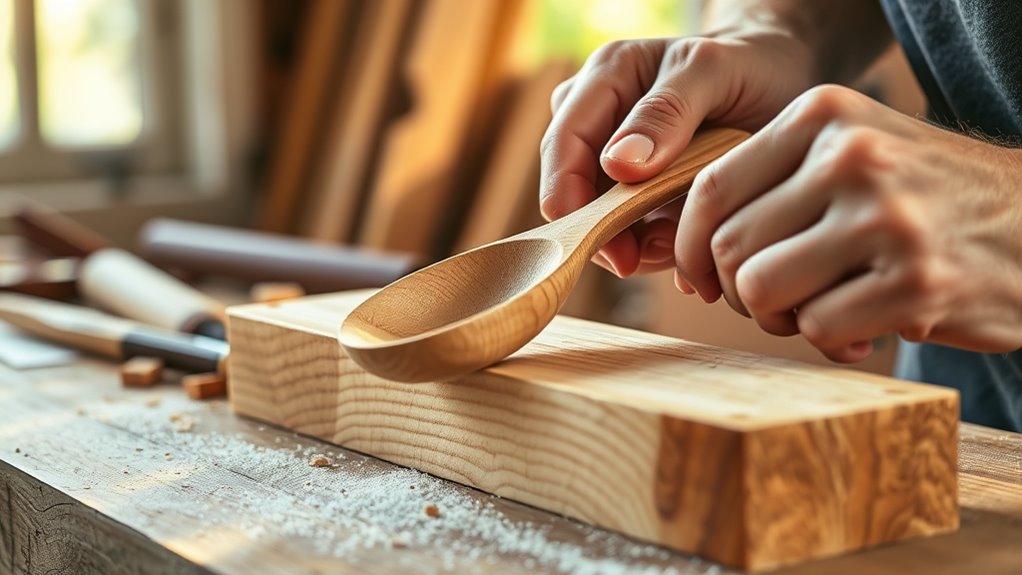
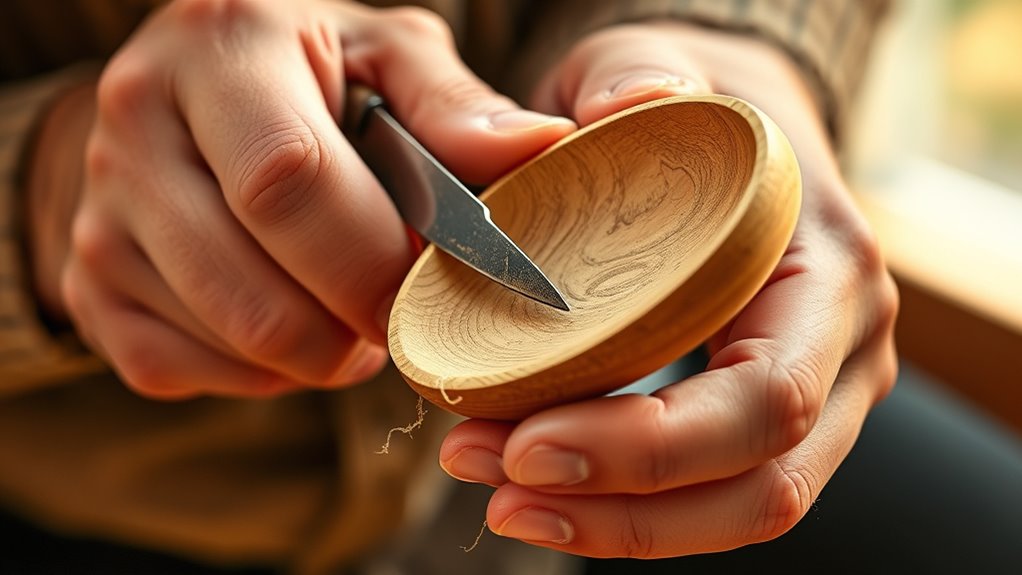
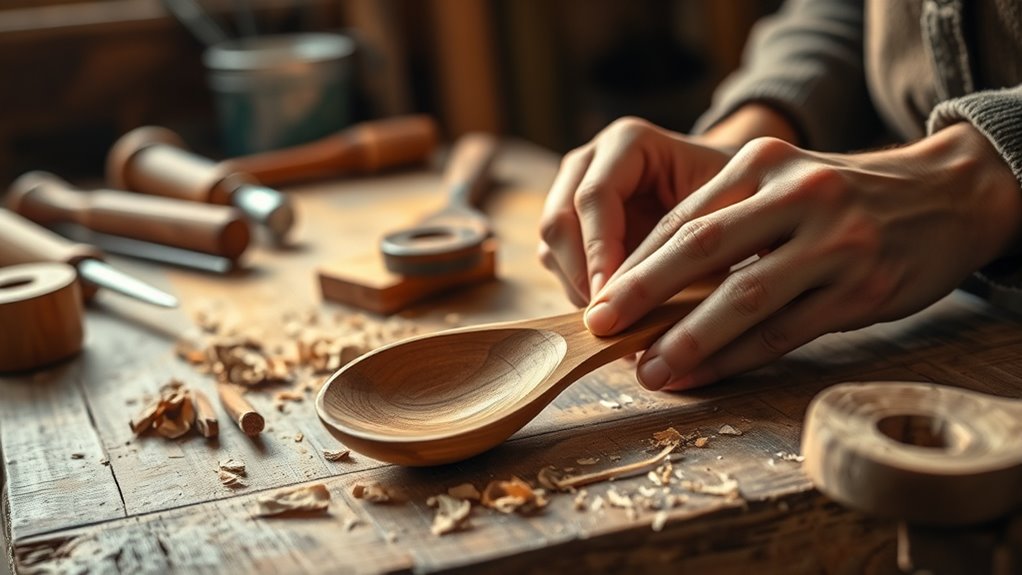
Carving the Bowl and Handle
Carving the bowl and handle transforms your rough blank into a functional, ergonomic spoon. Begin by shaping the carving bowl, using a gouge or carving knife to carve from the center outward, creating a smooth, uniform slope. Gradually deepen the bowl, checking thickness regularly to maintain about 3/16 to 1/8 inch for strength. For handle shaping, use a drawknife or band saw to define the profile, then refine with a spokeshave for comfort. To enhance your wooden spoon, incorporate precise tools for smooth curves and consistent thickness. Finish by smoothing all surfaces with sandpaper up to 220 grit, removing tool marks for a polished look. Proper carving ensures a durable, comfortable spoon ready for final finishing with food-safe oil. Additionally, paying attention to material selection is crucial for a sturdy and safe finished product.
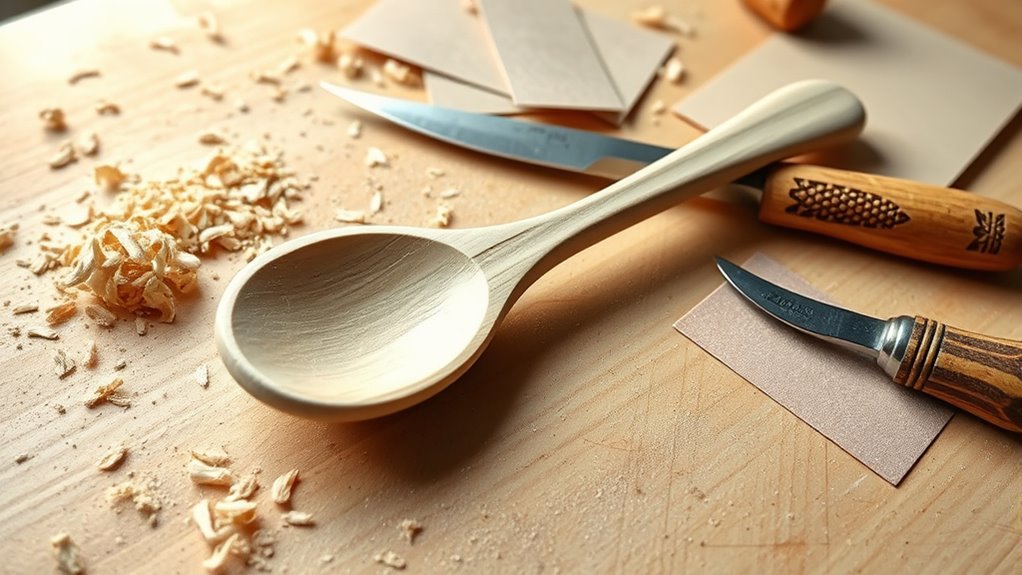
Smoothing and Refining the Surface
Start by using progressively finer grit sandpaper, beginning at 120 and ending at 220, to remove tool marks and smooth the surface. Use small drum attachments on rotary tools or Dremels to refine interior curves and hollows. Finish by carefully removing sharp edges with a card scraper or fine abrasive buffs, then wipe the spoon clean and apply a food-safe oil to seal and enhance the finish. Incorporating professional equipment can ensure a cleaner and more precise result.
Sanding Techniques and Grits
To achieve a smooth, professional finish on your wooden spoon, you’ll need to carefully progress through different grit levels of sandpaper. Start with 120 grit to remove tool marks and shape the surface. Move to 220 grit for finer sanding, followed by 400-600 grit to refine the surface further. This gradual increase in grit guarantees you achieve a polished, splinter-free surface suitable for food contact. Use consistent, gentle strokes along the grain to prevent scratches and maintain an even finish. For inside curves and hollows, utilize small rotary tools or buffing attachments to reach tight spots effectively. Always inspect your surface during each grit stage, making sure tool marks are gone before applying a finish or oil.
- Use consistent strokes along the grain to avoid scratches
- Progress through finer grits for a polished look
- Inspect regularly to ensure all tool marks are removed
Removing Carving Marks
After you’ve completed the initial sanding with 120-grit paper, it’s time to focus on removing the remaining carving marks and uneven surfaces. Use finer sandpaper, like 220-grit, to refine the surface and eliminate any visible carving marks. Hand sanding with this grit helps you achieve a smooth finish and prepares the spoon for the final touches. For tight corners and interior areas, a small drum sander or rotary tool with a fine abrasive attachment can be very effective. Additionally, a curved or straight card scraper can gently erase tool marks and blend passages between carved surfaces. Be thorough and consistent with hand sanding across all surfaces to assure your spoon feels smooth and comfortable to handle.
Achieving Smooth Finish
Achieving a smooth finish involves carefully refining the surface of your carved spoon to eliminate any remaining imperfections. Start with 120-grit sandpaper to remove coarse tool marks, then progress to finer grits like 220 or higher for a sleek, smooth surface. Use a light, consistent sanding motion, applying minimal pressure to avoid gouging or unevenness. Pay special attention to curved and intricate areas, using small pieces of sandpaper or specialized tools for detail work. Be thorough on all surfaces, including the inside of the bowl and handle edges, to prevent splinters. Once sanding is complete, wipe the spoon with a clean cloth, then apply a food-safe oil or finish to seal and enhance the surface. This ensures your spoon is both beautiful and safe for use.
Applying a Food-Safe Finish
Have you chosen a food-safe finish for your wooden spoon yet? To protect your creation and keep it safe for use, you need to apply a food-safe finish like beeswax, mineral oil, or pure tung oil. Generously apply the oil to all surfaces of the wooden spoon, including the handle and bowl. Then, wipe off any excess to prevent sticky residue. This finish forms a protective barrier that helps seal the wood and maintain its moisture. Allow the finish to fully absorb and dry—this can take several hours or overnight, depending on the product. Reapply periodically, especially after washing, to keep your spoon in top condition. Remember, avoid any finishes with synthetic chemicals or petroleum-based ingredients to ensure safety during culinary use.
Tips for Maintaining and Caring for Your Spoon
Proper maintenance guarantees your wooden spoon stays in great condition for years to come. To ensure excellent wood care, regularly apply food-safe oils like beeswax, mineral oil, or walnut oil to prevent drying and cracking. Hand wash your spoon with mild soap and water, avoiding soaking or dishwasher use, which can damage the wood’s integrity. Periodically inspect for cracks or splits; if you find any, consider repairing or retiring the spoon to maintain safety. Before oiling, lightly sand the surface with fine grit sandpaper to smooth it and boost durability. Proper storage in a dry, shaded area helps prevent moisture absorption. Consistent maintenance keeps your spoon functional, safe, and beautiful over time.
- Use food-safe oils regularly for excellent wood care
- Sand lightly before reapplying oils for durability
- Store in a dry, shaded spot to prevent moisture damage
Tips for Sharing and Connecting With Others
Connecting with other woodcarvers can greatly enrich your crafting experience. Joining a community, whether online or in person, opens doors to sharing your projects and receiving valuable feedback. Platforms like Instagram, especially accounts like @spoonoutside, let you showcase your spoon carvings and see others’ work, inspiring your own. Engaging in social media posts about your process helps build a connection with fellow hobbyists and experts alike. Sending handwritten notes or small tokens to community members fosters personal bonds and appreciation. Participating in group carving events or challenges encourages shared learning and camaraderie across all ages. These interactions deepen your skills, motivation, and understanding of the craft’s social and cultural significance.
Frequently Asked Questions
How to Make Wooden Spoons for Beginners Step by Step?
To make wooden spoons as a beginner, start by choosing a straight, seasoned hardwood like maple or cherry. Sketch your spoon shape, then cut out the rough form with a saw or hatchet. Use carving knives and gouges to hollow and refine the bowl, shaping the handle comfortably. Sand the entire spoon smoothly, then finish with food-safe oil. Let it dry and cure before using, ensuring it’s safe for cooking.
What Is the Best Wood to Carve a Wooden Spoon With?
Think of choosing wood like selecting a sturdy friend for a journey. For carving a wooden spoon, hardwoods like maple, cherry, and walnut are your reliable companions—they’re durable and have a fine grain, making your carving smoother. Softwoods like basswood and pine are easier to work with, perfect for beginners, but they wear out faster. Always pick seasoned, dry wood for the best results and safety.
Is Green or Dry Wood Better for Spoon Carving?
When choosing between green and dry wood for spoon carving, you should consider their properties. Green wood is softer and easier to carve, making it ideal for initial shaping, but it can crack as it dries. Dry wood is more stable and less prone to splitting, perfect for finishing your spoon. For best results, start with green wood and switch to dry wood for the final, durable piece.
What Size Gouge Is Best for Spoon Carving?
Choosing the right gouge for spoon carving is like picking the perfect brush for painting. For beginners, a 12mm (1/2 inch) sweep gouge is ideal because it balances control and material removal. It’s versatile enough for shaping the bowl and handle. Opt for a gouge with a gentle curve to create smooth, flowing lines. Avoid larger gouges, which are too broad for detailed work, and smaller ones for rough shaping.
Conclusion
Just like a craftsman shapes raw material into art, you’ve transformed wood into a beautiful, functional spoon. With patience and practice, each carve echoes the timeless dance of creation, connecting you to ancient traditions. Keep honing your skills, sharing your passion, and savoring the joy of handmade craft. Remember, every spoon tells a story—yours is just beginning. Embrace the journey, and let your handiwork speak of patience, skill, and tradition.