
To make a beginner-friendly wooden picture frame, start by choosing your wood and planning your frame’s size. Use a saw and miter box to cut four pieces at 45-degree angles, then verify the angles with a square. Apply wood glue to the corners, clamp them tightly, and reinforce with nails or screws. Smooth the surface with sandpaper, then finish with stain or paint. For a polished look and more helpful tips, keep exploring this project.
Key Takeaways
- Measure and cut wood pieces at 45-degree angles using a miter box or saw for precise corners.
- Apply wood glue to mitered edges, clamp securely, and reinforce joints with nails or screws.
- Sand the assembled frame thoroughly, starting with coarse grit then fine for a smooth surface.
- Insert your photo, secure with backing or clips, and add glass or acrylic for protection.
- Finish by staining or painting the frame to customize and enhance its appearance.
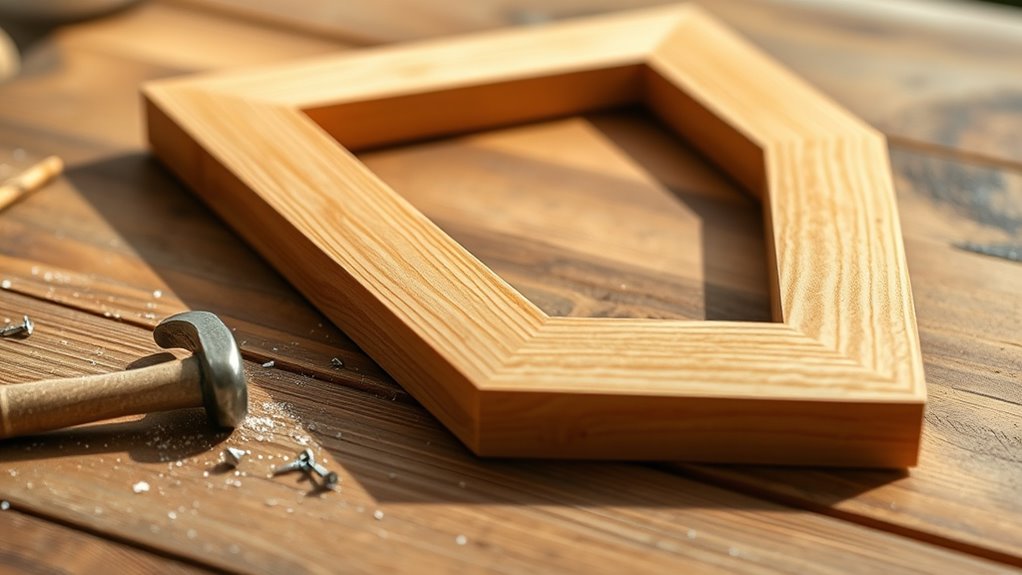
Creating your own wooden picture frame is a rewarding project that allows you to customize your decor and showcase your favorite photos. When starting out, gather the essential woodworking tools you’ll need, such as a saw, clamps, a square, sandpaper, and a drill. Having the right tools makes the process smoother and helps you achieve clean, precise cuts. Before you begin cutting, decide on the frame size and style. Using a miter box or a miter saw, you can cut the corners at a 45-degree angle to create a professional-looking frame. This is where framing techniques come into play—accurately aligning the corners is vital for a polished finish. Take your time to measure carefully and double-check your angles before making cuts.
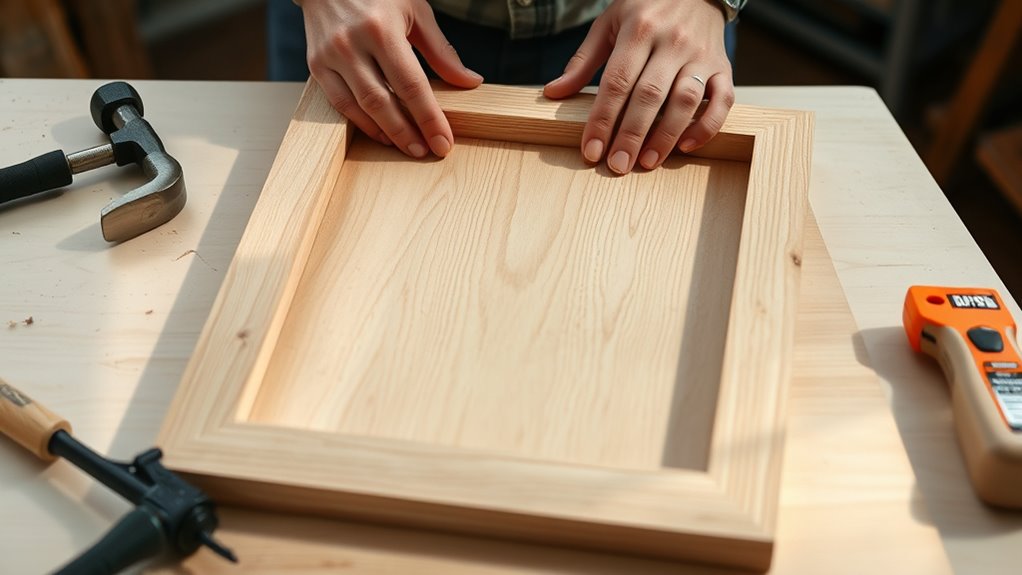
Once your pieces are cut, use a square to ensure the edges are perfectly aligned. Applying framing techniques like dry fitting the pieces together first allows you to see how the joints come together and make adjustments if needed. When you’re satisfied with the fit, apply wood glue to the mitered edges and clamp the pieces tightly to secure the joints. Clamping helps guarantee the glue bonds well and prevents gaps or misalignments. For added stability, you can also nail or screw the corners, but always drill pilot holes first to avoid splitting the wood. Additionally, understanding space management can help you plan your workspace efficiently for better workflow during your project.
After the glue has dried, sand the frame thoroughly to smooth out any rough edges or uneven surfaces. Start with coarse-grit sandpaper, then switch to finer grits for a polished finish. Sanding not only improves appearance but also prepares the surface for painting or staining. If you want to add a personal touch, consider staining or painting your frame after sanding. This step allows you to match your decor or create a contrasting look that highlights your photo.
Finally, insert your photo into the frame, securing it with backing material or clips. You can also add a glass or acrylic sheet for protection. Mount the frame on your wall or place it on a shelf to display your favorite memories. Making your own wooden picture frame might require some patience, but following these woodworking tools and framing techniques guarantees a professional result. Plus, you’ll have a custom piece that’s meaningful and uniquely yours.
Frequently Asked Questions
What Tools Are Essential for Making a Wooden Picture Frame?
To make a wooden picture frame, you’ll need essential tools like a saw, measuring tape, and a miter box to guarantee precise cuts. Use proper measuring techniques to get accurate dimensions, and always prioritize woodworking safety by wearing goggles and gloves. A square helps with perfect corners, while clamps keep pieces steady. These tools and safety measures make your project easier and safer, resulting in a beautiful finished frame.
Can I Customize the Size of My Wooden Frame Easily?
Imagine you’re a craft wizard in a modern fairy tale—yes, you can customize your wooden frame size easily. With DIY sizing tips like measuring precisely and adjusting your cuts, you’ll craft a perfect fit every time. Frame size customization is simple when you start with the right tools and measurements. So, go ahead, modify dimensions to match your photo or artwork, and create a truly personalized masterpiece.
What Type of Wood Is Best for Beginners?
You should choose pine or basswood as they’re ideal for beginners. These woods have attractive yet simple wood grain patterns, making them easier to work with. To enhance durability, consider basic wood treatment methods like sanding and sealing. Pine and basswood are soft, so they’re forgiving if you make mistakes, and their light color helps you see your work clearly, ensuring a smooth, professional-looking finished frame.
How Do I Finish or Paint My Wooden Frame?
Think of your wooden frame as a blank canvas awaiting its story’s final chapter. To finish or paint it, choose simple painting techniques like brush strokes or sponging for texture. Apply a primer first, then add your colors with even coats. Once dry, add finishing touches such as sealants or varnishes to protect your work. These steps bring your creative vision to life, giving your frame a polished and personalized look.
Are There Eco-Friendly or Recycled Wood Options Available?
Yes, you can find eco-friendly or recycled wood options for your project. Look for sustainable materials like reclaimed wood, which is repurposed from old furniture or pallets, reducing waste. Many suppliers offer recycled wood options, ensuring your frame is environmentally friendly. By choosing these options, you support sustainability and add a unique, rustic charm to your picture frame. Always verify the supplier’s eco-credentials to make sure you’re making a green choice.
Conclusion
Now that you’ve mastered the art of making a wooden picture frame, who needs fancy gallery pieces? With a little sweat (and maybe some splinters), you’ve created a masterpiece that’s truly one-of-a-kind—just like you. So go ahead, proudly hang your DIY glory and pretend you’re the next big interior designer. Remember, nothing says “professional” like a homemade frame with a dash of personality—and a lot of questionable craftsmanship. Cheers to your crafty greatness!