To make your tabletop pop with epoxy inlay techniques, use bold, contrasting colors and layer them carefully to add depth. Choose precise tools like fine syringes and spatulas for clean lines and sharp details. Test your colors on scrap beforehand to guarantee they’ll look great once cured. Experiment with layering and contrast to create eye-catching effects that highlight your design. Keep practicing different techniques, and you’ll open even more impressive finishes. If you keep exploring, your skills will truly stand out.
Key Takeaways
- Use bold, contrasting epoxy colors to highlight inlay details and create visual depth.
- Test color combinations on scrap wood to achieve vibrant, eye-catching effects.
- Incorporate transparent resins to showcase natural wood grains alongside colorful inlays.
- Employ fine-tipped tools for precise, clean lines that enhance the design’s pop.
- Layer multiple colors with proper curing to add dimension and dynamic visual interest.
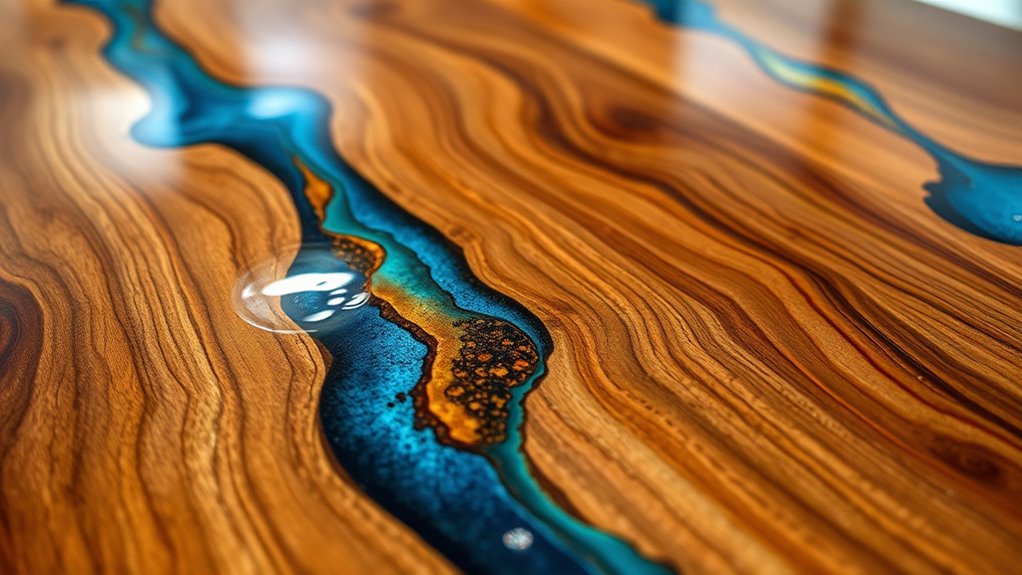
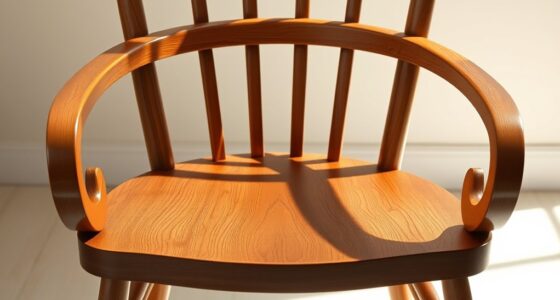
Epoxy inlay techniques offer a versatile way to enhance woodworking projects by adding decorative elements or restoring damaged surfaces. When you’re exploring ways to make your table tops stand out, understanding resin color options is vital. The right colors can transform a plain surface into a stunning centerpiece, whether you prefer bold, vibrant hues or subtle, translucent shades. You can choose from a wide spectrum of pigments, dyes, or pre-mixed tinted epoxies to match your design vision. Combining contrasting or complementary colors can create eye-catching effects, while transparent resins allow natural wood grains to shine through. The key is to select colors that enhance your overall aesthetic and fit the style you’re after.
Equally important is inlay tool selection. The tools you choose directly impact the precision and quality of your design. Small detail work calls for fine-tipped syringes, toothpicks, or micro brushes, which give you control over intricate patterns. For larger fills or broad areas, you might opt for spatulas or palette knives that help spread the resin smoothly. Using the right tools minimizes mess and guarantees your inlay sits perfectly flush with the surface. If you’re working with multiple colors, having separate tools for each prevents unwanted mixing and keeps your colors clean and vibrant. Proper tool selection also speeds up your workflow and reduces frustration, especially when working on detailed designs or geometric patterns.
When applying epoxy inlay, preparation is vital. You want to have your colors mixed and ready beforehand, so you can work efficiently without interruption. Always test your resin colors on scrap wood to see how they look once cured—colors can shift slightly as the resin hardens. This step helps you avoid surprises and guarantees your final piece matches your vision. As you work, take your time to layer your colors if necessary, allowing each layer to cure properly before adding more. This approach prevents smudging or bleeding of colors, giving your inlay crisp, clean lines. Additionally, understanding contrast ratio can help you select resin shades that enhance visual depth and clarity in your design.
Finally, patience and practice are your best friends with epoxy inlay techniques. Experiment with different resin color options and tools on scrap projects before committing to your main piece. This way, you’ll gain confidence in handling the resin and learn how colors behave once cured. With the right combination of resin colors and inlay tools, you can create stunning, custom inlays that make your table tops truly pop, elevating your woodworking craftsmanship to a whole new level.

Metabo HPT 10-Inch Single Bevel Compound Miter Saw, 15-Amp Power Saw with Xact Cut Shadow Line, Precision Miter Angles, Single Bevel 0-45°, 40T TCT Miter Saw Blade, Lightweight Design, C10FCG2
POWERFUL AND PRECISE: This 10-inch single bevel compound miter saw features a 15-Amp motor delivering high power for...
As an affiliate, we earn on qualifying purchases.
Frequently Asked Questions
How Long Does Epoxy Inlay Typically Last?
Epoxy inlay typically lasts for many years if you consider epoxy durability and proper inlay maintenance. The lifespan depends on factors like exposure to sunlight, temperature changes, and wear. When you take good care of your tabletop, avoid harsh chemicals, and keep it clean, your epoxy inlay can remain beautiful and intact for a decade or more. Regular maintenance helps ensure your inlay continues to look stunning over time.
Can Epoxy Inlay Be Removed or Repaired?
Think of epoxy inlay like a glass mirror embedded in wood—removable but delicate. You can repair minor scratches with sanding and touch-up, but removal techniques, like heating or chemical solvents, can help if you need to replace it. Just like fixing cracks in a windshield, careful methods guarantee you don’t damage your table. With patience and proper techniques, you can restore or update your epoxy inlay without much trouble.
What Types of Wood Are Best for Epoxy Inlay?
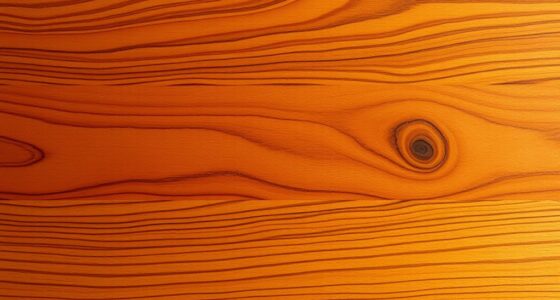
When choosing wood for epoxy inlay, you should focus on wood selection and grain patterns. Hardwoods like oak, walnut, and maple are excellent because they resist dents and absorb epoxy well. Look for wood with interesting grain patterns to add visual interest and depth. Avoid softwoods that might dent or warp over time. Properly preparing your wood guarantees a smooth, durable inlay that enhances your table’s aesthetic.
Is Epoxy Inlay Suitable for Outdoor Furniture?
In the blink of an eye, epoxy inlay has become a popular choice for outdoor furniture. You can absolutely use epoxy inlay outside, but make sure it offers high outdoor durability and UV resistance. These qualities prevent yellowing, cracking, and damage from weather. Choose a marine-grade or UV-resistant epoxy to guarantee your inlay stays vibrant and intact, enduring the elements like a true time traveler.
How Do I Prevent Air Bubbles During Epoxy Application?
To prevent bubble formation during epoxy application, you should focus on proper surface preparation and technique. Make sure the surface is clean and free of dust or moisture. Mix the epoxy slowly to reduce air entrapment, and pour it in a thin, steady stream. Use a heat gun or torch to gently burst any bubbles that appear on the surface. These steps help guarantee a smooth, bubble-free finish.

Mortising Machine, Tenon Tools Mortising Attachment for Drill Press and Woodworking Mortise, Bench Drill Locator Set for Mortiser Circles/Square Hole Chisel Drilling Machine Mortise Machine.
Mortising Attachment for Drill Press Set include:locator,press block,side positioning rod,fixed seat and other accessories,also comes with 4 kinds...
As an affiliate, we earn on qualifying purchases.
Conclusion
Now, picture your tabletop transformed into a shimmering canvas, where vibrant epoxy inlays weave through the wood like glowing veins of color. With these techniques, you can turn a simple surface into a stunning masterpiece that catches every eye. As the epoxy settles into its final glossy finish, you’ll see your vision come alive—bright, bold, and uniquely yours. Get ready to impress and enjoy the breathtaking beauty you’ve crafted right at your fingertips.
VEVOR Mortising Attachment for Drill Press, 4 Model Drills Square Hole Chisel Set, Bench Drill Locator Set Mortise and Tenon Tools with 5 Bushings, for Woodworking Mortising Tenoning Drilling Machine
Multiple Sizes Available: Our drill press mortising attachment kit comes with five bushings, each designed to accommodate different...
As an affiliate, we earn on qualifying purchases.

Benchtop Mortiser, 3400RPM 3/4HP Woodworking Mortising Machine with 1/4", 3/8", 1/2" Chisels Wooden Workbench, Benchtop Drill Press for Making Round Holes Square Holes Or Special Square Holes
【Solid Cast Iron Construction】- CXRCY Heavy Duty Mortising Machine is well built with premium cast iron, which makes...
As an affiliate, we earn on qualifying purchases.