To create a mosaic serving tray from mixed hardwood offcuts, start by selecting colorful, contrasting wood scraps and plan a pattern that highlights their grains. Cut the pieces precisely, then glue and press them onto a sturdy backing, shaping the mosaic to fit your design. Sand the surface for smoothness, and finish with a protective coat for durability. If you continue exploring, you’ll discover detailed tips for perfecting your project and achieving a professional look.
Key Takeaways
- Select and prepare diverse hardwood scraps with contrasting colors, grains, and textures for visual interest.
- Plan your mosaic design on a flat surface, arranging pieces to highlight natural wood features.
- Cut offcuts precisely using a fine-toothed saw, then glue and press pieces onto a sturdy plywood backing.
- Sand the entire tray smoothly to eliminate rough edges and enhance the mosaic’s visual appeal.
- Apply a food-safe protective finish, like oil or polyurethane, to ensure durability and water resistance.

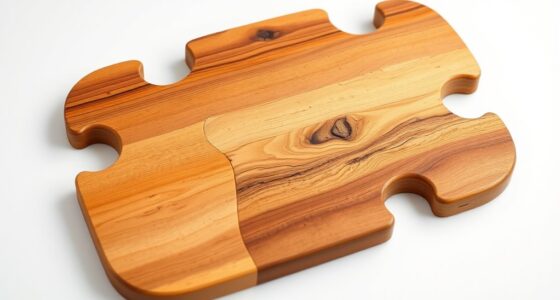
Transforming leftover hardwood offcuts into a beautiful mosaic serving tray is a rewarding project that combines creativity with sustainability. When you decide to craft your tray, the first step is focusing on a vibrant, colorful design that truly stands out. The key to achieving this lies in careful material selection. You want to gather a variety of hardwood scraps—think maple, cherry, walnut, or oak—that differ in color, grain, and texture. These differences will give your mosaic visual interest and depth, making each piece unique. Select offcuts that are sturdy enough for handling and cutting, guaranteeing they won’t splinter or break easily during your work. The more diverse your collection, the more dynamic your finished piece will appear.
Create a vibrant mosaic by selecting diverse, sturdy hardwood scraps like maple, cherry, walnut, or oak.
Once you’ve chosen your materials, you can start planning your design. Consider a pattern that highlights the natural colors and grains of each wood type. A geometric layout, like a starburst or herringbone, can really showcase the colorful design, or you might opt for a more freeform, organic arrangement for a softer look. Laying out your offcuts on a flat surface before gluing helps you visualize the final product and make adjustments. Take your time in this phase; the arrangement is what will make your mosaic truly eye-catching.
Next, you’ll want to cut your offcuts into manageable pieces if necessary, using a fine-toothed saw or a specialized cutting tool. Precision here guarantees your pieces fit tightly together, which is crucial for a clean, professional finish. When you’re satisfied with your layout, apply a strong adhesive designed for wood to each piece and press them into a prepared backing or base. A sturdy, water-resistant plywood works well since it can withstand daily use. As you assemble, pay attention to the gaps between pieces—aim for minimal spacing to keep the mosaic cohesive.
After the adhesive sets, you’ll need to sand the entire tray gently but thoroughly. This step smooths out any rough edges and makes the surface even, enhancing the colorful design’s visual appeal. Once sanded, you can apply a protective finish, like a food-safe oil or polyurethane, to enhance the wood’s natural hues and guarantee durability. This final layer also helps preserve the vibrant, colorful design you’ve created, making your mosaic serving tray not only beautiful but practical for everyday use.

6pcs Wooden Tray Fillable Mosaic Tray Wood Decorative Tray Art Tray Art Trays,Mosaic Supplies for DIY Plate Ornaments Mosaic Crystal Making Crafts
Versatile DIY Mosaic Tray: This 6.88 x 3.46 x 0.39 inch mosaic fillable tray is ideal for crafting…
As an affiliate, we earn on qualifying purchases.
As an affiliate, we earn on qualifying purchases.
Frequently Asked Questions
What Types of Hardwood Offcuts Are Best for Mosaics?
When choosing hardwood offcuts for mosaics, focus on those with interesting hardwood grain patterns and vibrant color variation. Exotic woods like zebrawood or rosewood add striking contrast, while oak or maple offer consistent grain and tones. Select pieces that are small, easy to cut, and free of defects. These qualities guarantee your mosaic will be visually appealing and durable, making your project stand out with rich textures and lively hues.
How Do I Prevent the Tiles From Cracking Over Time?
Think of your mosaic as a delicate dance, where each tile must stay in step over time. To prevent cracking, you should seal the grout thoroughly, creating a protective barrier against moisture and dirt. Be mindful of temperature fluctuations, which can cause expansion and contraction. By sealing the grout and avoiding sudden temperature changes, you help your mosaic stay vibrant and intact, preserving its beauty through years of use.
Can I Customize the Tray’S Size and Shape Easily?
You can easily customize the tray’s size and shape using various shaping techniques like cutting, sanding, or routing. For more options, explore different materials or add handles. Many projects offer customization options to fit your needs, whether you want a smaller, rounded, or uniquely shaped tray. Just make certain you use appropriate tools and techniques, and you’ll have a personalized tray that matches your style and space perfectly.
What Safety Precautions Should I Take During Construction?
You should prioritize workspace safety by wearing personal protective equipment like safety glasses, gloves, and a dust mask to protect against splinters, dust, and debris. Make certain your workspace is well-ventilated and free of clutter to prevent accidents. Use sharp tools carefully, keeping blades covered when not in use. Always follow safety instructions for power tools, and take breaks to stay alert, minimizing risks during your project.
How Do I Clean and Maintain the Finished Mosaic Tray?
Think of your mosaic tray like fine art; it needs gentle care. To clean it, use soft, damp cloths and mild cleaning techniques—avoid harsh chemicals that can damage the finish. Regular maintenance tips include wiping after use and avoiding prolonged exposure to water or direct sunlight. Keep your tray looking vibrant and beautiful by caring for it thoughtfully, just like a treasured masterpiece.
6pcs Wooden Tray Fillable Mosaic Tray Wood Decorative Tray Art Tray Art Trays,Mosaic Supplies for DIY Plate Ornaments Mosaic Crystal Making Crafts
Versatile DIY Mosaic Tray: This 6.88 x 3.46 x 0.39 inch mosaic fillable tray is ideal for crafting…
As an affiliate, we earn on qualifying purchases.
As an affiliate, we earn on qualifying purchases.
Conclusion
As you finish your mosaic serving tray, you’ve crafted a miniature symphony of wood, each piece playing its part in harmony. This project transforms scattered offcuts into a functional piece of art, turning chaos into coherence. Just like a masterful mosaic, your tray reflects patience and creativity, making it a true centerpiece. Now, every time you serve, you’re presenting a story woven from the rich, diverse textures of your hard-earned craftsmanship.

Tried & True Original Wood Finish, 8 oz. – Linseed Oil & Beeswax Blend, Ideal for All Woodwork, Long-Lasting Durability, Food Safe Sealer, Non-Toxic Wood Finish
SUPERIOR BLEND OF LINSEED OIL & BEESWAX: Tried and True wood finish is a superior blend of linseed…
As an affiliate, we earn on qualifying purchases.
As an affiliate, we earn on qualifying purchases.

THE HARDWOOD EDGE Cherry Craft Boards 1/4 x 6 1/2 x 15 inch (8 Pack) Solid Hardwood Laser Ready
Craft Wood — Thin-sawn, 100% pure hardwood planks designed for crafts; Natural wood blanks for laser cutting &…
As an affiliate, we earn on qualifying purchases.
As an affiliate, we earn on qualifying purchases.