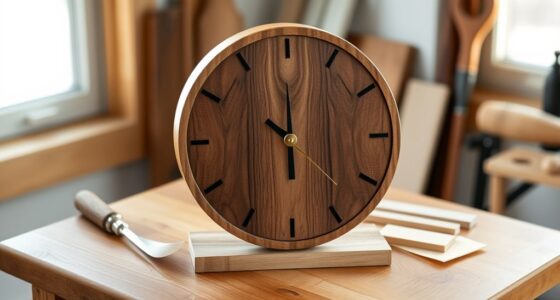

You can craft a Japanese Kumiko panel using simple hand tools like craft knives, small saws, and rulers, with no need for specialized equipment. Start by selecting lightweight woods such as basswood or bamboo, then carefully measure and cut precise pieces. Use scoring and snapping techniques for joints, and assemble the pieces through tight interlocking joinery, focusing on symmetry and pattern. If you continue exploring, you’ll discover how traditional techniques blend with modern ease to create stunning Kumiko panels.
Key Takeaways
- Use thin, lightweight woods like basswood or bamboo and simple tools such as craft knives or small hand saws.
- Measure and mark pieces precisely with rulers or tapes for accurate fitting and consistent pattern creation.
- Cut notches or slots carefully with scoring techniques, then gently snap or carve to interlock pieces securely.
- Focus on symmetrical geometric patterns, ensuring tight joints without glue by fitting pieces snugly together.
- Practice patience and attention to detail, blending traditional Kumiko principles with accessible, everyday tools for beautiful results.
Have you ever wondered how traditional Japanese craftsmanship transforms simple wooden pieces into intricate works of art? When it comes to creating a Japanese Kumiko panel, understanding the balance between tradition and innovation is key. Traditionally, Kumiko involves precise joinery and fine craftsmanship, relying on traditional techniques passed down through generations. These methods emphasize meticulous craftsmanship, where each piece fits perfectly without the need for nails or glue. However, you don’t need specialized tools or advanced woodworking skills to craft your own Kumiko panel. Modern adaptations have made this art form more accessible, allowing you to enjoy the beauty of Kumiko without the complexity.
Traditional Japanese Kumiko craftsmanship combines precise joinery with modern accessibility.
To start, gather your materials—thin, lightweight wood strips such as bamboo or basswood work best. You’ll want to cut these into uniform lengths, but you don’t need a fancy saw. A simple craft knife or small hand saw will do just fine. The key to a successful Kumiko panel is precise measurement and clean cuts. Use a ruler or a measuring tape to mark your pieces carefully, ensuring they fit together snugly. You don’t need to be a master carpenter; patience and attention to detail will serve you well.
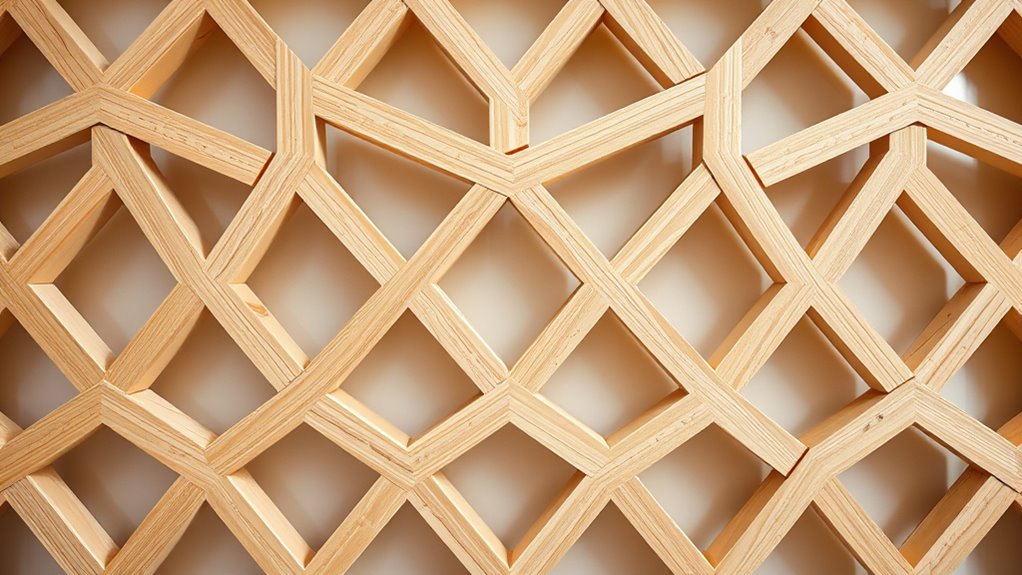
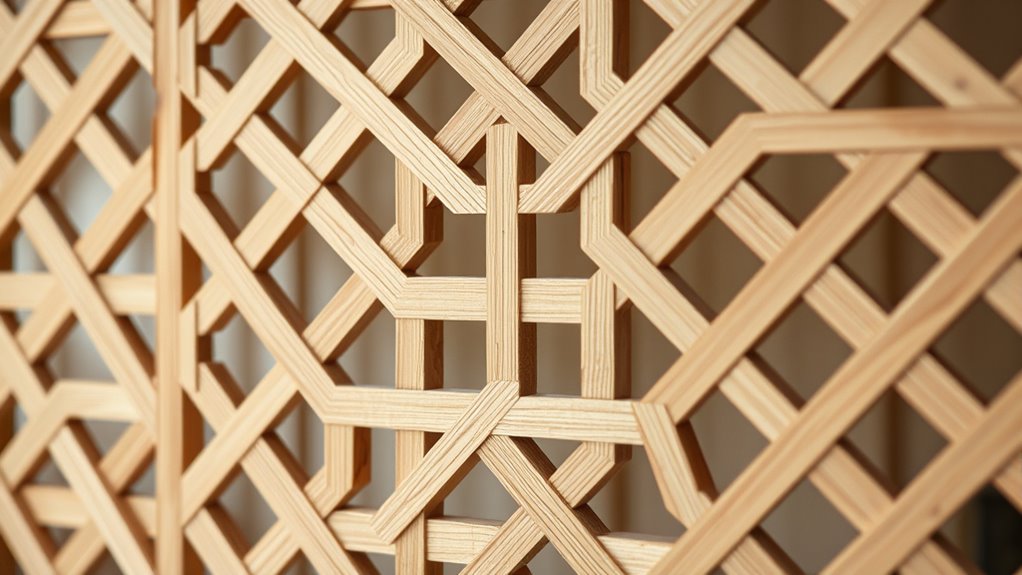
Next, familiarize yourself with the traditional techniques of joinery, but adapt them to your tools and skill level. Instead of complex joints, focus on creating tight, interlocking patterns like the classic geometric lattice. You can achieve this by carefully cutting notches or slots where the pieces will intersect. Many modern tutorials suggest using a craft knife to score and gently snap the wood, creating precise joints without specialized tools. This approach simplifies the process while maintaining the integrity of the traditional design. Incorporating resilience in your craftsmanship will help you overcome any challenges during the process.
As you assemble your Kumiko panel, pay close attention to the pattern. The beauty of Kumiko lies in its intricate, repeating geometric motifs—especially the hexagon or square grids. Remember, the traditional techniques prioritize neatness and symmetry, but modern adaptations encourage flexibility. Feel free to experiment with different patterns and wood types to suit your aesthetic preferences. Use thin, strong glue sparingly at the joints if needed, but often the interlocking fit is enough to hold everything together securely.
Creating a Kumiko panel without specialized tools is a rewarding craft that connects you to centuries-old traditions while embracing contemporary simplicity. By blending traditional techniques with modern adaptations, you can produce a beautiful, intricate piece that showcases Japanese craftsmanship’s elegance—all with accessible tools and a bit of patience. This approach makes the art form more approachable and allows you to enjoy the timeless beauty of Kumiko in your own space.

HQMaster CNC Router Bits 1/8" Shank CNC Bit End Mill Flat Nose Carbide Endmill Two Flute Spiral Upcut Milling Cutter Tool Set for Wood PVC MDF Hardwood 10Pcs (1/8"CED x 1/8"SD x 11/16"CEL x 1-1/2"OAL)
RANGE OF PROCESSING: For carving/cutting/engraving/milling/slotting/sculpturing in materials like MDF, ABS, PVC, acrylic, nylon, resin, plastics, density board, wood,...
As an affiliate, we earn on qualifying purchases.
Frequently Asked Questions
Can I Create Kumiko Panels Using Only Common Household Items?
Yes, you can create kumiko panels using only common household items, making it a great DIY home decor project. Focus on repurposing sustainable materials like scrap wood or cardboard for the lattice framework. Use basic tools like scissors, knives, or even glue to cut and assemble your pieces. This approach lets you enjoy crafting a beautiful, eco-friendly kumiko panel without needing specialized tools, perfect for a creative, budget-friendly project.
What Are the Best Types of Wood for Beginner Kumiko Projects?
Picking the right wood for your beginner kumiko projects is like choosing a trusty sidekick—durable and easy to work with. Softwoods like cypress, pine, or cedar are ideal because they’re lightweight and forgiving, making your beginner techniques smoother. These woods are less likely to crack or splinter, helping you build confidence. Start with these options to master the basics before trying more complex woods down the line.
How Long Does It Typically Take to Complete a Kumiko Panel?
The assembly time for a kumiko panel varies based on your skill level, but it generally takes between a few hours to a couple of days. As a beginner, expect it to take longer as you learn and perfect your cuts and fitting. If you stay patient and steady, you’ll find the process becomes quicker over time. Remember, your skill level directly influences how long it takes to complete your kumiko panel.
Are There Any Safety Precautions to Consider When Making Kumiko?
Did you know that proper safety precautions can reduce accidents by up to 50%? When making kumiko, always wear safety gear like goggles and gloves to protect your eyes and hands. Make sure good workspace ventilation to avoid inhaling dust and small particles. Keep your workspace tidy to prevent tripping hazards. By following these safety tips, you can enjoy crafting your kumiko panel safely and confidently.
Can Kumiko Panels Be Customized With Different Patterns or Designs?
You can definitely customize kumiko panels with different patterns or designs. The key is to explore various traditional and modern motifs, giving you ample design flexibility. With your woodworking skills, you can create unique patterns by adjusting the sizes and arrangements of the wooden pieces. This allows you to personalize your kumiko panels to match your style or interior decor, making each piece a distinctive work of art.

EANOSIC 5PCS CNC Wood Carving Router Bits Set, 1/4'' Shank, 15° Detail Carving Liner+ 20° Profile bit+30°+60°+ 90° V Groove Router Bit Set
Industrial-Grade CNC V Groove Bit Set: 1/4" shank; 2-1/2" total length; MAX R.P.M. 24000.
As an affiliate, we earn on qualifying purchases.
Conclusion
Creating a Japanese Kumiko panel without specialized tools shows that beauty isn’t confined to expensive equipment. Just as the intricate lattice reveals simplicity and patience, your effort transforms basic materials into art. Sometimes, the absence of tools pushes you to discover new techniques, emphasizing that craftsmanship lies within. In the end, it’s not the tools that define your work, but your dedication and creativity—proving that even the simplest materials can create something truly exquisite.

Eyryfui 6Pcs CNC Router Bits Set, 1/4" Shank Solid Carbide Multiple Uses Router Bit for Woodworking Detail Carving Trimming V Groove Engraving Slotting Mortise MDF Resin Lettering Sign Making
Versatile Set: This carbide CNC router bit set with 1/4 inch shanks is suitable for multiple woodworking tasks...
As an affiliate, we earn on qualifying purchases.

FoxAlien 20/30/45/60/90deg 0.1mm Triangular CNC Router Bits Set, 1/8" Shank Engraving Carving V-Bit with Nano Blue Coating Sharp Pyramid Bits for Acrylic Wood MDF Aluminum Lettering Sign Making
【Wide Applications】It is widely used to engrave and carve on hardwood, plywood, acrylic, plastic fiber, resin, PCB, aluminum...
As an affiliate, we earn on qualifying purchases.