To make a glowing LED river table on a budget, start by choosing affordable, waterproof LED strips with high density for even lighting. Prepare your workspace, then carefully pour resin in layers, adding decorative elements and curing each step properly. Use a heat gun to remove bubbles and position your LEDs for maximum glow. With patience and attention to detail, you can craft a stunning table that looks expensive. Continue exploring for more tips to perfect your project.
Key Takeaways
- Select affordable, waterproof LED strips with high density and color-changing features compatible with your power supply and controller.
- Prepare your workspace with protective coverings, and pour resin in thin layers, curing each before adding the next for a smooth river effect.
- Position LED strips carefully within the resin, ensuring even distribution and removing bubbles with a heat gun or torch during pouring.
- Incorporate decorative elements like stones or sand before the final resin pour to enhance visual appeal and depth.
- Maintain proper resin temperature and patience during curing to achieve clarity, a professional look, and a durable, glowing table.

Creating a glowing LED river table doesn’t have to break the bank. With some careful planning and a little DIY spirit, you can craft a stunning piece that illuminates your space without draining your wallet. The key is choosing the right LED strip and mastering resin pouring techniques that give your table a professional finish. When it comes to LED strip selection, look for flexible, color-changing LED strips that are compatible with your controller and power supply. You don’t need the most expensive options; many affordable LED strips offer bright, vivid colors and smooth dimming capabilities. Make sure you select a strip with a waterproof coating if you plan to have the LEDs embedded in resin, as this will protect the lights from moisture and ensure longevity. Also, opt for strips with a high density of LEDs per meter for a more uniform glow.
Once you’ve selected your LED strip, focus on the resin pouring techniques. Proper pouring is critical to achieving a clear, smooth river effect. Start by preparing your work area, covering surfaces with plastic or tarps to catch drips. Mix your resin in small batches, following the manufacturer’s instructions closely, and stir slowly to minimize bubbles. Before pouring, pour a thin layer of resin at the bottom of your mold and allow it to cure partially, creating a base that prevents your LED strips from sinking. Carefully lay your LED strip on this initial layer, making sure it’s positioned where you want the glow to be most prominent. Then, pour the main resin layer over the LEDs, working slowly and steadily. Use a heat gun or torch to gently remove any bubbles that rise to the surface.
Another technique is to pour the resin in stages, allowing each layer to cure before adding the next, which helps prevent cracks and ensures clarity. Keep the resin at the right temperature—generally around 70-75°F—to avoid cloudiness or uneven curing. If you want a more dynamic look, consider adding small decorative elements like stones or sand before pouring the final layer. Throughout the process, patience is your best friend; rushing can cause imperfections that are hard to fix later. Additionally, understanding space and organization can help you set up your workspace efficiently, minimizing clutter and making the project more manageable. With attention to detail in your LED strip selection and resin pouring techniques, you’ll end up with a mesmerizing glowing river table that looks much more expensive than it actually cost. It’s all about combining affordable materials with skillful craftsmanship to create an eye-catching centerpiece on a budget.
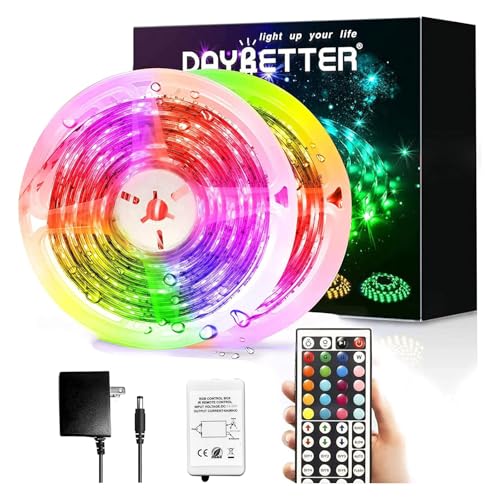
DAYBETTER Led Strip Lights Waterproof, 32.8ft(2 Rolls of 16.4ft) Led Tape Lights Color Changing 300 LEDs Light Strips Kit with 44 Keys Ir Remote Controller and 12v Power Supply for Indoor Outdoor Use
Using resin as a material makes the light strip waterproof, not only for indoor use, but also outdoor…
As an affiliate, we earn on qualifying purchases.
As an affiliate, we earn on qualifying purchases.
Frequently Asked Questions
Can I Customize the LED Colors for Different Moods?
Yes, you can definitely customize the LED colors for different moods. Many LED lighting options offer a wide range of LED color options, allowing you to set the perfect mood lighting customization. With remote controls or smartphone apps, you can easily switch between colors, adjust brightness, and create dynamic lighting effects. This flexibility makes it simple to tailor your LED river table’s ambiance for any occasion or vibe you want to achieve.
What Is the Best Type of Wood for Durability?
When choosing wood for your project, focus on durability and suitable wood selection. Hardwoods like oak, maple, or walnut are excellent choices because they resist dents and scratches better than softwoods. To guarantee finish durability, sand the surface thoroughly and apply multiple coats of a high-quality sealant or epoxy. This combination not only enhances the wood’s natural beauty but also prolongs the lifespan of your glowing LED river table.
How Long Does the LED Lighting Last Before Replacement?
The LED lifespan typically ranges from 25,000 to 50,000 hours, depending on the quality. Battery life varies based on the type of batteries used and how often you turn on the LEDs, usually lasting several hours per charge. You should expect to replace or recharge the batteries regularly, especially if you use the LED lighting frequently. Proper maintenance can extend the overall lifespan of your LED lighting.
Is It Safe to Use Waterproof LEDS Indoors?
Imagine the thrill of illuminating your space with waterproof LEDs, but is it safe for indoor lighting? You might wonder about LED waterproofing and indoor lighting safety. Rest assured, high-quality waterproof LEDs are designed for indoor use, with sealed casings that prevent moisture intrusion. Just guarantee you choose LEDs labeled for indoor applications, and follow manufacturer instructions. When done right, your glowing river table becomes both stunning and safe, enthralling everyone’s attention.
What Tools Are Essential for Assembling the Table?
You’ll need essential tools like power tools—such as a drill, saw, and sander—to cut and assemble your table. Woodworking jigs are vital for ensuring precise cuts and joints, making your project safer and more accurate. Don’t forget safety gear like goggles and gloves. These tools help you achieve a professional look and sturdy construction, all while making the assembly process smoother and more enjoyable.

BEAMNOVA Reusable Epoxy Resin Mold Kit, 24 * 12 * 3 Inches, with 2 Dividers for Multiple Sizes, River Table, Wood Board Craft, Art Making Crafting Frame
**Superior to Silicone Molds:** Unlike traditional silicone molds that can tear and deform, BEAMNOVA Epoxy Resin Mold is…
As an affiliate, we earn on qualifying purchases.
As an affiliate, we earn on qualifying purchases.
Conclusion
Now that you know how to craft your glowing LED river table on a budget, imagine the stunning centerpiece you’ll create—an ocean of light and wood in your own home. With a little creativity and effort, you can turn ordinary materials into a breathtaking masterpiece. Don’t let cost hold you back; this project proves that with determination, you can make magic happen. So, immerse yourself and let your DIY spirit shine brighter than ever before!

SUPERNIGHT 24 Keys RGB LED Strip Light Wireless Dimmer Remote Controller Led Light Remote Replacement for SMD 5050 3528 2835 Led Strip Lights
【Prefect Replacement Remote】Compatible with all 5050 2835 3528 RGB light strip (Other models don't match), no matter what…
As an affiliate, we earn on qualifying purchases.
As an affiliate, we earn on qualifying purchases.

Silicone Measuring Cups for Resin Supplies – Kit with 600ml & 100ml Mixing Cups and Tools for Molds, Epoxy, Cooking, Casting Moulds, Jewelry Making
【Silicone Measuring Cup】: Silicone cups for resin set include 600ml silicone cups*1, 100ml resin cups*5, 10ml resin mixing…
As an affiliate, we earn on qualifying purchases.
As an affiliate, we earn on qualifying purchases.