To stain your cabinets darker for a modern look, start by thoroughly prepping the surfaces—sanding lightly and cleaning to guarantee good adhesion. Choose a high-quality, dark stain like espresso or dark walnut, applying multiple thin coats with a brush or cloth, working along the grain. Between coats, lightly sand for smoothness. Finish with a clear sealant to protect and deepen the color. Keep these techniques in mind for a sleek transformation—more tips will help you achieve a flawless result.
Key Takeaways
- Properly sand and clean cabinets to ensure smooth, even stain absorption for a modern, dark finish.
- Choose high-quality dark stains like espresso or dark walnut, and consider pre-stain conditioners for uniform color.
- Apply multiple thin coats of stain, working along the grain, allowing drying time between coats for rich depth.
- Use a clear sealant such as polyurethane for durability, applying with a brush or spray for a sleek, professional look.
- Enhance the modern aesthetic with minimalist hardware, contrasting countertops, and sleek lighting to complement the dark stain.

Furniture Repair Kit Wood Markers – Set of 13 – Markers and Wax Sticks with Sharpener Kit, for Stains, Scratches, Wood Floors, Tables, Desks, Carpenters, Bedposts, Touch Ups, and Cover Ups
PRODUCT DETAILS – This 13 piece kit includes 6 Repair Markers, 6 paper wrapped wax sticks and 1…
As an affiliate, we earn on qualifying purchases.
As an affiliate, we earn on qualifying purchases.
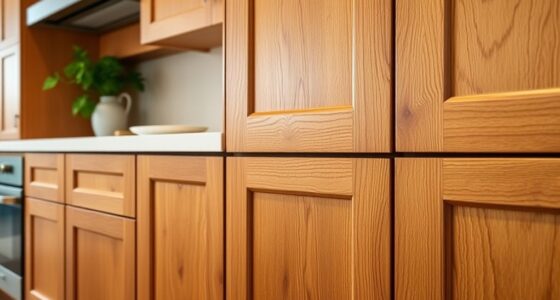
Preparing Your Cabinets for a Darker Stain
Before applying a darker stain, it is essential to prepare your cabinets properly. Start by removing all hardware, doors, and drawers to access every surface easily. Next, lightly sand the entire cabinet surface with 150-220 grit sandpaper or a sanding block. This step promotes stain adhesion, removes any gloss, and reveals the wood grain for better stain penetration. If your cabinets have an existing finish like polyurethane, lightly sanding creates a rougher surface, guaranteeing the stain adheres well. Thoroughly clean all surfaces using a damp cloth or tack cloth to remove dust, grease, and debris. Proper preparation ensures the staining process will be smooth and results will be even, giving you a rich, darker finish that lasts. Additionally, understanding the importance of color accuracy can help you choose the right stain tones to achieve a modern and cohesive look. Using the correct self watering plant pots for your project can also contribute to maintaining a clean and organized workspace during your renovation. Incorporating knowledge about electric power generation can help you understand how to create sustainable energy solutions while working on your project, ensuring an eco-friendly approach from start to finish. Moreover, paying attention to wood type can influence how well the stain absorbs and the overall final appearance of your cabinets. Exploring automation technologies in your workspace can further enhance efficiency and reduce manual effort during your renovation process.

Minwax 227634444 Wood Finish, Espresso, 1/2 Pint
RICH EVEN COLOR – Minwax Wood Finish is a deep penetrating, oil-based wood stain that provides beautiful color…
As an affiliate, we earn on qualifying purchases.
As an affiliate, we earn on qualifying purchases.
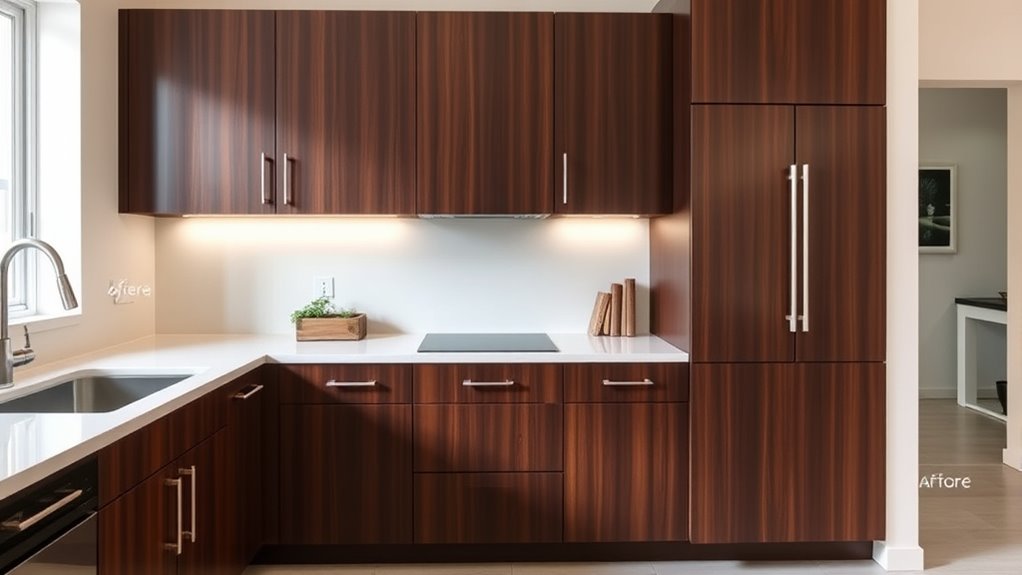
Choosing the Right Type and Color of Stain

Once you’ve prepared your cabinets, choosing the right stain type and color becomes the next key step. Your stain color sets the tone—darker stains like espresso or dark walnut create a bold, modern look, while lighter shades like honey add warmth. For a rich finish that highlights the wood grain, oil-based wood stain offers deep hues but takes longer to dry and has a stronger odor. Water-based stains dry faster, are eco-friendly, and easier to clean, though they may lack the same depth. Gel stains are ideal for controlling stain application, especially on tricky surfaces or when you want an opaque, solid color. Your staining technique will influence the final finish, so choose a wood stain and stain application method that aligns with your desired look. Understanding stain application techniques can help you achieve a professional and even finish, and considering personality traits can also influence your aesthetic choices and approach to home projects. Additionally, selecting the appropriate resources and tools can make the staining process more efficient and successful.

Varathane Water-Based Crystal-Clear Ultimate Polyurethane | Interior Wood Protection | Fast Dry Time | Easy Clean Up | Satin | Half Pint
Protects indoor wood surfaces such as furniture, windows, cabinets, trim and more
As an affiliate, we earn on qualifying purchases.
As an affiliate, we earn on qualifying purchases.
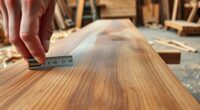
Applying Multiple Thin Coats for Depth and Richness

Applying multiple thin coats of stain is essential for achieving a deep, even finish that highlights the wood’s natural grain. Thin coats allow each layer to dry thoroughly, preventing drips and blotches. This gradual staining builds up color with better control over the final shade, enhancing depth and richness. Waiting at least 12 hours between coats ensures proper curing and stronger adhesion, resulting in a durable finish. Light sanding with fine-grit paper between coats smooths imperfections and promotes even application for subsequent layers. Visualize the process:
| Coat Number | Appearance | Effect |
|---|---|---|
| 1 | Light tint | Foundation for depth |
| 2 | Slightly darker | Builds up color gradually |
| 3 | Rich hue | Achieves desired shade |
| 4 | Final finish | Deep, even wood grain presence |
Consistently applying thin coats also allows for better layering techniques that contribute to a professional-looking result. Using proper drying times between coats is crucial to prevent issues like peeling or uneven color buildup. Additionally, understanding wood grain patterns can help in applying stain more evenly and accentuating natural beauty. Incorporating techniques for controlling stain penetration ensures an even and sophisticated finish that elevates the overall aesthetic.

4 Pack Hand Sanding Sponge Set -120 220 320 400 Grit- Coarse Medium Fine Grit Sanding Block, Sander Sponges for Wood-Working Drywall Metal, Washable and Reusable Sponge for Rust Removal Polishing
Assorted Grit Sanding Blocks – This set includes 4 sponge sanding blocks (4 x 2.6 x 0.7 inches)…
As an affiliate, we earn on qualifying purchases.
As an affiliate, we earn on qualifying purchases.
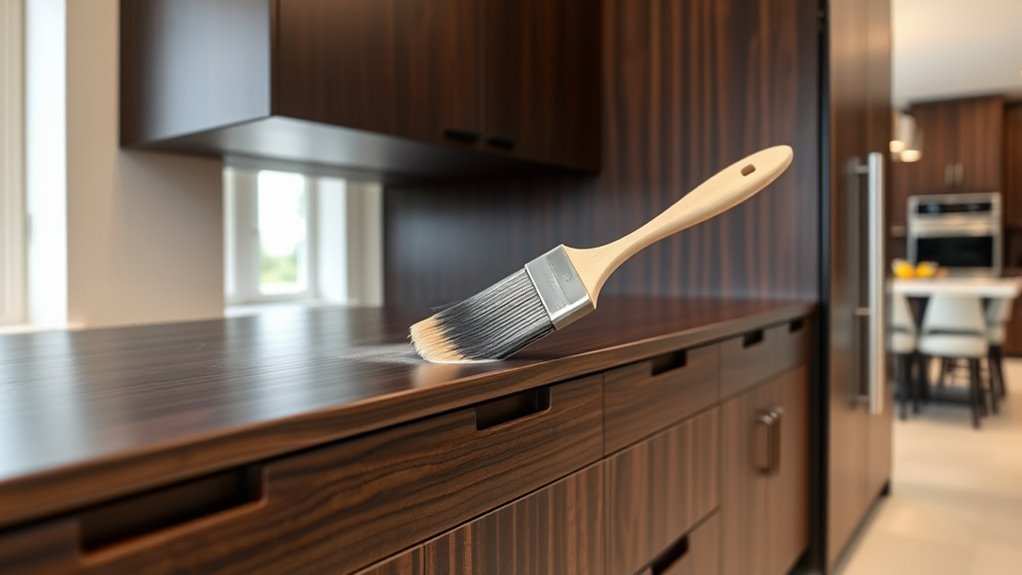
Techniques for Even and Smooth Stain Application

To achieve an even and smooth stain application, utilizing high-quality brushes or rags and working along the wood grain with long, consistent strokes is vital. This technique helps guarantee proper coverage and prevents streaks or uneven finish. When applying stain, work in manageable sections, maintaining a wet edge to avoid lap marks. Use even strokes to follow the wood grain, which promotes a uniform color and smooth appearance. After applying each coat, wipe excess stain with a clean rag within 5-15 minutes to prevent blotchiness. Lightly sanding between coats with fine-grit sandpaper or steel wool helps smooth out any uneven areas and enhances stain adhesion. Remember, thin, multiple coats are better than thick layers, resulting in a deeper, more even color with minimal drying issues. Proper surface preparation can also help prevent blotchiness and achieve a consistent finish. Additionally, understanding wood type is essential, as different woods absorb stain differently, affecting the final look. Incorporating data analytics can support better decision-making regarding stain application and finishing techniques, leading to more professional results. Considering growth and harvesting chia seeds can offer insights into sustainable practices that can be applied to other areas of home improvement, including finishing techniques.
Finishing Touches to Protect and Enhance the New Look

After staining your cabinets, adding a clear sealant is essential to protect the finish and enhance their appearance. A quality topcoat, like polyurethane or lacquer, creates a durable protective layer that boosts both gloss and satin finishes. To avoid brush marks and achieve a smooth finish, use the proper application technique—light, even coats and light sanding between layers. Applying multiple thin coats (around 3-4) ensures better adhesion, durability, and an even finish appearance. For a professional look, consider spray application to minimize imperfections. Allow each coat to cure for at least 24 hours, which guarantees maximum hardness and longevity. Proper curing time and careful application techniques can help you achieve a flawless result, and understanding sealant compatibility ensures your chosen finish adheres well to stained wood surfaces. Additionally, selecting the right protective coating tailored for wood finishes can significantly improve durability and appearance over time. Incorporating proper maintenance practices, such as regular cleaning and touch-ups, can further extend the life and beauty of your stained cabinets.
Frequently Asked Questions
How Do You Make Dark Wood Cabinets Look Modern?
To make dark wood cabinets look modern, start by choosing a deep, rich stain like espresso or dark walnut. Apply it evenly with a brush, following the grain, and use multiple thin coats for a sleek finish. Pair the cabinets with minimalist hardware and light-colored walls or countertops to create contrast. Opt for flat-panel doors and simple hardware to enhance the contemporary, streamlined appearance.
What Is the Best Way to Darken Cabinets?
Imagine transforming your cabinets into a rich, deep hue that commands attention. To do this, you should apply multiple coats of gel or oil-based stain, letting each dry fully. Use dark stains like Minwax Dark Walnut for a striking effect. Lightly sand between coats to make certain of smoothness, then seal with a clear finish to lock in the color and protect your modern masterpiece.
Are Dark Stained Cabinets in Style?
Yes, dark stained cabinets are definitely in style. You can achieve a sleek, modern look with deep espresso or walnut finishes that add warmth and richness. Just remember, they need good lighting and space planning to prevent the room from feeling smaller or heavy. Whether your style is modern, traditional, or transitional, dark cabinets offer timeless appeal and can elevate your kitchen’s overall design.
How Do You Make Dated Cabinets Look Modern?
They say a picture is worth a thousand words, and the same applies to your cabinets. To make dated cabinets look modern, start by lightly sanding them for a smooth surface, then apply a dark stain like Java or Dark Walnut for a sleek update. Finish with contemporary hardware and a semi-gloss topcoat to elevate the look. This simple transformation can turn old into new effortlessly.
Conclusion
By following these techniques, you can transform your cabinets with a darker stain that adds depth and sophistication. Did you know that a well-stained cabinet can increase your home’s value by up to 10%? With patience and the right approach, you’ll achieve a stunning, modern look that lasts. So go ahead—dare to darken and elevate your space, making it uniquely yours with a rich, beautiful finish.