
Did you know that walnut wood can increase in value by up to 25% when carefully finished to retain its natural beauty? This striking statistic highlights the importance of mastering walnut finishing techniques. As one of the most sought-after wood varieties, walnut not only provides a warm and elegant appearance but is also renowned for its durability. In this guide, you’ll discover effective tips for walnut finishing that ensure you enhance its rich hues without compromising its unique charm. Let’s embark on this journey to uncover the best walnut wood finish that elevates your woodwork while preserving its innate character.
Key Takeaways
- Walnut wood can appreciate in value significantly with the right finish.
- Preserving walnut’s rich color is essential for showcasing its beauty.
- Essential tips for walnut finishing can enhance the wood’s appearance.
- Choosing the best walnut wood finish affects durability and aesthetics.
- This guide will provide step-by-step instructions for achieving optimal results.
Understanding the Unique Properties of Walnut Wood
Walnut wood shines in the world of woodworking, showcasing a combination of stunning aesthetics and practical benefits. When exploring walnut wood properties, you will find that its remarkable workability and durability make it a favored choice among artisans. You should consider the reasons to choose walnut, particularly if you appreciate a wood that ages beautifully and develops a characteristic patina over time.
Why Walnut Is a Preferred Choice for Woodworkers
Woodworkers often gravitate towards walnut for its ease of manipulation. This hardwood works well with a variety of tools, making intricate designs and decorative details achievable. Its rich colors vary from deep browns to subtle purples, creating a visual feast in any project. With excellent stability and resistance to warping, walnut offers long-lasting performance. These appealing walnut wood properties not only satisfy aesthetics but also ensure functionality in furniture and cabinetry.
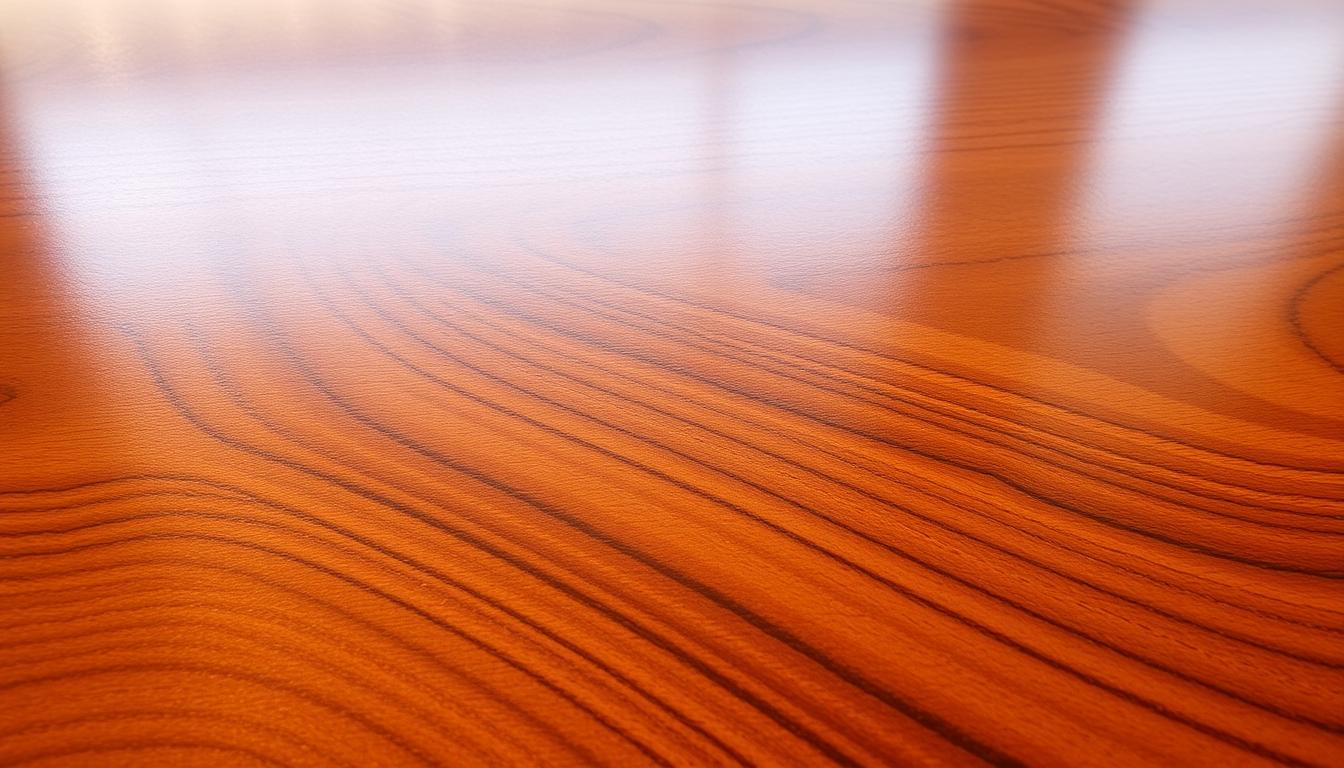
Characteristics of Walnut Grain and Color
Walnut grain characteristics define its allure. The wood typically features a dense, tight grain that enhances its luxurious appearance. Often, you might notice a straight grain, though it can also present wavy patterns, which contribute to its unique charm. As walnut ages, the transformation of its hues results in even deeper, richer tones, captivating those who appreciate the beauty of natural wood. The interplay of light and shadow on its surface showcases the natural variations inherent in this remarkable material.


Howard Products RF4016 RF3016 Restor-A-Finish, 16 oz, Walnut, 16 Fl Oz
- Restores wood finishes: Penetrates to blend scratches and blemishes
- Multiple color options: Nine shades to match various woods
- Easy application: Wipe-on, wipe-off process for quick restoration
As an affiliate, we earn on qualifying purchases.
As an affiliate, we earn on qualifying purchases.
Essential Tools and Materials for Walnut Finishing
Achieving a flawless finish on walnut wood requires the right tools and materials. Understanding what supplies you need makes a significant difference in the quality of your work. Investing in walnut finishing tools and essential materials for finishing is a step toward ensuring a beautiful outcome.
Common Supplies You’ll Need
When preparing to finish walnut, a selection of supplies proves invaluable. Some of the common materials include:
- Abrasives: Opt for sandpaper in 180 and 220-grit for effective smoothing.
- Grain fillers: Products like Old Masters Woodgrain Filler help level the surface.
- Tung oil varnish: A great option for enhancing walnut’s natural beauty.
- Latex gloves: Ensure safety during application to protect your skin.
- Rags and shop towels: Essential for application and cleanup purposes.
- Putty knives: Useful for spreading grain fillers evenly.
Choosing the Right Finishing Products
Selecting top finishing products can drastically improve your project’s outcome. Quality products make the application smoother and enhance the wood’s inherent character. Consider using:
- Zinsser SealCoat for priming before applying the topcoat.
- Polyurethane options for durability and a high-gloss finish.
- Shellac for maintaining the walnut’s rich hue without discoloration.

Preparing Your Walnut Surface for Finishing
Achieving a perfect finish on your walnut wood begins with careful surface preparation. This step is crucial for ensuring that the stain and topcoat adhere properly, enhancing the beauty of the wood grain without impacting its natural color. Proper techniques in sanding walnut and cleaning walnut surface will set the foundation for a lasting, stunning finish.
How to Sand and Clean Your Wood
Start by sanding walnut wood with precision. Utilize a random orbital sander or a sanding block, aiming for a grit level between 180 and 220. This process smoothens the surface, making it flat and ready for finish application. Once you have completed sanding, it’s essential to remove any dust and debris. A tack cloth or a damp rag works effectively for cleaning walnut surface before moving on to the finishing stages. To enhance the adhesion of your finish, consider applying a sanding sealer such as Zinsser SealCoat, which can help in further prepping the wood for the perfect finish.
Tools for Effective Surface Preparation
Investing in the right tools can dramatically improve your surface preparation efficiency. Here are essential items to consider:
- Random orbital sander for uniform sanding
- Sanding block for detailed areas
- Various grit sandpapers (180, 220 grit)
- Tack cloth or damp rags for cleaning
- Sanding sealer like Zinsser SealCoat for added protection

Mastering Walnut Finishing Without Compromising Its Rich Hue
When it comes to walnut finishing techniques, your approach can greatly impact the final appearance of the wood. Using proper methods allows you to highlight the rich brown tones that walnut is known for, keeping them vibrant and intact. Start by selecting a quality grain filler to promote a smooth finish. A tinted filler can enhance the natural depth of walnut without altering its distinctive hue.
Incorporating clear coats with careful application plays a key role in preserving walnut color. A thin layer applied evenly ensures that the beauty of the grain shines through while protecting it from potential damage. It’s vital to avoid heavy applications, as these can muddle the wood’s sophisticated look.

For walnut finish tips, remember to choose the right products suited for your specific needs. Water-based finishes are preferable for maintaining color integrity, while oil-based options can add warmth. Take your time with each step, ensuring that the walnut remains a showcase of its natural elegance.
Techniques for Enhancing Walnut’s Natural Color
When it comes to enhancing wood color, walnut has a unique beauty that can be accentuated with the right techniques. Using walnut grain fillers can create stunning depth, highlighting the intricate patterns and hues that make this wood so sought after. Coupling this with effective sealing methods ensures that the gorgeous color you achieve remains vibrant and protected over time.
Using Grain Fillers for Depth and Contrast
Applying walnut grain fillers can significantly elevate the visual appeal of your project. These fillers are available in various tints, allowing you to choose one that complements the rich tones of walnut. They fill the pores of the wood, creating contrast and depth that enhances the overall beauty. For a more pronounced effect, consider a tinted filler that can accentuate the darker and lighter variations of the walnut grain.
The Importance of Sealers in the Finishing Process
Sealing walnut wood is critical to preserving its color and integrity. Sealers act as a barrier, preventing finishes from penetrating too deeply into the wood. This helps maintain the natural color while offering protection from moisture and UV damage. The right sealer, such as a clear gloss or satin finish, will enhance the natural beauty of your walnut without altering its original hue.

Choosing the Right Finish: Oil, Varnish, or Shellac?
When it comes to achieving the best finishes for walnut, selecting the right product is crucial. The options available include oil, varnish, and shellac, each offering distinct benefits tailored to walnut wood. Understanding these finishes can guide you in making an informed choice that enhances the natural beauty of walnut while ensuring durability.
Benefits of Tung Oil and Varnish for Walnut
Tung oil and varnish are widely regarded as excellent choices for finishing walnut. Tung oil penetrates deeply into the wood, nourishing it and accentuating its warm tones. This creates a rich, inviting look that many woodworkers appreciate. Pairing oil varnish for walnut with proper application techniques, such as wet-sanding, can deliver a stunning finish that highlights the grain without detracting from the wood’s character.
How Shellac Preserves Color Without Yellowing
Shellac stands out for its unique ability to provide a clear finish that avoids yellowing over time. Applying shellac benefits walnut by maintaining its rich hue and ensuring a long-lasting aesthetic appeal. This makes it an ideal choice for those seeking a reliable finish that enhances the wood’s color without overshadowing its natural beauty.

Wet-Sanding Method to Achieve a Smooth Finish
Wet-sanding techniques can transform your walnut projects into beautiful, smooth finish walnut pieces. This method not only enhances the visual appeal of the wood but also improves the overall feel of the surface. By using water, you can create a finer finish that shows off the natural beauty of walnut grain.
Step-by-Step Instructions for Wet-Sanding
To achieve the best results with wet-sanding, follow these steps:
- Begin by applying a generous coat of your chosen finish to the walnut surface.
- Wait for a few minutes until the finish starts to become tacky but is still wet.
- Use wet/dry sandpaper, ideally in grits ranging from 320 to 600, and soak it in water.
- Gently sand the surface in a circular motion, allowing the sandpaper to glide over the wet finish.
- Wipe the surface clean with a damp cloth to remove any residue as you move along.
- Repeat the process if necessary, applying additional finish as needed.
Benefits of Wet-Sanding on Walnut
Utilizing wet-sanding benefits your walnut projects in several ways. This process effectively fills the grain, resulting in a more refined surface. It minimizes the risk of over-sanding, which can occur with traditional sanding methods. The outcome is a glossy sheen and a smooth finish walnut that showcases the wood’s natural color beautifully.

Deepening Walnut Color with Dyes and Glazes
Enhancing walnut color can transform your wood projects, adding depth and character to this already beautiful wood. By utilizing proper techniques like dyeing walnut and applying glazes, you can achieve a stunning finish that accentuates walnut’s natural beauty. The following methods will help you create a rich, uniform appearance without sacrificing the wood’s intrinsic charm.
How to Use Dyes to Enhance Hue Without Staining
Dyeing walnut is an effective technique to deepen its color while maintaining the wood’s unique grain pattern. Start by choosing a high-quality dye, typically dark brown, and dilute it with denatured alcohol. This mixture allows for easy application and better absorption into the wood. Use a brush or rag to apply the dye, working in the direction of the grain for optimal results. Multiple coats may be needed to achieve your desired darkness while ensuring that the walnut grain remains visible.
Applying Gel Stains for a Uniform Appearance
Gel stains walnut can deliver a consistent and even layer of color across your surface. Unlike traditional stains, gel stains remain thicker, making them ideal for achieving a uniform finish without excessive penetration. Apply the gel stain using a clean cloth, sponge, or brush, always working from one edge to the other. Blend in any sapwood areas seamlessly with the rest of the walnut. Allow the stain to sit for a few minutes before wiping off the excess, giving you control over the final color.

Protecting Your Walnut from UV Damage
Protecting your walnut furniture from UV damage is essential for maintaining its stunning color over time. Exposure to sunlight can lead to fading, diminishing the beauty of this rich wood. Selecting the right finishing products with UV inhibitors can greatly assist in preventing walnut fading, ensuring that your pieces remain vibrant for years.
Understanding UV Inhibitors in Finishes
UV inhibitors in finishes play a crucial role in safeguarding walnut surfaces from harmful rays. These additives work by absorbing or reflecting UV radiation, thereby minimizing the likelihood of discoloration. When you choose finishes that contain these inhibitors, you invest in your walnut’s longevity and visual appeal.
Comparing Finishing Products with UV Protection
When selecting a finish for your walnut wood, it’s vital to compare the options available. Products like polyurethane and lacquers often feature UV protection, making them ideal choices for enhancing durability while preventing walnut fading. Consider these factors when evaluating finishes:
| Finishing Product | UV Protection | Durability | Application Ease |
|---|---|---|---|
| Polyurethane | High | Excellent | Moderate |
| Lacquer | Moderate | Good | Easy |

By understanding the importance of UV inhibitors in finishes, you will be better equipped to select products that ensure the beauty and integrity of your walnut furniture are preserved. Prioritize finishes that not only protect but enhance the unique qualities of your walnut for a lasting investment in your home.
Maintaining Your Finished Walnut Furniture
To keep your walnut furniture looking exquisite, regular walnut furniture maintenance is essential. Proper care helps preserve both the beauty and durability of your walnut pieces. Start by dusting them with a soft, lint-free cloth to remove grime and prevent scratches. For additional shine, consider using a suitable furniture polish made for wood finishes.

Best Practices for Caring for Finished Walnut
When caring for walnut finishes, avoid using harsh chemicals that can damage the surface. Instead, opt for gentle, natural cleaning solutions. Always apply polish sparingly, as excessive buildup can dull the finish. Keeping your furniture away from direct sunlight protects it from fading and UV damage, extending the life of your beautiful walnut pieces.
When and How to Reapply Finishes
Reapply finishes tips suggest doing this every few years, particularly if your furniture is heavily used or has been exposed to sunlight. Assess the condition regularly; if the finish appears worn or dull, it’s time for a refresh. Use similar types of products to ensure compatibility and maintain color consistency. Following these guidelines will enhance the longevity of your walnut furniture while keeping it stunning.
Common Mistakes to Avoid in Walnut Finishing
Walnut finishing is a delicate process, and even small errors can have significant effects on your project’s outcome. Understanding common mistakes in walnut finishing can help you achieve the best results. By avoiding walnut finishing errors, you will ensure a stunning final appearance and lasting durability.
Over-sanding and How It Affects Color
One frequent mistake you might encounter is over-sanding your walnut surface. Excessive sanding can remove too much material, leading to a lighter shade that negatively impacts the wood’s rich color. It can also minimize the fine details of the grain. To avoid walnut finishing errors, consider these sanding tips walnut:
- Use finer grits only as needed and avoid excessive pressure.
- Regularly check your progress to ensure you maintain the desired color.
- Work systematically, sanding with the grain to preserve texture.
Mismatching Finishing Products
Using incompatible finishing products can lead to a poor final result. Mismatching products might cause adhesion issues or unwanted chemical reactions, ruining your hard work. To avoid these mistakes in walnut finishing, always ensure that your finish types are compatible. Before applying, conduct a small test on scrap wood if you’re unsure about interactions.

Conclusion
Mastering the art of walnut finishing is essential for showcasing the rich hues of this beautiful wood. This walnut finishing guide has provided you with comprehensive insights into understanding walnut’s unique characteristics and the best techniques to achieve a perfect walnut finish. By selecting appropriate tools and applying the recommended methods, you can effectively highlight walnut’s natural beauty while ensuring the longevity of your furniture.
Implementing the strategies outlined in this guide not only enhances the visual appeal of your walnut projects but also offers protection against damage. Final thoughts on maintaining your finished pieces emphasize the importance of regular care to keep them looking their best for years to come. With the right approach, you can create stunning walnut pieces that will be cherished and admired.
FAQ
What are the best grit levels of sandpaper for walnut finishing?
For optimal surface preparation, you should use sandpaper with grits of 180 and 220. This ensures a smooth and flat surface, allowing the finish to adhere properly.
How can I maintain the natural color of walnut wood during finishing?
Use high-quality grain fillers and avoid overly aggressive sanding. Choosing finishes like tung oil or shellac will help to enhance walnut’s natural beauty without altering its rich hue.
What is the wet-sanding technique, and how does it benefit walnut finishing?
Wet-sanding involves applying a liberal amount of finish and sanding with wet/dry sandpaper while still wet. This technique smooths the surface effectively and fills the grain while preventing over-sanding.
Can I use dyes to change the color of walnut wood?
Yes, using dark brown dyes diluted with denatured alcohol allows you to deepen walnut’s color while maintaining its natural hue. This approach can add dimension and richness without overwhelming the wood’s character.
How do I protect finished walnut furniture from UV damage?
Select finishing products that include UV inhibitors. These help to prevent fading and maintain the wood’s vibrant color over time. Comparing products like polyurethane and lacquers can guide your choice.
What are some common mistakes to avoid when finishing walnut?
Over-sanding can lighten the wood’s color and impact the grain details, while mismatching finishing products can lead to poor adhesion. Always use compatible materials to ensure a high-quality finish.
How often should I reapply finishes on walnut furniture?
It’s advisable to reapply finishes every few years, depending on usage and exposure. Always use similar products to ensure consistency in color and overall appearance.