To turn a maple burl into a stunning live-edge clock, start by selecting a piece with vivid grain patterns and natural edges. Carefully cut and shape it to preserve its organic form, then drill a central hole for the clock mechanism. Smooth the surface with fine sandpaper and choose a finish that enhances the grain, like oil or polyurethane. Finally, install the clock parts and reattach the hands. For detailed steps and tips, keep exploring the process.
Key Takeaways
- Select a visually appealing maple burl with natural edges, then cut and shape it into a circular or desired form while preserving live edges.
- Smooth the surface thoroughly with fine sandpaper to highlight the intricate grain patterns and prepare for finishing.
- Drill a central hole carefully for the clock mechanism, ensuring a snug fit and smooth operation.
- Apply high-quality finishes like tung oil or polyurethane to enhance grain beauty and protect the wood.
- Attach the clock mechanism and hands securely, ensuring proper function for a stunning, functional live-edge maple burl clock.

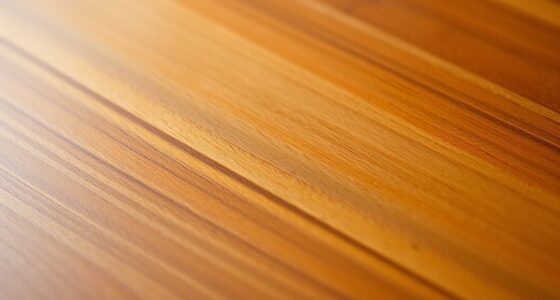
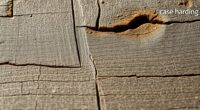
If you’re looking to create a unique and eye-catching timepiece, turning a maple burl into a live-edge clock is a rewarding project. Maple burl’s intricate grain patterns and natural edges make for a striking centerpiece. To start, choose a sturdy piece of maple burl with interesting character and size suitable for a clock face. You’ll need basic woodworking tools such as a bandsaw, sander, drill, and clamps, along with some finishing supplies. The key to a successful project lies in applying the right woodworking techniques and finishing tips to enhance the burl’s natural beauty.
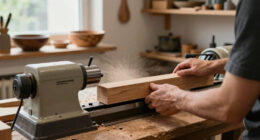
Begin by carefully cutting the burl into a circular or desired shape, keeping the live edge intact to preserve its organic feel. Use a jigsaw or bandsaw for precision, and take your time to follow the natural contours. Once cut, smooth the surface with progressively finer sandpaper, starting around 120 grit and finishing at 220 or higher for a sleek, polished look. When working with burl, pay special attention to its irregular surface—use hand tools or a random orbital sander to prevent gouging or uneven spots. This process not only reveals the stunning grain but also prepares the wood for finishing. Additionally, considering the contrast ratio of the finished piece can help you achieve a more visually striking result.
Carefully cut the burl into a shape, then sand smoothly to reveal its natural grain and prepare for finishing.
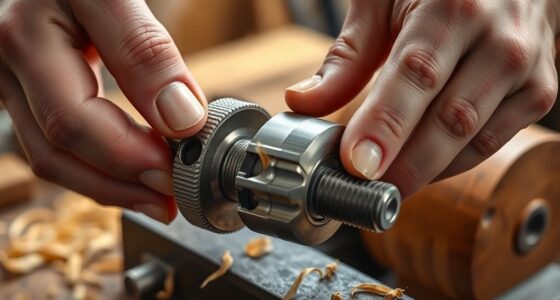
Next, drill a central hole for the clock mechanism. Measure carefully to guarantee the movement fits snugly, and consider a pilot hole to prevent splitting. Mount the clock mechanism and test its operation before proceeding with final touches. When it comes to finishing tips, applying a high-quality wood finish like an oil or polyurethane enhances the visual depth while protecting the burl’s delicate surface. For a natural appearance, use tung oil or Danish oil, which penetrates the wood, enriching the grain and providing a subtle sheen. If you prefer a more durable, glossy surface, opt for a clear polyurethane coat, applied in thin, even layers with a brush or spray.
Remember to allow each coat to dry thoroughly and lightly sand between coats for a smooth, professional finish. This step is vital for highlighting the burl’s intricate patterns and ensuring longevity. When the finish has cured, reattach the clock hands and ensure the mechanism operates smoothly. Your live-edge maple burl clock will now serve as a stunning functional art piece, showcasing your craftsmanship and appreciation for natural materials. With patience and attention to detail, you turn an ordinary piece of wood into a fascinating timekeeper that’s both beautiful and practical.
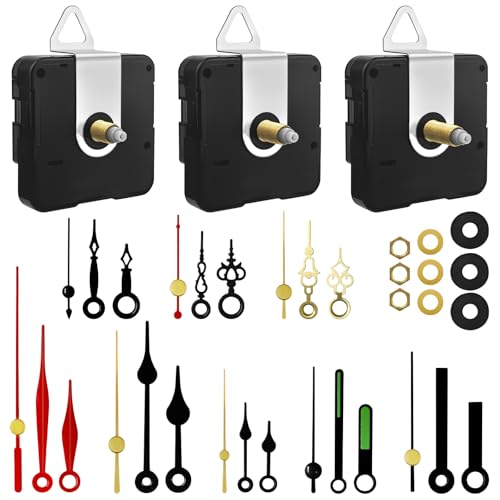
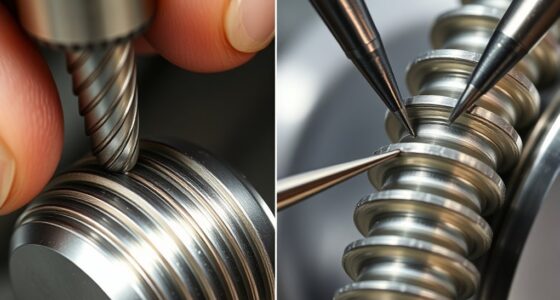
3PCS Clock Mechanism Kit, Quartz Clock Movement Replacement with 8 Pairs of Short Clock Hands, Battery Clock Replacement Mechanism Include Clock Hands DIY Repair Parts (Total Shaft Length 16/20/23mm)
- Variety of Shaft Sizes: Fits clock panels 0-12mm thick
- Includes 8 Pairs of Hands: Suitable for small 3-6 inch clocks
- Silent Sweeping Movement: Operates quietly for peaceful environment
As an affiliate, we earn on qualifying purchases.
As an affiliate, we earn on qualifying purchases.
Frequently Asked Questions
What Tools Are Essential for Carving a Live-Edge Clock?
To carve a live-edge clock, you’ll need essential tools like hand carving tools for detailed work and power tools for removing larger sections. A jigsaw or bandsaw helps shape the overall form, while chisels and gouges refine the edges. Sanding tools smooth the surface, and a rotary tool adds fine details. Combining hand carving with power tools gives you control and efficiency, resulting in a stunning, customized clock.
How Long Does the Entire Process Typically Take?
The entire process usually takes about 2 to 4 weeks, depending on factors like wood drying and your skill level. You start by selecting and drying the maple burl, which can take several weeks if air drying. Once the wood is ready, you carve, sand, and assemble the clock. The drying time is essential for stability, ensuring your clock looks stunning and functions perfectly.
Can Other Types of Wood Be Used Instead of Maple Burl?
Sure, you can use alternative woods, though it’s almost like choosing a backup singer—still good, but not quite the star. Different woods offer varied aesthetics and wood durability, so pick wisely based on your style and how much wear and tear your clock will face. Hardwoods like walnut or cherry make for durable, beautiful options, while softer woods might need extra care. Your choice sets the tone for your masterpiece!
How Do I Prevent the Wood From Cracking During Drying?
To prevent cracking during wood drying, you should control the moisture content carefully. Start by drying your wood slowly, ideally in a controlled environment with low humidity and stable temperature. Seal the ends of the wood with wax or glue to reduce uneven drying, which helps with crack prevention. Always monitor the drying process, and avoid exposing the wood to rapid changes in moisture or temperature to keep it intact.
What Are the Best Finishes to Enhance the Burl’s Appearance?
You’re on the right track to making your piece stand out! To enhance the burl’s natural beauty, choose finishes like tung oil or Danish oil for wood grain enhancement, which deepen the texture. For color enhancement, consider a light stain or a clear polyurethane to enrich the hues without overpowering the unique patterns. These finishes highlight the natural character, turning your project into a true eye-catcher.
Conclusion
Now that you’ve shaped and finished your maple burl, the real surprise awaits. With just a touch of your craftsmanship, this unique piece transforms into a stunning live-edge clock that’s sure to captivate. But the true magic lies in what’s next—hanging it up, setting the time, and watching it come to life. Are you ready to see your creation become a centerpiece? The moment is almost here—your masterpiece is about to reveal its final, breathtaking detail.