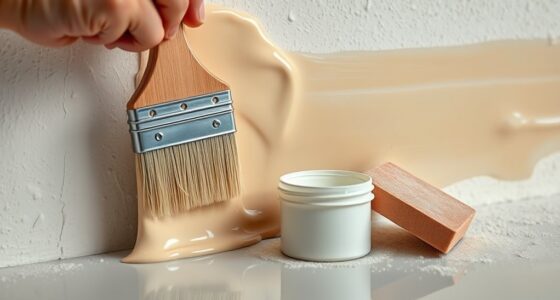

To master painter’s caulk for seamless trim installation, start with proper surface prep by cleaning and repairing imperfections. Choose a high-quality, paintable caulk suitable for your surfaces. Cut the nozzle at a 45-degree angle and apply with steady pressure, smoothing the bead immediately with a damp finger or tool. Remove masking tape at the right moment for clean edges. If you want expert tips to perfect your finish, keep going for detailed guidance.
Key Takeaways
- Properly prepare surfaces by cleaning, repairing imperfections, and ensuring dry, smooth areas for optimal caulk adhesion.
- Select high-quality, paintable caulks like latex or siliconized acrylic for flexibility and durability.
- Apply caulk with a steady hand, using a properly cut nozzle and consistent pressure to create a uniform bead.
- Smooth the bead immediately with a damp finger or tool to achieve a seamless, professional finish.
- Use masking tape along edges before caulking and remove it promptly to ensure crisp, clean lines.

DAP Alex Painter's Acrylic Latex Caulk, White, 10.1 Oz (7079818670)
- Adheres to various surfaces: Wood, plaster, drywall, masonry
- Water-ready in 24 hours: All-purpose acrylic caulk
- Paintable in 2 hours: Quick-dry, paint-ready caulk
As an affiliate, we earn on qualifying purchases.
As an affiliate, we earn on qualifying purchases.
Preparing the Surface for Perfect Caulking Results
To achieve a professional-looking caulk job, you first need to prepare the surface thoroughly. After cleaning the area with a soapy water-dipped rag to remove dust, dirt, and old caulk, let it dry completely. This step guarantees maximum adhesion and prevents future peeling. Check for imperfections and repair any damage, filling nail holes with a high-quality spackling compound, and leave it slightly raised to account for shrinkage as it dries. Use a scraper or putty knife to remove loose or peeling paint and debris that could interfere with the bond. Before applying new caulk, confirm that all repairs and fillers are fully dry and cured. Drying completely is vital for creating a smooth, durable, and professional finish. Incorporating water efficiency techniques and choosing appropriate materials can further enhance the longevity of your caulked surfaces. Additionally, ensuring proper surface preparation can significantly improve the effectiveness of your caulking project. Proper surface preparation not only improves adhesion but also can prevent issues like peeling or cracking over time. Staying informed about advances in automation technology can also help in maintaining efficient DIY projects.
Selecting the Ideal Caulk for Trim Projects
Choosing the right caulk for trim projects depends on understanding different types and their compatibility with your surfaces. You’ll want a product that’s paintable and durable to guarantee a seamless, long-lasting finish. High-quality brands offer the best balance of flexibility, ease of use, and resistance to cracking. For a truly unique culinary experience, consider exploring regional flavors and traditions to enhance your project’s authenticity. Additionally, selecting a caulk with appropriate adhesion properties ensures it bonds well to various surfaces, increasing the longevity of your trim installation. When choosing caulk, pay attention to its compatibility with different materials, which can affect adhesion and durability over time. Incorporating performance cookies to monitor your project progress can also inspire a calming workspace environment during your project.
Caulk Types and Compatibility
Selecting the right caulk for trim projects depends on understanding the different types available and their compatibility with paint and surfaces. Caulk types vary in flexibility, adhesion, and paintability. Latex or silicone-latex hybrid caulks are ideal for interior trim because they are paintable and flexible, ensuring a seamless finish. 100% silicone caulk isn’t suitable for paintable surfaces, as it doesn’t adhere well to paint. Siliconized acrylic caulks, like Painter’s Pro Siliconized Acrylic, offer a good balance of ease of application, paint adhesion, and durability. Always check labels to confirm the caulk is paintable, preventing peeling or cracking later. Here’s a quick overview:
| Caulk Type | Compatibility & Features |
|---|---|
| Latex / Silicone-Latex | Paintable, flexible, ideal for interior trim. Proper sealing helps prevent gaps from reappearing over time. |
| 100% Silicone | Not paintable, excellent for waterproof sealing. |
| Siliconized Acrylic | Paintable, durable, easy to apply. |
Using the right type of caulk also helps maintain the integrity of air quality, especially in well-sealed environments where proper sealing prevents dust and allergens from penetrating gaps. Maintaining proper sealing techniques with suitable caulk types is crucial for a professional finish and long-lasting results.
Paintability and Durability
Painter’s caulk, especially latex or acrylic-based formulas, is formulated to be highly paintable while offering excellent durability. This means you can easily apply your chosen paint over it, resulting in a seamless, professional finish. High-quality painter’s caulks contain silicone additives that enhance flexibility and adhesion, ensuring the caulk stays intact over time. Unlike 100% silicone, painter’s caulk allows for simple painting without sacrificing paintability or appearance. Good painter’s caulk resists cracking, shrinking, and staining, even in high-traffic or moisture-prone areas. When properly applied, it provides a durable seal that maintains its look and function after painting, preventing cracks or deterioration. This combination of paintability and durability makes painter’s caulk ideal for achieving long-lasting, seamless trim installations. Additionally, selecting the right best caulk for trim can further ensure optimal performance and a professional finish. Proper surface preparation and understanding caulk application techniques are also essential to achieve the best results. Moreover, choosing a caulk with flexibility and adhesion properties guarantees it will move with the trim and prevent cracking over time. Being aware of the key traits of successful quality assurance engineers can help in selecting the best products and techniques for your project. Incorporating industry trend awareness can also guide you toward innovative caulk formulations that enhance performance and longevity.
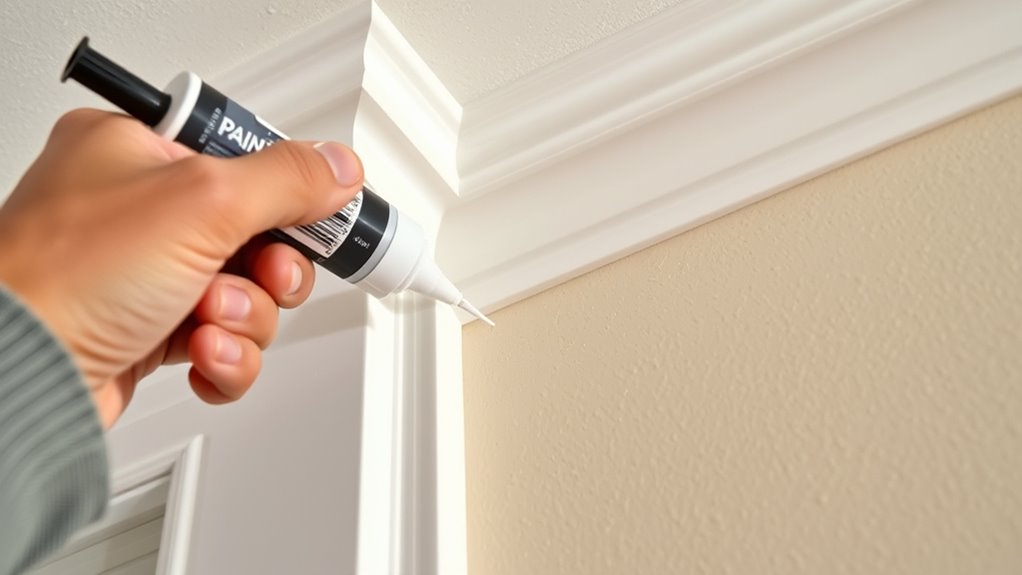
Properly Cutting and Loading the Caulk Tube
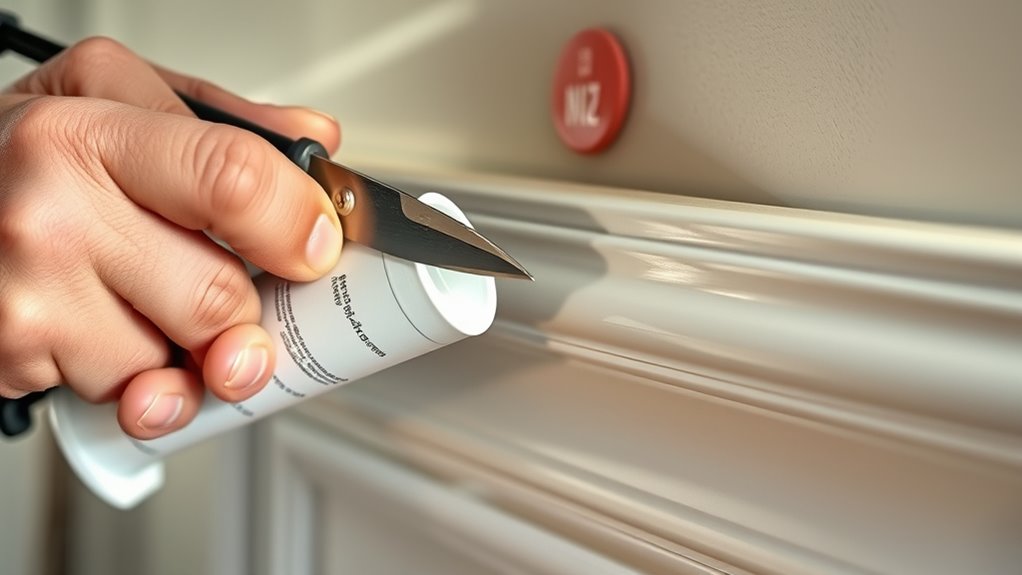
Start by cutting the nozzle at a 45-degree angle with a sharp razor to control your bead size. Make sure the opening matches your desired width for precise application. Then, load the tube securely into the gun, prime it until the caulk flows smoothly, and test on scrap before applying. For best results, consider security system effectiveness to ensure your work area remains safe and secure during the project. Additionally, paying attention to caulk application techniques can help achieve a more seamless finish. Ensuring your headphone compatibility with your tools can also facilitate easier handling and application during your project. Being aware of celebrity transformations can inspire you to adapt and improve your skills, much like how celebrities evolve their image for better outcomes. Proper surface preparation can further enhance adhesion and the overall quality of your trim installation.
Cutting the Nozzle Precisely
To cut the caulk tube nozzle accurately, first make sure the tube is securely loaded into the caulking gun to prevent slipping. When cutting, use a sharp razor blade and trim the tip at a 45-degree angle. This creates a clean, controlled opening ideal for precise application. Choose a small opening to produce a thin bead, perfect for detailed trim work. Always cut just enough to match your desired bead size—cutting too large causes excessive flow. Test the flow on scrap paper first to confirm the bead’s size and consistency. Proper cutting ensures smooth application and minimizes mess. Remember, a well-cut nozzle gives you better control, making your caulk lines clean and professional-looking. Proper technique in cutting and loading the nozzle can significantly improve your overall results. Ensuring your caulking tools are well-maintained also contributes to a neater finish. Additionally, understanding the latest tools and materials from brands like Nike Tech and Adidas Samba can inspire your approach to precision and innovation.
Loading and Priming Gun
Before loading your caulk tube into the gun, make certain the nozzle has been cut at a 45-degree angle with a sharp razor blade to control the bead size. Proper loading guarantees smooth application and minimizes mess. First, choose an opening size that matches the joint width for precise sealing. Insert the caulk tube securely into the caulking gun, ensuring it seats properly to prevent leaks. Prime the gun by squeezing the trigger until a small amount of caulk appears, which ensures a consistent flow.
To make loading easier, remember:
- Cut the nozzle at the correct angle before loading
- Select the right opening size for your joint
- Push the tube all the way in to secure it
- Prime the gun to guarantee smooth caulk flow
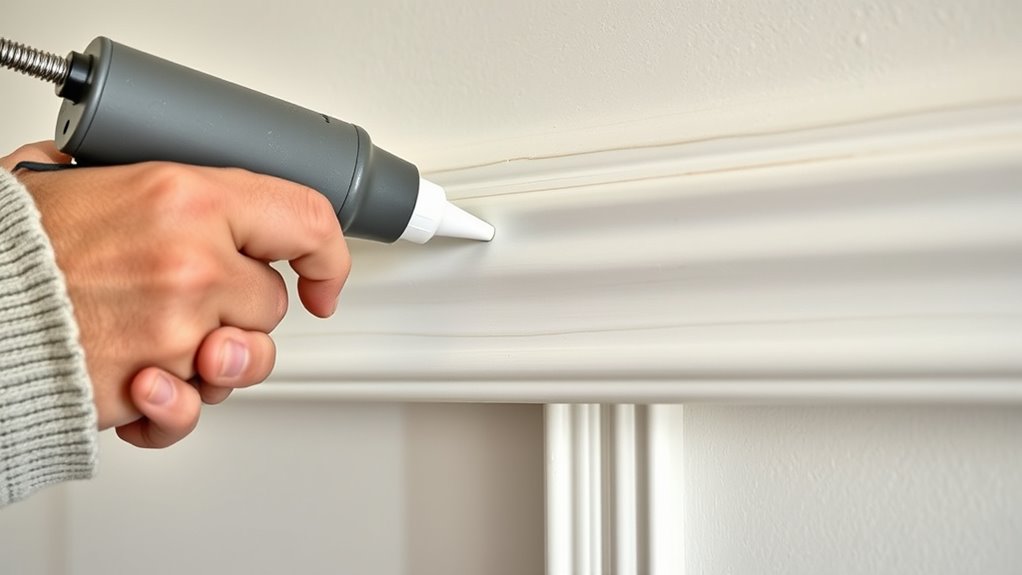
Applying Caulk With Precision and Consistency

Applying caulk with precision and consistency begins with preparing your tools properly. First, cut the tube tip at a 45-degree angle to control bead width, ensuring a precise application. Hold the gun at a steady 45-degree angle and apply consistent, even pressure to create uniform beads along the joint. Use a small amount of caulk to maintain control and prevent excess, which can cause uneven surfaces. Work in manageable sections to keep the caulk fresh for smoothing. Here’s a quick visual guide:
| Step | Key Idea |
|---|---|
| Cut tip at angle | Precision in bead size |
| Steady gun angle | Consistent application |
| Apply even pressure | Uniform beads |
| Use minimal caulk | Better control |
| Work in sections | Keeps caulk fresh for control |
Following these tips helps you achieve a smooth, professional finish.
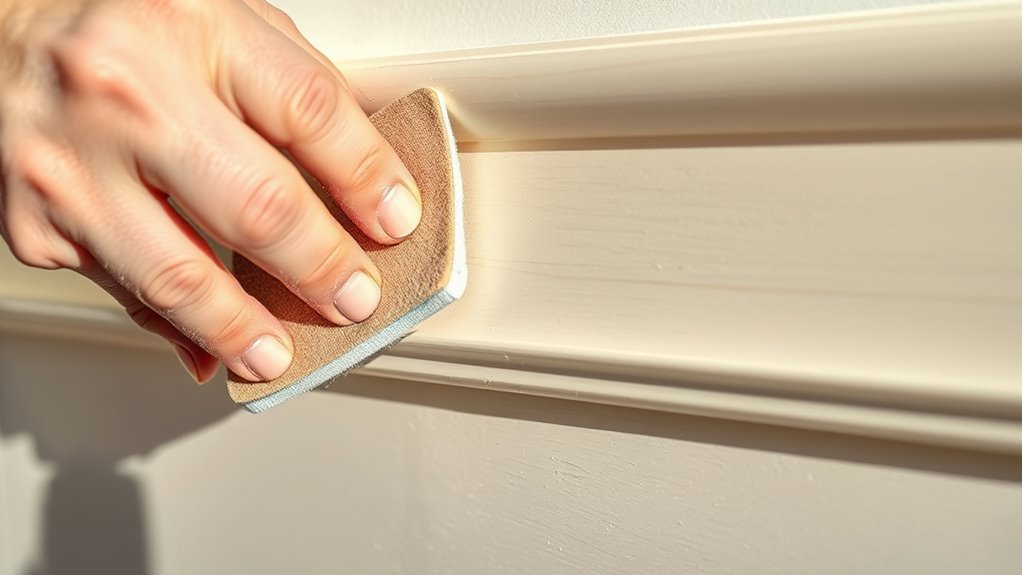
Smoothing and Shaping the Caulk Bead
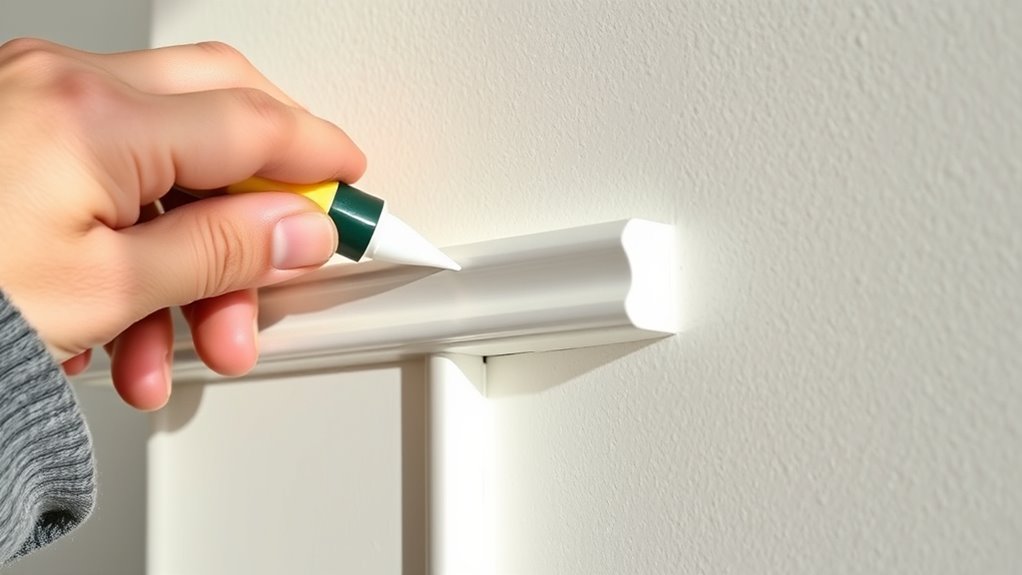
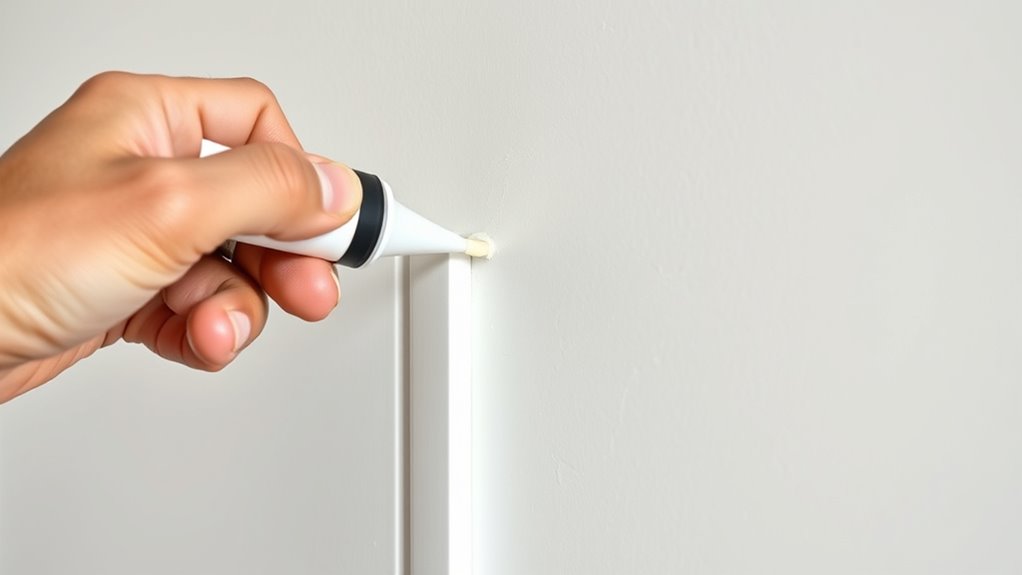
To get a smooth, professional finish, you need to properly shape and smooth the caulk bead right after applying it. Use a damp finger or a specialized tool to gently refine the line, keeping it even and seamless. Applying steady, gentle pressure guarantees your caulk looks clean and precise.
Proper Smoothing Techniques
Immediately after applying caulk, use a damp finger or a specialized smoothing tool to shape the bead gently. This step is vital for achieving a seamless, professional look. Maintain consistent pressure and smooth motion across the entire joint to guarantee evenness and proper adhesion. Be sure to smooth the caulk within 5-10 minutes of application before it starts to set or skin over. Slight overfilling the joint allows room for effective smoothing without gaps or voids. Keep your tools clean by wiping excess caulk with a damp cloth frequently. Proper smoothing techniques help create a smooth, uniform bead, making the final finish look polished and professional. Remember, patience and precision during smoothing are key to a flawless caulk application.
Shaping for a Seamless Finish
Once you’ve applied the caulk, shaping it for a seamless finish is essential. Use a damp finger or a caulk-smoothing tool to gently mold the bead immediately after application. Apply steady, consistent pressure to ensure the caulk adheres evenly and fully fills the joint. Work quickly before the caulk begins to set, as this allows for ideal shaping and prevents a rough or uneven surface. Follow the profile of the joint or molding by softly feathering the edges, creating a seamless, blended appearance. Remove excess caulk and refine the shape with a damp cloth or finger to produce crisp, clean lines that match the surrounding surface. Proper shaping guarantees a smooth, professional finish that enhances the overall look of your trim.
Using Masking Tape for Sharp, Clean Lines
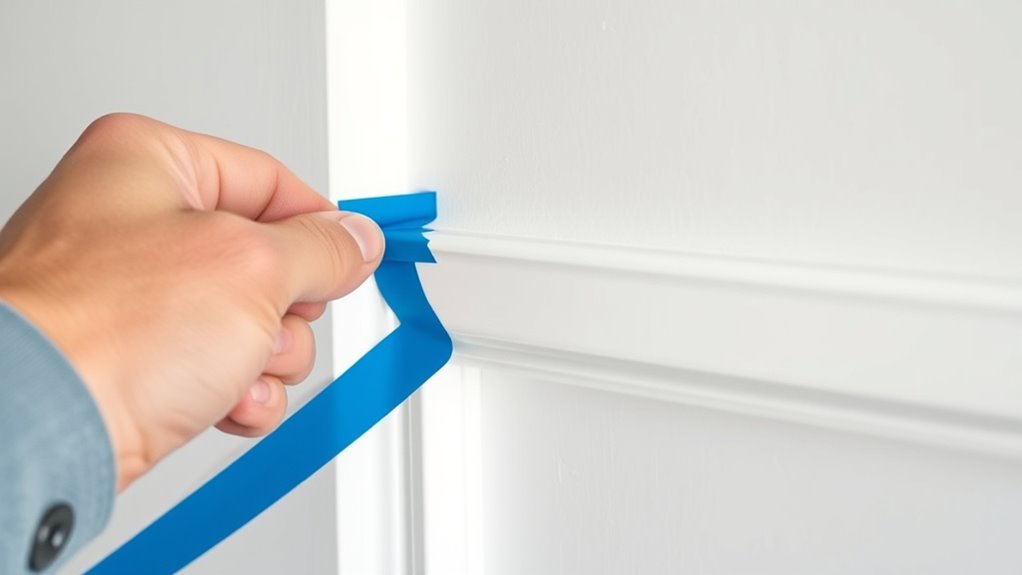
Using masking tape effectively is key to achieving sharp, clean lines when caulking. To do this, apply painter’s masking tape along the edge of the trim or wall before you start caulking. Make sure to press down the tape firmly to prevent caulk from seeping underneath, which can cause uneven lines. Once you’ve applied the caulk, remove the masking tape while the caulk is still slightly wet—ideally within 20 minutes—to avoid tearing or pulling dried caulk. Peel the tape back at a 45-degree angle slowly for a crisp finish. For intricate moldings, consider using custom masking templates made from wax paper and a marker to ensure precise, professional edges. Using masking tape properly guarantees a clean, sharp boundary every time.
Removing Tape at the Right Moment for Flawless Edges
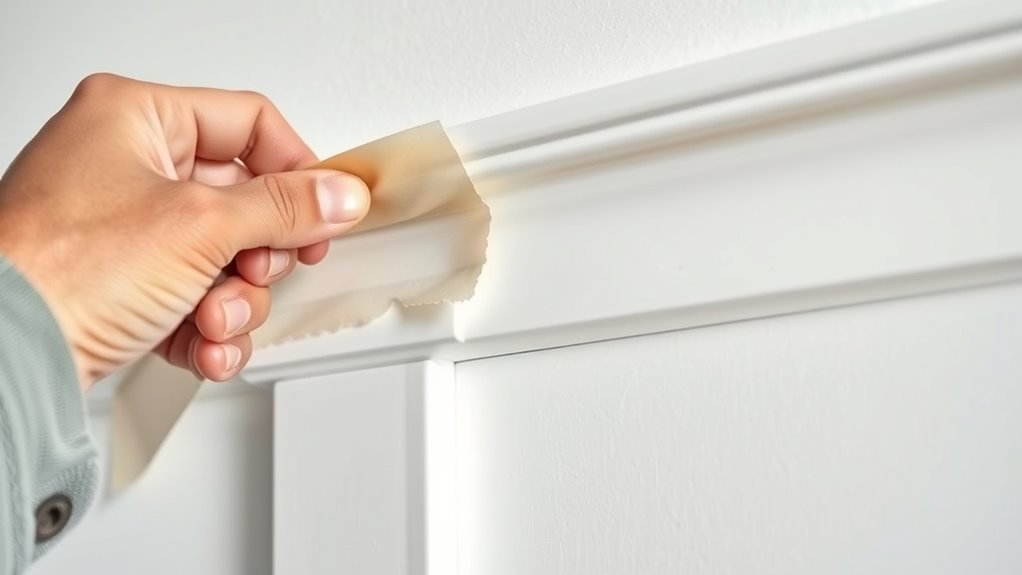
Have you ever pulled off masking tape too early or too late and ended up with uneven or jagged lines? The key is to peel the tape at the right moment. Wait about 20 minutes after applying caulk before you peel, ensuring it’s still slightly damp. This prevents pulling away dried caulk or paint, which can ruin your clean lines. When ready, peel the tape at a 45-degree angle to minimize damage to the fresh edge. Use a gentle, steady pull to avoid jagged or uneven lines. Remember, if you wait too long and the caulk cures completely, peeling can cause peeling or uneven edges. Timing is everything—peel too early or too late, and perfection is hard to achieve.
Painting Over Caulk for a Seamless Finish
Achieving a seamless finish when painting over caulk hinges on applying the right techniques. First, use a high-quality, paintable caulk like Alex Fast Dry for a smooth surface. Allow it to dry completely—about 20 minutes—before painting to avoid smudging or peeling. To create a seamless connection, use painter’s tape along the edges, removing it while the caulk is still slightly wet. When painting, opt for semi-gloss or gloss paint and apply with a fine, angled brush for precision. Before painting, smooth the caulk with a wet finger or smoothing tool to guarantee an even surface that blends effortlessly with the trim. These steps help you achieve a professional look with minimal effort and a flawless, seamless connection.
Handling Complex Corners and Molding Profiles
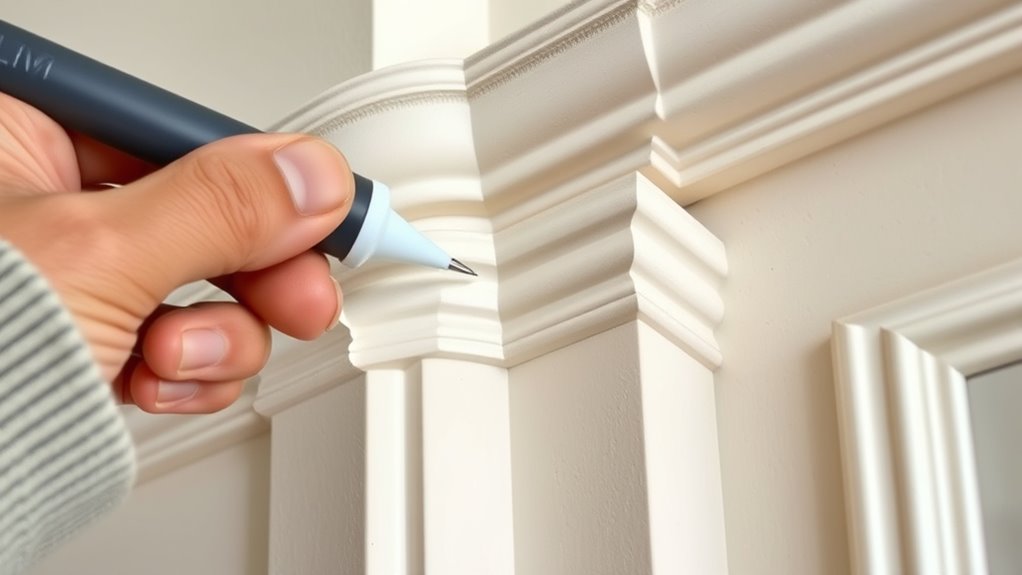
Handling complex corners and molding profiles requires careful preparation to make certain crisp, clean lines. Start by tracing the crown molding profiles onto wax paper with a marker, then cut out the pattern to create a custom masking template. Apply this template along intricate contours to guarantee precise, sharp paint lines. For return ends, carefully trace the profile to ensure a perfect fit and clean edge. When working on complex profiles, secure the masking firmly to prevent shifting during painting. This step is crucial to avoid smudges or uneven lines. Remember, removing the masking template while the paint or caulk is still slightly wet helps preserve crisp, professional-looking edges. Proper masking is essential for achieving flawless corners and molding profiles.
Final Inspection and Touch-Ups for a Professional Look

Once the caulk has fully dried, it’s time to inspect your work for any imperfections. Conduct a thorough final inspection in good lighting, checking that all seams are smooth, well-defined, and consistent with the surrounding surface. Look for gaps, uneven beads, or missed spots that may need touch-ups. Use a small, sharp tool or fine brush to precisely apply additional caulk or paint to address any flaws, ensuring a seamless finish. Remove any excess caulk or paint smudges immediately with a damp cloth to keep the surface clean. A careful inspection and strategic touch-ups help you achieve a professional look, making your trim appear flawless and polished. Taking these final steps guarantees your work looks expertly finished.
Frequently Asked Questions
Is It Better to Caulk Trim Before or After Painting?
When deciding whether to caulk trim before or after painting, it depends on your goals. Caulking before painting gives you a smooth, professional look by hiding gaps and joints, but it requires careful masking. Caulking after allows for easy touch-ups and fixing imperfections without disturbing the paint. Generally, caulking first and then painting over the dried caulk offers the best finish, ensuring clean, sharp lines.
How to Caulk Trim Perfectly?
To caulk trim perfectly, start by cutting the tip at a 45-degree angle for control. Hold the caulking gun at the same angle, applying steady pressure as you move smoothly along the joint. Immediately smooth the bead with a wet finger or tool for an even finish. Keep the bead consistent in size and speed, and remove masking tape while the caulk’s still slightly wet for sharp, clean lines.
Do Professional Painters Do Caulking?
You might think caulking is just a simple task, but professional painters elevate it to an art form. They don’t just do caulking—they perfect it, transforming rough joints into flawless, invisible seams. With expert precision, they select the best caulks, prepare surfaces meticulously, and apply with skill that makes the finish look seamless. Yes, professional painters do caulking—it’s a core part of their craft, ensuring durability and beauty.
What Is the Best Paintable Caulk for Interior Trim?
For interior trim, you want a paintable caulk that sticks well and smooths easily. Look for latex or latex-silicone hybrid options like Painter’s Pro Siliconized Acrylic Caulk, which offers good adhesion and ease of use. High-quality choices like GE Silicone II also work well, providing durability and flexibility. Avoid 100% silicone caulks, as they don’t accept paint properly. Always pick a caulk labeled “paintable” for a seamless, professional finish.
Conclusion
With patience and practice, mastering painter’s caulk becomes second nature, turning rough edges into smooth, seamless progressions. Think of it as sculpting with liquid, where your careful hand shapes perfection from chaos. When you follow these steps, each project transforms into a work of art, showcasing your craftsmanship. Remember, every flawless finish starts with attention to detail—your dedication will make your trim look like it belongs in a gallery, not just your home.