
Discover how Jane transformed her space with a vibrant DIY bookshelf project that combines bold colors, textured materials, and clever storage solutions. She carefully measured her wall, selected pine and veneer for warmth, and added floating shelves supported by hidden brackets. Jane also used wallpaper and LED lights for an eye-catching display. If you explore further, you’ll find tips and ideas to create your own stylish and practical bookshelf that stands out.
Key Takeaways
- Jane designed a vibrant, custom bookshelf using pine, veneer, and bold paint for a striking visual impact.
- She installed floating shelves with hidden supports, ensuring stability and maximizing space.
- The project included decorative diamond-shaped shelves and wallpaper backs for added style.
- Jane incorporated LED strip lighting to highlight her book collection and enhance the aesthetic.
- Her DIY approach kept costs under $150, repurposing materials and tools for long-term reuse.
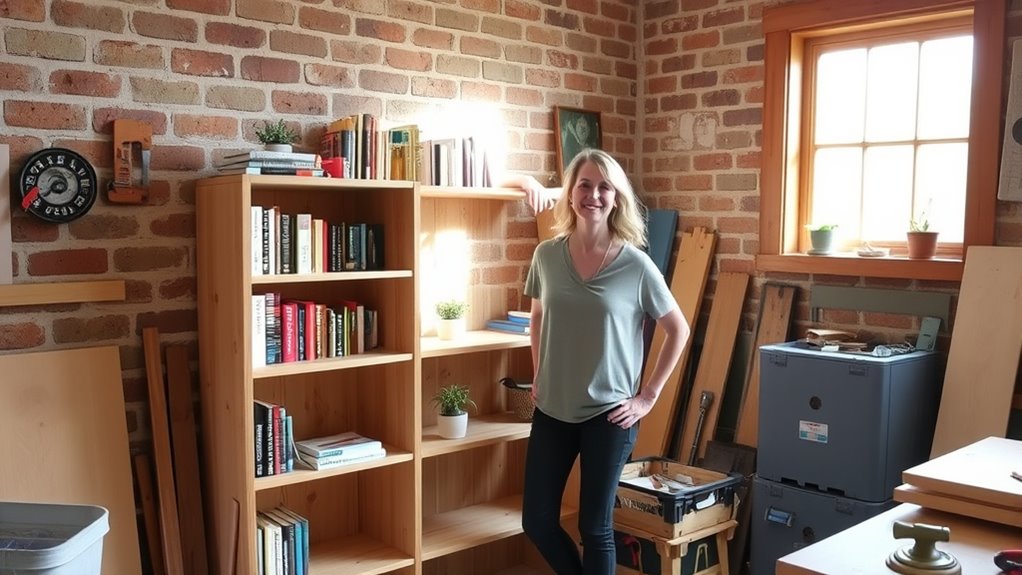
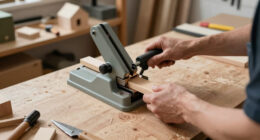
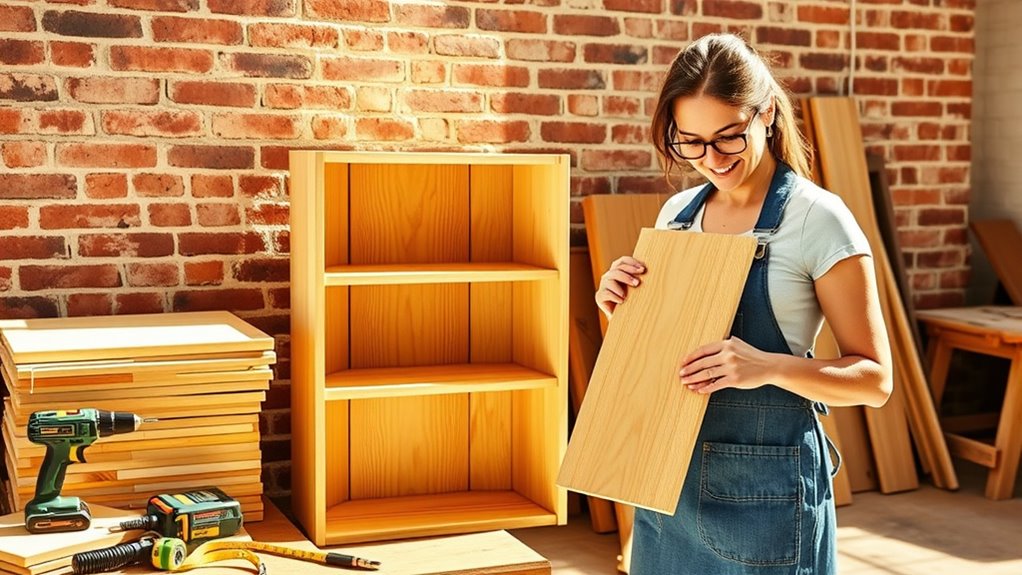
Have you ever wondered how DIY enthusiasts transform simple spaces with custom bookshelves? Jane’s project is a perfect example of how you can turn a plain wall into a functional and stylish focal point. She started by planning her design, measuring her wall carefully to determine the right shelf depth—around 10 inches—and height, based on her collection of hardcover books. When NOT To Makeover a Yard Sale Find, she knew that choosing the right materials and planning ahead would make her project more successful. With the basics in mind, she gathered materials like pine and a few sheets of veneer to add texture and contrast. Jane knew that using common tools like a miter saw, nail gun, level, and clamps would make the process smoother. She also picked up paint supplies to match her trim, opting for a bold color that would make the shelves pop against the wall. Jane’s approach combined practicality with creativity. She chose to install floating shelves supported by hidden brackets, maximizing space without sacrificing style. To add visual interest, she applied wallpaper to the backs of her shelves, creating a vibrant backdrop that makes her books and decor stand out. Using removable wallpaper made the project easier and allowed her to update the look later if she wanted. She also incorporated a faux finish by applying adhesive wood paper to the shelf backs, providing a warm, textured feel that mimics real wood veneer. She researched design inspiration to help choose color schemes and layout ideas that complemented her existing decor. For a modern touch, Jane integrated shallow diamond-shaped shelves, perfect for displaying decorative objects alongside her books. Throughout her project, Jane focused on support and stability. She used a stud finder to locate wall studs for attaching her shelves securely, reinforcing with blocking where necessary. She worked over a couple of days, allowing paint and wallpaper to dry thoroughly between steps, which helped her achieve a polished finish. Budget-wise, she kept costs low by repurposing stock cabinets and using inexpensive materials, bringing her project under $150. She also invested in a few tools, including a saw and drill, which she now plans to reuse for future projects. Jane’s design balances functionality and aesthetics. She spaced her shelves about 14 inches apart, allowing for both horizontal and vertical book storage, and added small LED strip lights to highlight her collection. Her shelves are low enough to be kid-friendly, with durable trim paint to withstand wear. Additionally, researching AI content creation tools helped her come up with engaging descriptions to share her project online and inspire others. Focusing on market trends enabled her to select colors and styles that are currently popular, ensuring her shelves stay stylish for years to come.

Starunder 6 Pack Floating Shelf Brackets, 6 Inch Heavy Duty Industrial Shelf Bracket, Black Metal L Brackets for Shelves Support DIY(1/5 Inch Thicked)
Real Hidden Brackests: These black shelf brackets have no lips and can be truly hidden. The base can…
As an affiliate, we earn on qualifying purchases.
As an affiliate, we earn on qualifying purchases.
Conclusion
Your DIY bookshelf project shows that even in a world filled with sleek, mass-produced furniture, a personal touch creates something truly special. While store-bought pieces may be uniform and predictable, your handmade shelves reflect creativity and effort, making your space uniquely yours. It’s a reminder that sometimes, the most charming designs come from hands-on projects—proving that imperfections can become the very thing that makes your home feel warm and authentic.

NEXTIPS Book Nook Vintage Library Wooden DIY Kit – 3D Bookshelf Model with LED Lighting, Classic Study Room Decor for Adults
Premium Wood Material – Made from high-quality, eco-friendly wood with smooth edges for safe and enjoyable assembly.
As an affiliate, we earn on qualifying purchases.
As an affiliate, we earn on qualifying purchases.
Ismoon Peel and Stick Wallpaper Floral Vintage Stick on Wall Paper Beige French Textured Contact Paper for Cabinet Removable Self Adhesive Wallpaper Vinyl Roll Shelf Deco, 17.3×78.7in
Design: Inspired by French gardens, exuding elegance and romance, a soft beige background features light brown floral branches…
As an affiliate, we earn on qualifying purchases.
As an affiliate, we earn on qualifying purchases.

Edge Supply Walnut Wood Veneer Sheet Flat Cut, 24” x 48”, Non Glued, 10 mil Paper Back, “A” Grade Veneer Face – Easy to Apply Oak Veneer Sheet – Veneer Sheets for Restoration of Furniture
REAL WOOD VENEER SHEET – ready to stain, real wood veneer sheets which are ideal for using when…
As an affiliate, we earn on qualifying purchases.
As an affiliate, we earn on qualifying purchases.