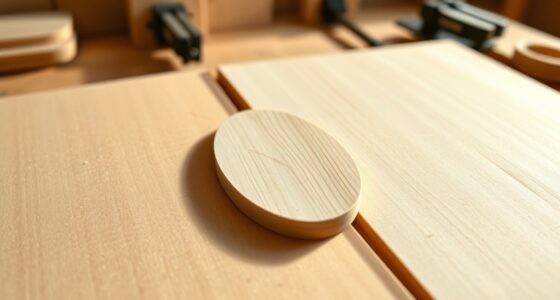

To create decorative edge patterns with box and finger joints, start by carefully measuring and shaping each finger to guarantee consistent spacing. Experiment with unique patterns such as zigzags or curved contours to add visual interest. Incorporate contrasting inlays or follow intricate patterns within the fingers to enhance aesthetics. Precise routing and alignment are vital for a seamless look, and you can achieve stunning effects by combining structural accuracy with creative design—discover more ways to elevate your woodworking next.
Key Takeaways
- Plan and select consistent finger and gap sizes to form balanced, symmetrical decorative patterns.
- Incorporate inlays within or between fingers to add contrasting textures and visual interest.
- Use templates or jigs to ensure precise, repeatable pattern shapes like zigzags or curves.
- Align pattern elements carefully during assembly for seamless, professional-looking decorative edges.
- Finish with fine sanding and contrasting finishes to highlight the decorative edge patterns effectively.

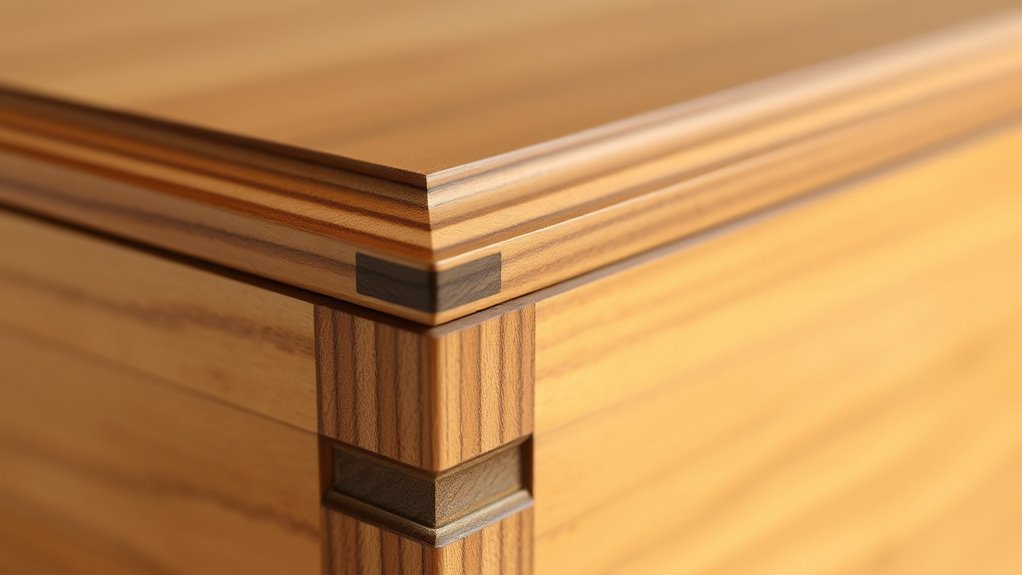
Have you ever wondered how craftsmen create strong, seamless joints in woodworking? It all starts with precise joint alignment. When working with box and finger joints, getting the parts perfectly aligned is essential. Misaligned joints can weaken the structure and ruin the visual appeal. To achieve flawless joint alignment, you need to carefully measure and cut each piece, ensuring the fingers and slots match perfectly. Using jigs or guides can help hold pieces steady during cutting, reducing the chance of errors. Proper joint alignment not only enhances the strength of the joint but also creates a clean, professional appearance, which is especially important when adding decorative inlays.
Precise joint alignment ensures strong, seamless, and professional-looking box and finger joints.
Speaking of decorative inlays, they are often used to elevate the aesthetic of boxes and furniture with finger joints. Incorporating decorative inlays into the joint areas can transform a simple, functional design into an eye-catching piece. You can embed contrasting woods, metal, or other materials into the joint to create intricate patterns or borders. When doing this, it’s vital to plan your inlay placement in advance, so it complements the joint’s structure without compromising its integrity. The inlays should be flush with the surface for a seamless look, which requires precise routing or carving. This attention to detail enhances the visual appeal and showcases your craftsmanship.
Creating decorative edge patterns with box and finger joints also involves choosing the right spacing and pattern for the fingers. You might opt for a traditional straight pattern or experiment with zigzags and curves for a more dynamic look. The key is consistency; uniform fingers and spaces give the joint a balanced, symmetrical appearance. When combined with decorative inlays, these patterns become even more striking. The inlays can follow the contours of the pattern or serve as accents within the fingers, adding depth and richness to the design. The careful alignment of each element ensures the pattern looks intentional and professional.
In addition to aesthetics, these joints serve as a proof of your skill. The precision involved in joint alignment and the creative use of decorative inlays demonstrate your mastery of woodworking techniques. As you work, always double-check measurements, test fits, and refine your cuts. This diligence guarantees that your box or piece not only stands firm but also stands out as a work of art. Moreover, understanding the importance of color accuracy in your finishes can help ensure that the visual aspects of your project are consistent and vivid. Ultimately, mastering box and finger joints allows you to combine structural strength with decorative elegance, creating pieces that are both durable and visually appealing.
Frequently Asked Questions
What Types of Wood Are Best for Decorative Joints?
You should choose softwoods like pine or cedar, or hardwoods such as maple, cherry, or walnut for decorative joints. These types of wood are suitable choices because they’re easy to work with and hold detail well. Avoid very hard or oily woods like teak or ipe, which can be challenging to cut precisely. Picking the right types of wood guarantees your decorative joints look clean and professional.
How Can I Customize Joint Patterns for Unique Designs?
Imagine your woodworking project as a canvas, waiting for engraved joint designs to bring it to life. You can customize joint patterns by experimenting with alternating pattern techniques, creating intricate visual effects. Mix different shapes and sizes, or add engraved details within the joints, to craft unique, eye-catching designs. Let your creativity flow, and transform simple joints into stunning focal points that showcase your personal style.
Are There Tools Specifically for Creating Decorative Edge Patterns?
Yes, there are tools specifically for creating decorative edge patterns. You can use routers with specialized bits for intricate routing techniques, which allow you to craft unique designs. Additionally, various jigs and templates help you achieve consistent joint design options, enhancing your decorative edge work. These tools enable you to experiment with different patterns and styles, giving your woodworking projects a personalized and polished look.
How Do Decorative Joints Affect the Strength of a Box?
Decorative joints can enhance the aesthetic impact of your box, but they might slightly diminish joint durability if not properly crafted. You’ll want to carefully select your joint type to balance beauty and strength. For example, finger joints offer good durability, while intricate decorative patterns may introduce weak points. Proper craftsmanship ensures your box remains sturdy while showcasing eye-catching details, so take your time to optimize both strength and visual appeal.
Can Decorative Joints Be Used in Outdoor Woodworking Projects?
Like a seasoned sailor steering stormy seas, you can definitely use decorative joints in outdoor projects. To guarantee weather resistance and material durability, choose weather-resistant woods like cedar or treated lumber. Proper sealing and finishing protect your joints from moisture and decay. With the right materials and care, decorative joints add beauty and strength, making your outdoor woodworking both functional and visually appealing, standing the test of time against the elements.
Conclusion
You now see how box and finger joints can transform simple edges into stunning patterns. Did you know that properly crafted finger joints can be up to 50% stronger than traditional box joints? This means your projects not only look beautiful but also last longer. So, take your woodworking skills to the next level and experiment with these decorative joints. With patience and practice, you’ll create pieces that are both functional and visually mesmerizing.