To build and reinforce a butt joint, guarantee precise alignment of your pieces for strength and appearance. Use metal brackets, screws, or dowels to reinforce the connection, making it sturdy while maintaining a clean look. Sand and fill gaps to improve aesthetics, and choose reinforcement methods based on the load your joint needs to bear. With proper techniques, your joint will be durable and attractive—continue exploring to master more effective reinforcement strategies.
Key Takeaways
- Ensure precise alignment of pieces for a strong, visually appealing butt joint.
- Use reinforcement methods like metal brackets, dowels, or screws to enhance strength and stability.
- Apply finishing techniques such as sanding, fillers, or veneer to hide gaps and improve appearance.
- Select reinforcement materials based on the joint’s load requirements and material type.
- Balance structural durability with aesthetic appeal by careful placement of reinforcements and attention to detail.

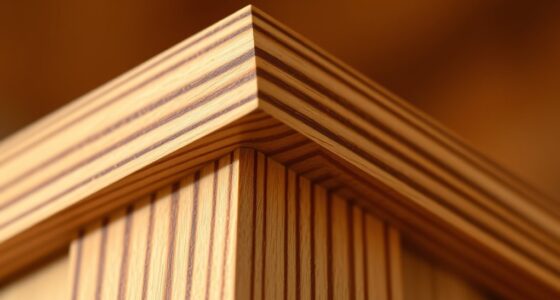
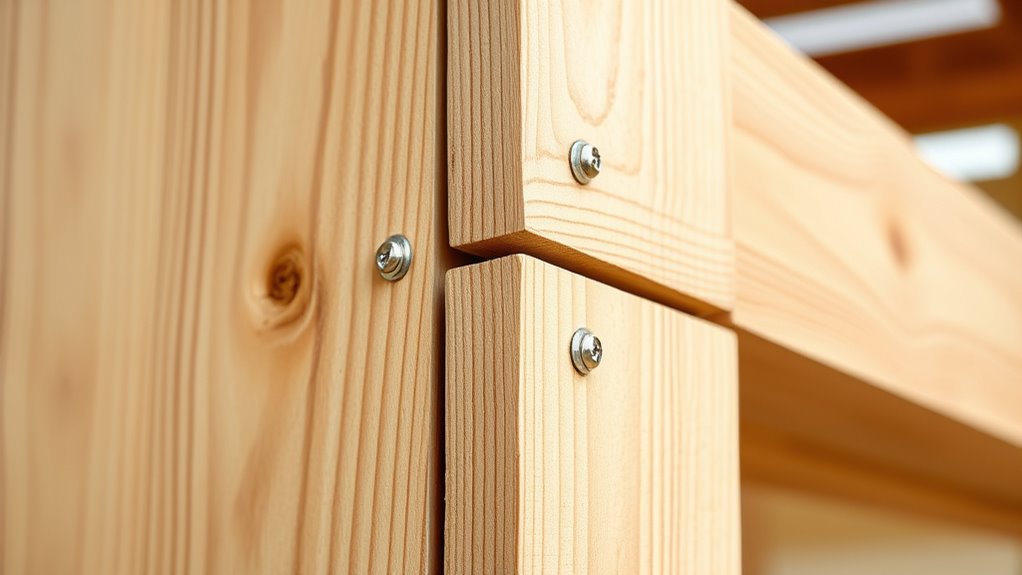
Have you ever wondered how two pieces of material are joined seamlessly? When it comes to butt joints, the goal is to create a connection that’s both sturdy and visually appealing. These joints are straightforward—simply aligning two pieces end-to-end or face-to-face—but guaranteeing they stay secure and look neat takes some know-how. Reinforcement techniques are essential here, especially if the joint will bear weight or experience stress. You might consider adding metal brackets, dowels, or screws to strengthen the connection. These methods not only improve durability but can also help distribute forces evenly across the joint, preventing potential weak spots. However, it’s equally important to think about aesthetic considerations. A well-executed butt joint should look clean and professional; visible imperfections can detract from the overall appearance of your project. To achieve that, you can use joint fillers, sanding, or even veneer to hide gaps and rough edges. When reinforcing, choose your materials wisely—metal fasteners, for example, can be hidden beneath surface finishes or painted to blend seamlessly with the surrounding material. This way, you reinforce the joint without compromising the visual integrity of your work. The choice of reinforcement techniques depends on the specific application and the materials you’re working with. For example, wooden butt joints often benefit from glue combined with nails or screws, which provide both adhesion and mechanical strength. In contrast, metal or plastic joints might rely more on welding or mechanical fasteners. Regardless of the method, proper alignment is vital. Misaligned pieces can compromise both strength and aesthetics, so take your time to position everything accurately before securing it. Another consideration is the type of load the joint will bear. For structural projects, extra reinforcement is necessary, while decorative pieces might only require minimal reinforcement to maintain a clean look. Always remember that the aesthetic considerations should complement your reinforcement choices. Sometimes, a slight gap or seam is unavoidable, but you can minimize its visual impact through careful sanding, filling, and finishing. In the end, a successful butt joint balances strength and appearance. By thoughtfully applying reinforcement techniques and paying attention to aesthetic details, you can create connections that are both durable and visually pleasing. Whether you’re building furniture, framing, or craft projects, understanding how to reinforce butt joints effectively ensures your work stands the test of time while looking great.

Heavy Duty Workbench Bracket Kit – Set of 8 3-Way Right Angle Steel Corner Brackets with Screws for 2×4 Wood, Ideal for DIY Custom Workbench, Woodworking Tables and Work Benches for Garage
Workbench Bracket Kit – This heavy-duty workbench bracket kit includes 8 three-way supports and 64 screws. All components…
As an affiliate, we earn on qualifying purchases.
As an affiliate, we earn on qualifying purchases.
Frequently Asked Questions
What Are the Best Adhesives for Butt Joints?
For butt joints, the best adhesives are epoxy, polyurethane, and cyanoacrylate glues because they offer high bonding strength. Epoxy provides a strong, durable bond ideal for heavy loads. Polyurethane is flexible and good for surfaces exposed to moisture. Cyanoacrylate, or super glue, works well for quick fixes on small, non-structural joints. Choose the adhesive type based on the materials you’re bonding and the strength required for your project.
How Do Temperature Changes Affect Butt Joint Strength?
Imagine a rubber band stretching in the summer heat—that’s thermal expansion at work. Temperature changes can weaken your butt joint because different materials expand or contract unevenly, affecting material compatibility and joint strength. When it gets hot, the joint may loosen; in cold, it could crack. To prevent this, choose adhesives and materials designed to tolerate temperature fluctuations, ensuring your connection stays strong regardless of climate shifts.
Can Butt Joints Be Used in Load-Bearing Structures?
You can use butt joints in load-bearing structures, but you should be aware of their load-bearing limitations. They may not be ideal for heavy loads unless reinforced properly, such as with additional fasteners or welding. To guarantee structural integrity, it’s essential to evaluate the joint’s design and the materials used. When used correctly and reinforced, butt joints can contribute to stable, safe load-bearing structures.
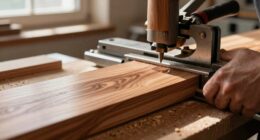
What Tools Are Essential for Precise Butt Joint Assembly?
Imagine a perfect fit—your tools make it happen. You’ll need a measuring tape or combination square for measurement accuracy, guaranteeing your joint is precise. A clamps or a jig helps maintain joint alignment, preventing shifting during assembly. A sharp pencil marks cut lines clearly, while a square ensures right angles. These essential tools work together, turning a simple butt joint into a sturdy, well-aligned connection you can rely on.
How Long Does It Take for Glued Butt Joints to Cure?
Typically, glued butt joints take about 24 hours to fully cure, but curing time can vary depending on the glue type and environmental conditions. You should allow sufficient time for the glue to dry completely, ensuring a strong bond. Avoid stressing the joint during this period, and check the manufacturer’s instructions for specific drying and curing times. Patience guarantees a durable, secure connection with your butt joints.

8 Values Wood Dowels Kit 1/4 3/8 5/16 Inch Fluted Wooden Dowel Pins Pegs Hardware Pins Fluted Wood Dowels for Furniture Woodworking DIY Crafts (Pack of 110Pcs)
Fluted Wooden Dowel Set – Includes 1/4 x 1-3/16Inch & 1/4 x 1-1/2Inch & 1/4 x 2Inch &…
As an affiliate, we earn on qualifying purchases.
As an affiliate, we earn on qualifying purchases.
Conclusion
While some might think butt joints are too simple for strong connections, they can actually be quite durable when properly reinforced. Don’t overlook their usefulness in many projects—just make certain you use the right adhesive or fasteners. With proper technique, these joints provide reliable strength without complicated methods. So, next time you’re building, remember that even basic joints like butt joints, if done right, can serve your needs perfectly.

ANPTGHT Self Centering Doweling Jig Kit Drill Guide Bushings Set Wood Doweling Jig Woodworking Joints Tools for Straight Holes (Blue)
【Drill-hole sizes】1/4-Inch, 5/16-Inch, 3/8-Inch, 7/16-Inch and 1/2-Inch, suitable for creating different wood pin joints
As an affiliate, we earn on qualifying purchases.
As an affiliate, we earn on qualifying purchases.

Gorilla All Purpose Wood Filler, Natural Finish, 16 Ounce Tub (Pack of 1) – Water Resistant for Indoor or Outdoor Projects and Repairs
Gorilla tough: Gorilla Wood Filler is the go-to product for strong water resistant repairs on cracks, gouges and…
As an affiliate, we earn on qualifying purchases.
As an affiliate, we earn on qualifying purchases.