
To sand veneer safely, start with a medium grit like 120 to smooth imperfections, then switch to finer grits such as 220 for a polished finish. Use backing pads to evenly support the abrasive paper and prevent uneven spots, especially over contoured surfaces. Keep your strokes steady, overlapping, and gentle to avoid stop marks and gouges. Proper grit progression and technique help achieve a flawless surface—continue to discover tips for the best results.
Key Takeaways
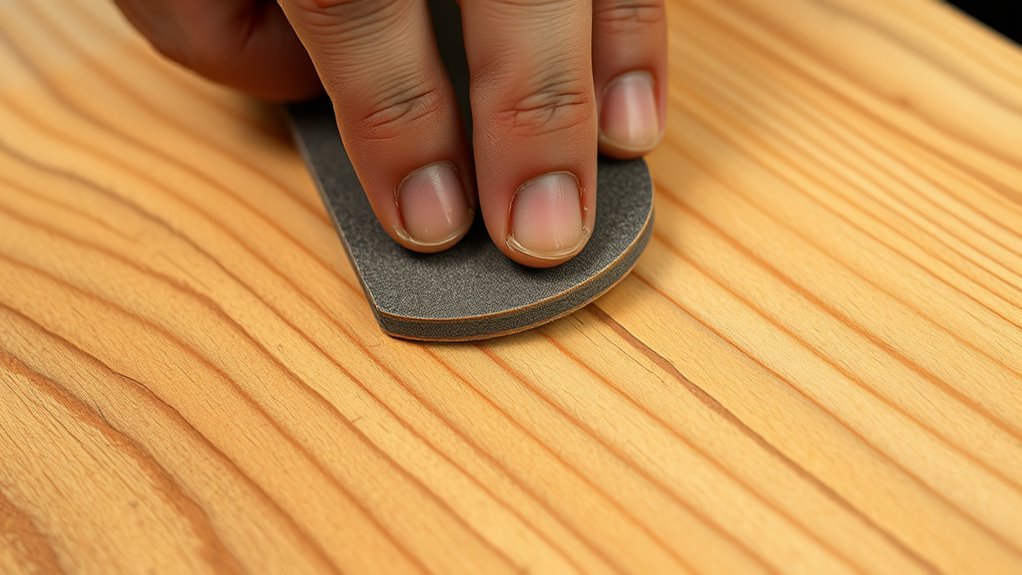
- Use a backing pad to support abrasive paper, ensuring even pressure and preventing gouges on the veneer surface.
- Start with medium grit (120) and gradually move to finer grits (220+) for a smooth, professional finish.
- Sand with the grain and maintain steady, overlapping strokes to avoid stop marks and surface scratches.
- Attach a dust collection system or HEPA filter vacuum to minimize airborne veneer dust and protect respiratory health.
- Apply light, consistent pressure and regularly check your work to prevent gouges and achieve a flawless, even surface.
Sanding veneer can enhance the appearance of your project, but it’s important to do so safely to prevent damage and health risks. One of the most critical aspects of safe veneer sanding is managing dust. Veneer dust is fine and lightweight, easily becoming airborne and inhaled, which can pose serious respiratory hazards. To protect yourself, always use a dust collection system or attach a high-efficiency particulate air (HEPA) filter vacuum to your sander. This not only keeps your workspace cleaner but also considerably reduces your exposure to harmful dust particles. Wearing a dust mask or respirator is equally essential, especially if you’re sanding for extended periods or working in a less-ventilated area. Proper dust control isn’t just about health; it also improves visibility and precision during sanding, making your work more effective.
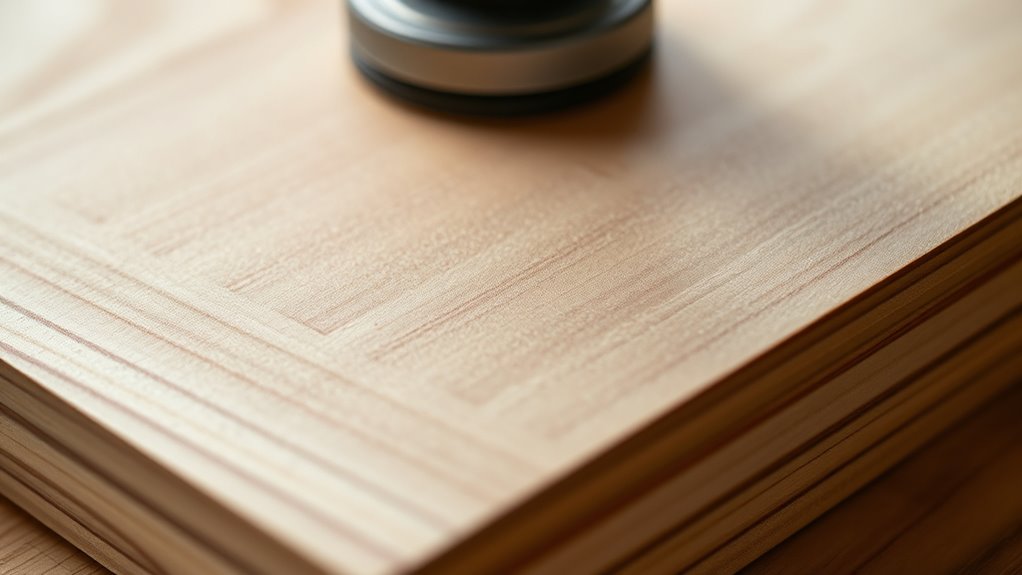
When it comes to sanding techniques, your goal should be to achieve a smooth, even surface while preserving the veneer’s integrity. Start with a medium grit, such as 120, to gently remove any imperfections or rough spots. Always sand with the grain of the veneer to prevent scratches and uneven marks. Use light, consistent pressure—pressing too hard can gouge the veneer or create uneven surfaces. As you progress, switch to finer grits like 220 or higher for a polished finish. Remember to regularly check your work for stop marks—those tiny scratches or uneven spots caused by uneven sanding passes. These can be minimized by maintaining a steady pace and overlapping your strokes slightly, ensuring even coverage.
Backers, or sanding pads that support your abrasive paper, are essential tools in achieving a flawless finish. Using a backing pad helps distribute pressure evenly, reducing the risk of creating uneven spots or gouges. For veneer, flexible backing pads work best as they contour to the surface, preventing flat spots and ensuring uniform sanding. When changing grits, always clean or replace your abrasive to avoid cross-contamination, which can lead to scratches. Additionally, take your time with each grit change, gradually refining the surface rather than rushing through the process. This careful approach results in a more professional appearance and reduces the likelihood of damaging the veneer.

10 Foot Long Dust Collection Power Tool Hose Kit with 8 Attachments for Multiple Types/Brands of Power Tools and Work Shop Vacuums Featuring Sili Flex Fit Fittings (Hose w/ 8 Fittings)
- Flexible Silicone Fittings: Stretchable silicone for easy fitting
- Long Dust Collection Hose: 10-foot hose for extensive reach
- Universal Compatibility: Connects to various tools and vacuums
As an affiliate, we earn on qualifying purchases.
As an affiliate, we earn on qualifying purchases.
Frequently Asked Questions
What Types of Sandpaper Are Best for Veneer Finishing?
For veneer finishing, you should choose fine grit sandpaper like 220 to 320 for smooth results. Start with medium grits, such as 150, if you need to remove imperfections, then move to finer grits for polishing. Use abrasive pads for delicate areas. Proper grit selection guarantees you don’t damage the veneer, and abrasive pads help achieve a flawless finish without gouging. Always sand lightly and evenly to protect the veneer surface.
How Do I Prevent Sanding Marks on Delicate Veneer Surfaces?
To prevent sanding marks on delicate veneer, always follow the grain direction, moving your sander smoothly and evenly. Use light sanding pressure to avoid gouging the surface, and switch to finer grits gradually for a smooth finish. Keep the sander moving constantly, and don’t stay in one spot too long. This technique helps you achieve a flawless, mark-free veneer surface without damaging the delicate material.
Can I Use Power Sanders on Veneer Safely?
Yes, you can use power sanders on veneer safely if you follow proper dust control and sanding techniques. Use a low grit to start, and keep the sander moving to prevent gouging. Always wear a dust mask and work in a well-ventilated area to protect yourself from dust. Light pressure and steady motion help avoid sanding marks, ensuring a smooth, professional finish on your veneer surface.
What Are Common Mistakes When Sanding Veneer?
Don’t bite off more than you can chew when sanding veneer; rushing can cause damage. A common mistake is ignoring grain direction, which can lead to scratches or uneven surfaces. You also need to think about veneer thickness—using too much pressure or a too-aggressive grit can gouge or sand through it. Take your time, stay aligned with the grain, and use gentle strokes to avoid costly mistakes.
How Do I Repair Sanding Mistakes on Veneer?
To repair sanding mistakes on veneer, start by cleaning the area and lightly sanding with fine grit paper to smooth imperfections. If the damage is deep, apply a matching sanding sealer to blend the repair. Keep in mind the veneer’s thickness to avoid over-sanding, which can cause damage. Always sand gently and gradually, ensuring you don’t remove too much veneer, and finish with a compatible finish for a seamless look.
Conclusion
Remember, sanding veneer carefully guarantees your project turns out flawless, just like a master craftsman from the days of hand-carved furniture. Use the right grits, backers, and stop marks to avoid scratches and gouges. Keep your work steady, and don’t rush—patience is key. With a gentle touch, you’ll be creating beautiful, smooth surfaces that look like they belong in a palace. Stay vigilant, and your work will stand the test of time, just like a well-made tapestry.