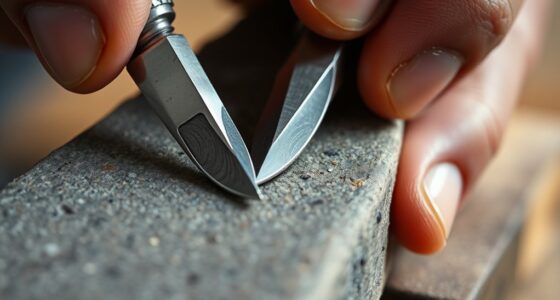

When carving in the round, choosing the right tools for each stage is key. Start with larger gouges and rasps to quickly rough out the basic shape and focus on controlling your cuts. Use finer chisels and carving knives for blocking out details and adding textures. Proper tool selection helps you maintain control and achieve realistic results. Keep refining your technique as you progress, and you’ll discover how each step brings your sculpture to life.
Key Takeaways
- Use large gouges and rasps for initial roughing to quickly remove material and establish the sculpture’s basic form.
- Match finer tools like detail chisels for refining shapes and adding texture during the finishing stage.
- Focus on blocking out major shapes and planes early to create a solid foundation before detailed work.
- Employ deliberate, controlled movements during blocking out to avoid mistakes and maintain proportion.
- Transition smoothly from roughing to finishing tools to enhance surface details and overall sculpture realism.
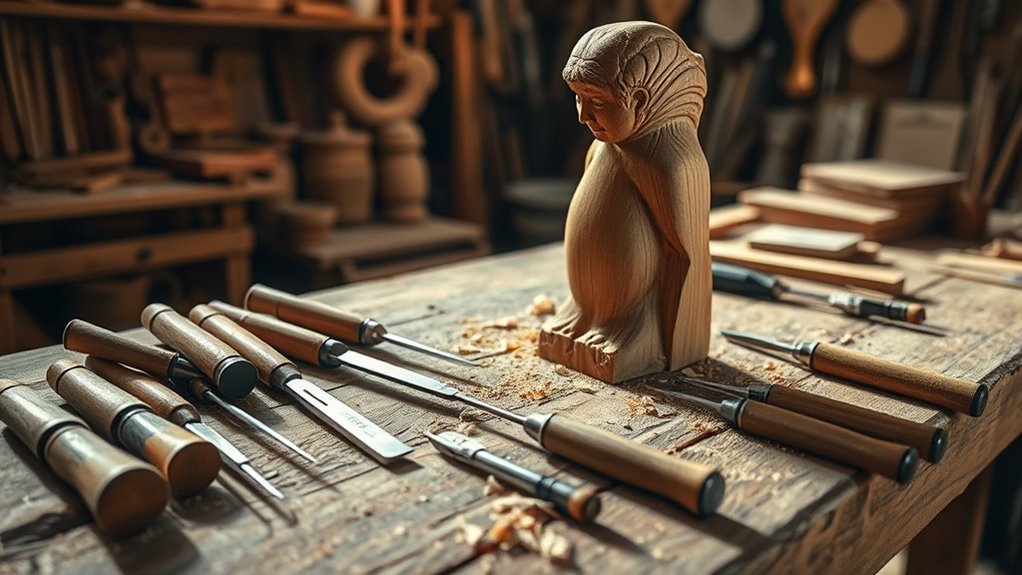
Ever wondered what makes carving in the round so mesmerizing? It’s the way you can transform a simple block of wood into a lifelike sculpture, revealing intricate texture details that invite viewers to explore every curve and contour. To achieve this, you need to choose the right tools and master effective blocking out techniques. Your tools set the foundation for how smoothly and accurately you can carve, so selecting the appropriate gouges, chisels, and knives is essential. For roughing out the initial shape, larger gouges and rasps work best—they help remove material quickly while maintaining control. As you progress, finer tools like detail chisels and carving knives allow you to refine features and add delicate texture details. The key is to switch tools as needed, matching their size and shape to the work at each stage. Additionally, understanding the different wax types and their properties can influence how your tools interact with the material, especially when working with materials like beeswax or soy-based waxes.
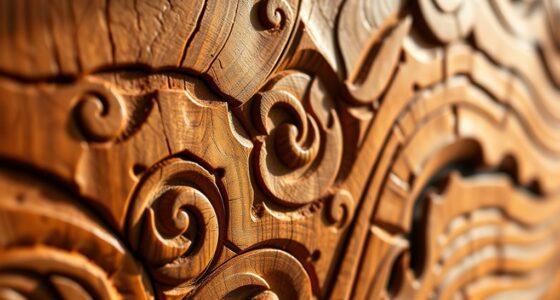
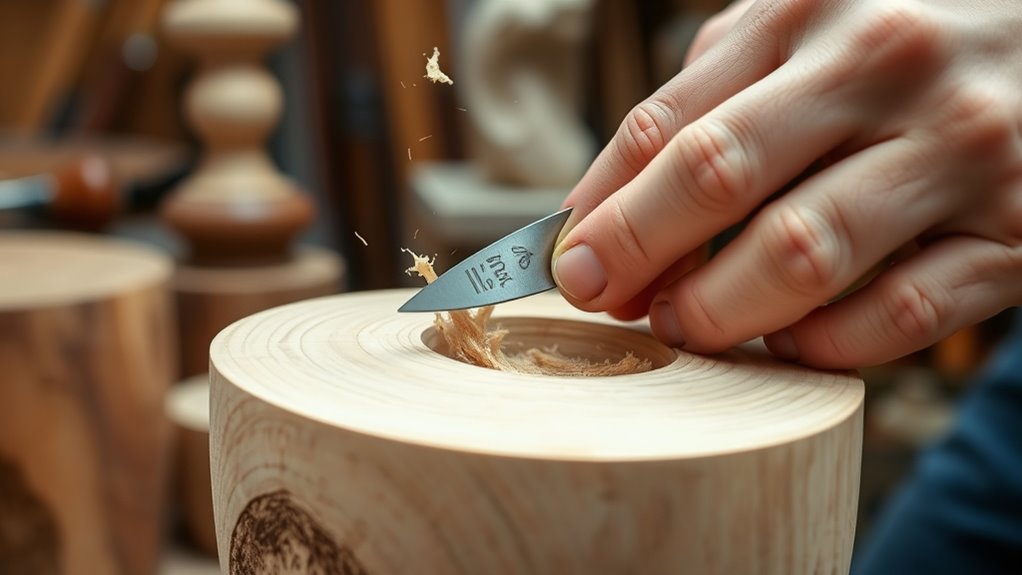
When you start blocking out your sculpture, your goal is to establish the overall form, focusing on big shapes and proportions. Think of this phase as giving your sculpture its skeleton—roughly defining the major planes and curves. Don’t worry about perfect details yet; instead, concentrate on removing excess material and creating a solid foundation. Using a combination of roughing and shaping tools, you can gradually bring the piece into a recognizable form. This stage requires patience, as rushing can lead to mistakes or loss of control. Once the main shape is in place, you shift your attention to the finishing techniques that will bring your sculpture to life. Here, you add texture details that give depth and realism—such as fine lines, surface patterns, and subtle textures that mimic natural surfaces. Whether it’s the roughness of bark or the smoothness of skin, these details make your sculpture more engaging.
Finishing techniques involve careful sanding, polishing, and sometimes even the application of stains or paints to enhance texture details further. These techniques help smooth out rough areas or accentuate specific features, adding contrast and visual interest. Remember, the way you approach these finishing steps can dramatically influence the final appearance. A well-executed finish highlights the texture details you painstakingly carved, making your sculpture more engaging. Ultimately, successful carving in the round hinges on how well you combine precise tool selection, thoughtful blocking out, and refined finishing techniques. Each step builds upon the last, culminating in a dynamic piece that captures both form and texture, inviting viewers to experience your craftsmanship firsthand.

LWCUSNJ 12-Piece Wood Carving Chisel Set – CR-V 60 Steel Multi-Shape Edge Gouges Carving tool for Woodworking Beginners and Professionals with Storage Case
- High-Quality Steel Blades: Made from Cr-V 60 steel for durability
- Corrosion-Resistant & Sharp: Maintains sharpness in various conditions
- Ergonomic Walnut-Style Handles: Comfortable, sturdy grip for extended use
As an affiliate, we earn on qualifying purchases.
As an affiliate, we earn on qualifying purchases.
Frequently Asked Questions
What Safety Gear Is Recommended for Carving in the Round?
You should wear protective gear like safety goggles to shield your eyes from flying debris, and a dust mask to prevent inhaling wood particles. Wearing gloves can protect your hands, but guarantee they’re snug to avoid catching in tools. Always follow safety precautions by working in a well-ventilated area and keeping your tools sharp. These measures help prevent injuries and ensure a safer carving experience.
How Do I Maintain and Sharpen My Carving Tools Effectively?
Imagine you’re shaping a delicate sculpture, and your chisel starts to drag. To keep it sharp, regularly perform tool maintenance, like honing with a fine stone or diamond file. Use proper sharpening techniques—maintain the correct angle and apply even pressure. For example, in a woodworking studio, a craftsman sharpens tools daily, ensuring precision and safety. Consistent sharpening preserves edge quality and prolongs your tools’ lifespan.
Which Wood Types Are Best Suited for Detailed Round Carving?
For detailed round carving, choose hardwoods like cherry, maple, or boxwood because their fine, straight grain allows for precise detail and smooth finishes. Softwoods like pine can work but may be harder to control due to their irregular grain, making complex carving more difficult. Always consider the wood grain; a consistent grain helps you achieve cleaner cuts, especially when working on intricate, rounded designs.
How Do I Prevent Wood From Splitting During Carving?
Imagine you’re carving a delicate sculpture and notice tiny cracks forming. To prevent wood from splitting, focus on grain orientation—carve with the grain, not against it. Make certain your wood is properly seasoned to reduce moisture content, which helps maintain stability. For example, in a case study, seasoned hardwood with aligned grain resisted splitting better during detailed work. Always plan your cuts, work slowly, and support weak areas to keep your project intact.
What Are Common Mistakes to Avoid in Initial Carving Stages?
When starting your carving, avoid common mistakes like using a poor tool grip, which can lead to slips or uneven cuts. Don’t carve too deeply too early, as this weakens the wood and causes splits. Keep your tools sharp and controlled, and focus on gradual, shallow cuts. Always plan your carving depth carefully, and work patiently, ensuring each cut is deliberate to prevent mistakes that could ruin your project.
Conclusion
Now that you’ve mastered tool selection and blocking out, your carving in the round will truly come alive. Remember, even the most skilled artisans from the Renaissance would’ve loved a Dremel! Keep experimenting, stay patient, and let your creativity flow. With each carve, you’re bringing your vision to life—just like the great sculptors before you. So grab your tools, embrace the process, and turn your masterpiece into a timeless wonder.