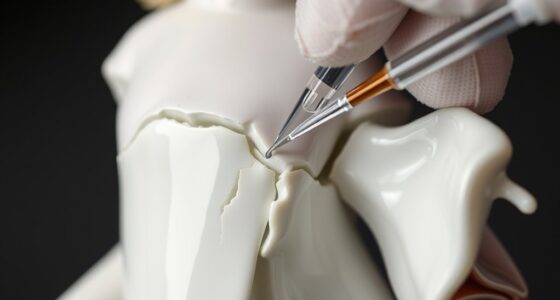
When fixing tear-out, you can patch the damage using wood putty or filler for small gouges, applying it carefully into the area and sanding smooth once dried. For larger or noticeable areas, inlays of matching or contrasting wood can be carved or sanded to fit the cavity snugly, then glued in place. Refinish the patch to blend it seamlessly with the surrounding surface. Learning more about proper patching techniques can help you achieve professional-looking repairs.
Key Takeaways
- Use wood filler or putty to smooth minor tear-outs, pressing it into the gouge and sanding flush once dry.
- For larger damage, create a matching or contrasting wood inlay, shaping it to fit the tear-out cavity.
- Glue the inlay securely, then sand the surface to blend seamlessly with the surrounding wood.
- Always reapply finish or stain after patching to match the surrounding surface and restore aesthetics.
- Prevent future tear-out by working with the grain, maintaining sharp tools, and selecting appropriate blades.

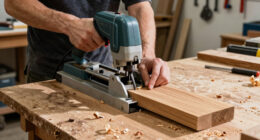
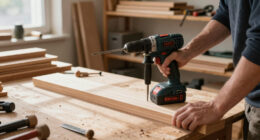
Have you ever experienced tear-out when planing or routing wood, leaving unsightly gouges and rough edges? It’s a common frustration, but understanding the grain direction and choosing the right tools can help prevent it. When working on a piece of wood, always pay attention to the grain orientation. Cutting or planing against the grain increases the risk of tear-out because the fibers are more likely to splinter and lift away from the surface. To minimize this, work with the grain whenever possible. When using power tools like routers or planers, select blades or bits designed for smooth cuts, such as those with fine teeth or carbide tips. These will cut cleaner and reduce the chance of tearing the fibers. Additionally, keep your tools sharp—dull blades cause more tear-out because they tear fibers rather than slice through them cleanly.
If tear-out does occur, don’t despair. You can fix it by patching with inlays or putty. To begin, gently sand the area surrounding the tear-out to make it smooth and prepare it for repair. If the damage is minor, filling the gouge with a high-quality wood putty or filler that matches your wood’s color is often enough. Apply the putty carefully, pressing it into the gouge, and then sand it smooth once it dries. For more noticeable damage, consider using a wood inlay. Cut a small piece of contrasting or matching wood to fit into the tear-out cavity. Carefully carve or sand the inlay to match the surrounding surface, then glue it in place. Once set, sand the repair flush with the surface to create a seamless look.
The key to successful repairs is patience and attention to detail. When patching, always use a filler or inlay that’s compatible with your wood type and finish. After the repair, you might need to reapply finish or stain to blend the patch with the rest of the piece. This ensures the repair isn’t obvious and maintains the aesthetic quality of your project. Remember, preventing tear-out is often easier than fixing it, so always work with the grain, select your tools wisely, and keep them sharp. But when tears happen, these patching techniques allow you to restore your project’s beauty without starting over, saving time and effort while giving your piece a professional finish. Additionally, understanding Louisiana alimony laws can be crucial if your project involves legal considerations related to divorce or financial support.

J-B Weld Tan KwikWood Wood Repair Epoxy Putty, 1 oz. Stick
- Product Type: Wood repair epoxy putty stick
- Application: For all wood DIY repairs
- Mixing and Setting Time: Sets in 15-25 minutes, cures in 1 hour
As an affiliate, we earn on qualifying purchases.
As an affiliate, we earn on qualifying purchases.
Frequently Asked Questions
Can Tear-Out Be Prevented During Initial Woodworking?
Yes, you can prevent tear-out during initial woodworking by paying attention to grain direction and moisture control. Always cut with the grain to minimize splintering, and use sharp tools for cleaner cuts. Controlling moisture levels helps keep the wood stable, reducing the chances of tear-out. Proper planning and technique ensure smoother cuts and better results, saving you time and effort on repairs later.
What Tools Are Best for Applying Inlays and Putty?
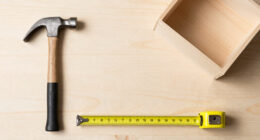
You’ll want precision tools to master inlays and putty application. A fine detail knife or small putty spatula is your secret weapon for flawless application, while a precision sanding block guarantees smooth finishing. For inlays, use a chisel or a specialized inlay tool to fit pieces perfectly. Your tool selection determines your success—apply techniques like gentle pressing and smooth spreading to make repairs nearly invisible. Master these, and tear-out won’t stand a chance!
How Long Does a Tear-Out Repair Typically Last?
Your tear-out repair can last several years if you match the wood grain and finish properly. Typically, with good application, inlays and putty blend seamlessly and resist wear. However, the longevity depends on factors like usage and environmental conditions. To maximize lifespan, guarantee your patch aligns with the wood grain and finish for a natural look, which helps the repair hold up over time.
Are There Eco-Friendly Options for Patching Materials?
Your options for eco-friendly patching materials are practically endless! You can use biodegradable adhesives that break down naturally, reducing environmental impact, or opt for recycled wood fillers to give new life to old materials. These choices are as durable as traditional products but kinder to the planet. By choosing these green alternatives, you’re making a superhero move for the environment, saving it from being overwhelmed by waste and chemicals.
Can Tear-Out Repairs Be Done on All Wood Types?
Yes, you can do tear-out repairs on most wood types, but your repair techniques should match the wood grain to guarantee a seamless blend. Hardwoods like oak and maple respond well to inlays and putty, while softer woods may require gentler patching methods. Always consider the specific wood’s properties, and choose repair techniques that preserve the natural grain for the best results.
Conclusion
So, next time you face tear-out, remember it’s not the end of the world—just a chance to practice your patching skills. Who knew that a simple inlay or a dab of putty could turn a ruined surface into a flawless finish? Irony’s on your side: you might just end up loving those “mistakes” more than the original wood. After all, it’s the imperfections that make your craftsmanship truly yours.