To achieve a mirror-smooth finish on open-pore woods, start by thoroughly sanding the surface with fine grit to remove imperfections. Select a compatible grain filler, press it into the pores with a putty knife or cloth, then wipe away excess before it dries. After drying, lightly sand to ensure a perfectly smooth surface. Mastering these steps allows you to create an even, glossy finish that highlights the wood’s natural beauty—continue exploring to perfect your technique further.
Key Takeaways
- Thoroughly sand the wood surface with fine grit to create a smooth base before applying filler.
- Choose a compatible grain filler suited for your finish type (oil, water, shellac).
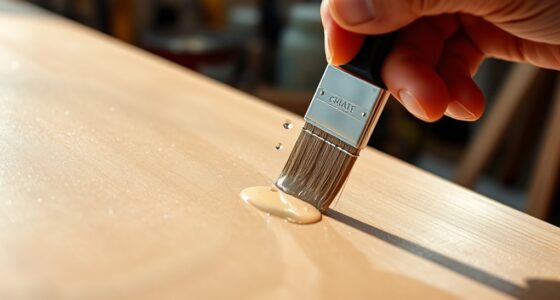
- Apply filler evenly, pressing into pores, then remove excess with a clean cloth for a smooth, complete fill.
- Allow the filler to dry fully, then lightly sand with fine grit to eliminate imperfections.
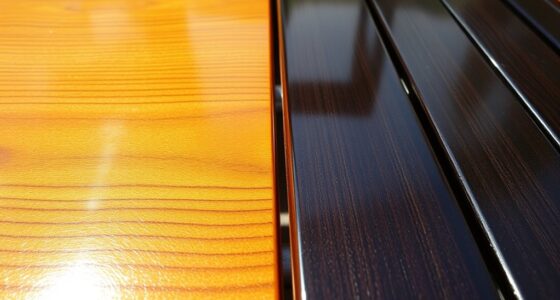
- Use the properly prepared surface as a flawless base for stain or topcoat, achieving a mirror-like finish.

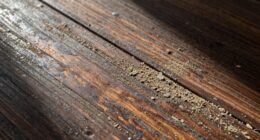
If you’re working with open-pore woods, understanding how to properly fill the grain is essential for achieving a smooth, finished surface. Open-pore woods, like oak or cherry, have a porous structure that absorbs stain and finish unevenly unless you address the grain beforehand. Proper wood preparation is crucial; it sets the foundation for a flawless final look. Before you begin, make sure your surface is clean and free of dust, grease, or old finishes. Sand the wood thoroughly, starting with a coarse grit to remove imperfections and progressing to a fine grit to create a smooth surface. This step ensures that the grain filling will adhere evenly and that your finishing techniques will deliver the desired mirror-like quality.
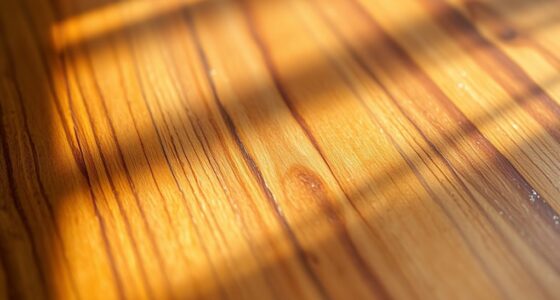
Proper preparation ensures a smooth, mirror-like finish on open-pore woods.
Once your surface is properly prepared, selecting the right grain filler becomes your next priority. You want a product compatible with your chosen finish—whether oil-based, water-based, or shellac. Apply the filler in thin, even coats using a putty knife or a lint-free cloth, pressing it into the open pores. The goal is to fill the grain completely, so take your time and work in manageable sections. After applying, allow the filler to set according to the manufacturer’s instructions. Wipe away excess filler with a clean cloth or a damp sponge, being careful not to leave ridges or lumps that could mar the surface.
The key to a successful grain fill is patience and attention to detail. Once the filler has dried, lightly sand the surface with a fine-grit paper—around 320 to 400 grit—to smooth out any imperfections and ensure the surface is perfectly even. This step is vital because it helps achieve a mirror‑smooth finish, as it removes any residual filler or rough spots that could show up under the final coat. Remember, proper wood preparation combined with meticulous finishing techniques is what separates a good piece from a stunning one. The smoother the surface, the fewer coats of finish you’ll need, and the less sanding you’ll have to do later.
Finally, proceed with your finishing techniques—whether applying stain, varnish, or lacquer—knowing that your grain filling has created the perfect canvas. The result will be a sleek, reflective surface that highlights the beauty of the wood grain. Mastering grain filling and proper wood preparation makes all the difference in achieving professional, mirror‑like finishes on open-pore woods.
Goodfilla Neutral Base, 8 oz, Wood and Grain Filler, Stainable, Tintable, Sandable, Zero Waste, Non-Toxic, USA Made
⚒️ HIGH QUALITY & MONEY SAVING: Save time and money with this wood filler that does not shrink,…
As an affiliate, we earn on qualifying purchases.
As an affiliate, we earn on qualifying purchases.
Frequently Asked Questions
What Types of Finishing Products Are Best for Grain Filling?
You should choose a grain filler that offers excellent finish quality and is compatible with your wood type. Oil-based or water-based grain fillers work well for open-pore woods, providing a smooth surface. Always consider grain filler selection based on finishing product compatibility to guarantee proper adhesion and durability. Test on a small area first to confirm the desired finish, and follow manufacturer instructions for best results.
How Long Should I Wait Between Applying Grain Filler Coats?
You should wait about 15 to 30 minutes between applying grain filler coats, but it’s essential to use your timing patience. Make certain the previous coat is dry and tack-free before adding another layer. Rushing the process can lead to uneven filling or sticking. Always follow the manufacturer’s recommendations for drying times, and check the surface before applying the next coat to guarantee a smooth, mirror‑like finish.
Can Grain Filling Be Done on Previously Finished or Stained Wood?
Think of your wood surface as a canvas waiting for a fresh coat. Yes, you can perform grain filling on previously finished or stained wood, but first, you must prepare the surface thoroughly. Use light sanding to remove gloss and dirt, ensuring good adhesion. Then, apply your grain filler, following restaining techniques if needed. Proper surface prep guarantees a smooth, mirror‑like finish, even on aged or stained surfaces.
What Are Common Mistakes to Avoid During Grain Filling?
You should avoid application errors like applying grain filler too thick or unevenly, which can cause an uneven finish. Proper surface preparation is essential; make sure the wood is clean, sanded smooth, and free of dust before filling. Rushing the process or skipping steps may lead to poor adhesion or visible imperfections. Take your time, follow manufacturer instructions carefully, and guarantee the surface is well-prepared for the best mirror-smooth finish.
How Do Environmental Conditions Affect the Grain Filling Process?
Environmental conditions greatly influence the grain filling process. You need to control moisture levels carefully, as too much humidity can cause uneven filling or cloudiness, while too little can hinder the process. Temperature effects are also vital; excessive heat accelerates drying and may lead to cracks, whereas cooler temperatures slow down curing. By managing moisture control and maintaining stable temperatures, you guarantee a smooth, mirror‑like finish on open‑pore woods.

Sand Paper, 48 PCS Sandpaper, 120 to 5000 Assorted Grit Sandpaper Sheets, 9 x 3.6 Inch Premium Wet Dry Sandpaper for Wood Furniture Finishing, Metal Sanding, Automotive Polishing
Meets All Your Needs: 48 pcs sand paper kit, 16 grits sandpaper assortment, including 3 sheets of each…
As an affiliate, we earn on qualifying purchases.
As an affiliate, we earn on qualifying purchases.
Conclusion
By mastering grain filling for open-pore woods, you can achieve mirror-smooth finishes that enhance your projects. Imagine working on a handcrafted oak table; after proper filling, the surface becomes flawless, highlighting the wood’s natural beauty. With patience and the right techniques, you’ll transform rough, open-pore surfaces into stunning, professional-looking pieces. Keep practicing, and soon, your furniture will boast a glossy, smooth finish that truly impresses.
LUORNG 2pcs Carbon Steel Stiff Putty Knives with Wooden Handle 1.5" Drywall Taping Chisel Scraper Putty Tool for Taping Paint Wall Floor Tile Putty Scraper
The scraper of the putty knife is made of high-hardness 3CR13 stainless steel. Robust, durable, and wear-resistant. Good…
As an affiliate, we earn on qualifying purchases.
As an affiliate, we earn on qualifying purchases.

Clear Coat for Wood Stain Repairs, Brush-On Matte and Gloss Finish, Sealing and Sheen Matching, Interior and Exterior Wood, 2 fl oz Total by spot.
Seal and Protect Wood Stain Repairs: Includes one matte and one gloss clear coat designed to seal stained…
As an affiliate, we earn on qualifying purchases.
As an affiliate, we earn on qualifying purchases.