
To build a simple wooden planter box, choose weather-resistant lumber like cedar or treated wood. Measure and cut your pieces carefully, then join the sides with outdoor screws, ensuring corners are square. Install a bottom panel with drainage holes, line the interior with landscape fabric, and add gravel for drainage. Finish with a coat of weatherproof stain or paint. If you continue exploring, you’ll find detailed steps to help you create a durable, attractive planter.
Key Takeaways
- Select durable, weather-resistant wood like cedar or pressure-treated lumber, measuring and cutting all components accurately before assembly.
- Assemble the frame with level, square joints using exterior screws or pocket hole joinery for stability.
- Attach the bottom panel with drainage holes and line the interior with landscape fabric or mesh to prevent soil loss.
- Install the bottom inside the frame, elevate it slightly for drainage, and secure with screws or nails.
- Finish the planter with trim, sanding, and a protective coating, then fill with soil and plants.
Selecting the Appropriate Lumber for Your Planter Box
Choosing the right lumber is essential for building a durable and safe planter box. If you want longevity, consider pressure-treated lumber, but be aware it may contain chemicals that could leach into soil, especially if you’re planting edibles. Rot-resistant woods like cedar and redwood naturally resist decay and insects, making them excellent choices for outdoor use. They’re often more affordable than exotic hardwoods like Ipe or oak, which offer exceptional durability but come at a higher cost. When selecting lumber, guarantee it’s rated for weather exposure to prevent warping, cracking, or decay over time. Additionally, selecting appropriate wood types for outdoor use helps ensure your planter box withstands the elements and provides a safe environment for your plants.
Measuring and Cutting the Wooden Components

Before you start assembling your planter box, it’s important to measure and cut each wooden component accurately. Use a tape measure and a pencil to mark the measurements for the sides, ends, and bottom. Choose straight, warp-free wood like cedar or treated lumber to guarantee clean cuts and a sturdy final product. Double-check all measurements before cutting to prevent mistakes. When you’re ready, use a circular saw or miter saw to cut along your marked lines, keeping the blade steady for straight edges. Cut all components—side panels, end pieces, and the bottom—prior to assembly. Accurate measurements and careful cutting of the wood components will help you build a well-fitting, durable planter box with ease. Remember to use quality materials to ensure your planter box lasts through seasons of outdoor use. Additionally, selecting appropriate wood types can improve the longevity and appearance of your finished project. Properly maintaining your planter will also help preserve its condition over time. To further enhance your project, consider wood treatment options that can protect against weathering and pests.
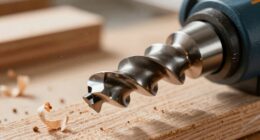
Drilling Pilot Holes and Preparing Fasteners
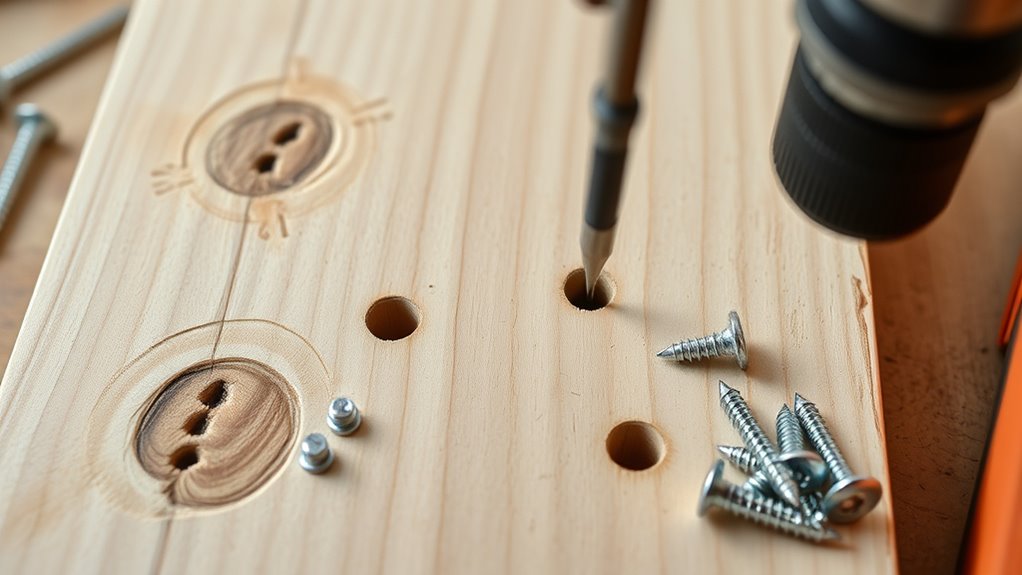
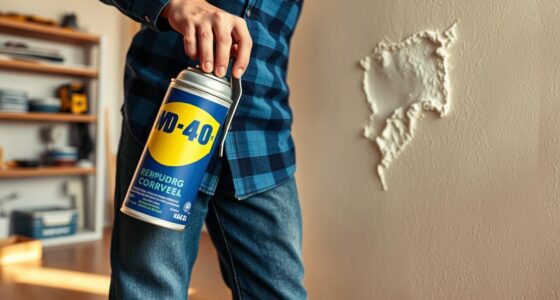
To make certain your planter box holds together securely and avoids splitting, it’s crucial to drill pilot holes before inserting screws. Using a drill bit that matches your fasteners ensures the wood doesn’t crack, especially near edges and joints. For a cleaner, more professional look, consider pocket screws and a pocket hole jig set to the correct depth, like 1 3/8″. Pre-drill pilot holes about 1/2″ from the edges and space them evenly to keep your pieces aligned and secure. Always choose exterior-rated, corrosion-resistant screws, such as galvanized or stainless steel, to withstand outdoor conditions. Pre-drilling not only maintains wood integrity but also makes inserting fasteners easier and more precise, resulting in a durable, long-lasting planter box. Additionally, understanding the importance of contrast ratio can help you select the right projector for clear, vibrant visuals if you decide to incorporate digital displays into your gardening space. Incorporating tuning techniques can also help you customize and optimize your project for better durability and aesthetic appeal. Proper preparation of the wood and fasteners ensures your project remains sturdy and resilient against outdoor elements, much like the noise levels considerations in modern heat pump systems for optimal indoor comfort. Moreover, selecting sustainable materials can enhance the eco-friendliness of your project and contribute to environmental conservation efforts. Being aware of moisture management techniques is also essential to prevent wood rot and prolong the lifespan of your planter box.
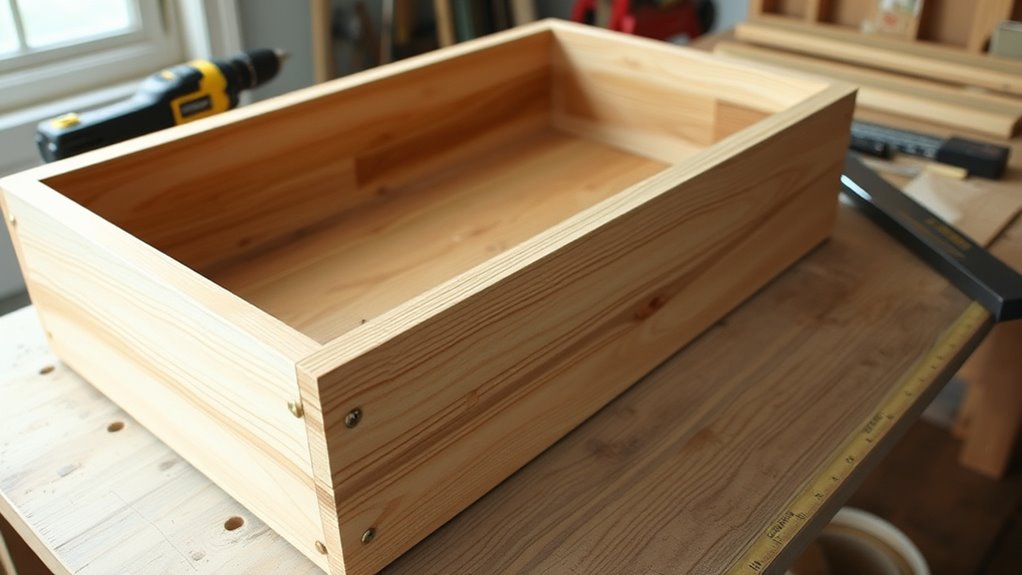
Assembling the Sides and Frame of the Planter
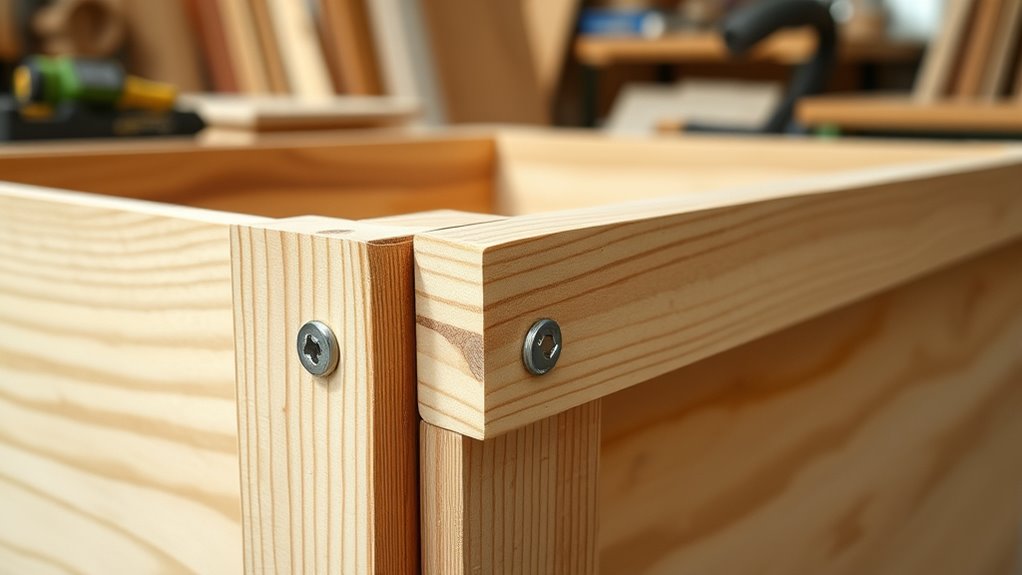
Start by attaching the side slats to the corner legs with exterior-rated screws, making sure they’re flush and square using a carpenter’s square. Use pocket hole joinery or pre-drilled holes to keep the connections clean and prevent splitting. Check that all panels are level and square as you assemble to make certain the planter’s stability and proper shape. Incorporating proper tools during assembly can make the process easier and more accurate. Ensuring proper building techniques enhances the durability of your wooden planter box. Additionally, paying attention to website performance metrics can help you assess how effectively your DIY project guide is reaching readers interested in home improvement. Being mindful of environmental considerations when selecting your materials can also contribute to a more sustainable project. Using correct assembly methods can further improve the longevity and appearance of your finished planter.
Attaching Side Slats
Attaching the side slats to the vertical legs is a crucial step in assembling your planter’s frame. Start by pre-drilling pilot holes in each slat and leg to prevent splitting and guarantee precise placement. Position each side slat along the frame, making sure they are spaced evenly for both aesthetics and drainage. Use a carpenter’s square to verify that each slat is perfectly vertical and flush with the adjoining slats. Secure each slat with 1.25-inch exterior screws, starting from the bottom and working upward, ensuring each one is firmly attached. Check that all screws are tight and the slats are aligned properly before moving on. Properly attaching the side slats provides a sturdy, attractive structure for your planter. Incorporating vintage accessories and rustic elements can further enhance the farmhouse charm of your finished project. Additionally, ensuring the security of the structure is essential, as cybersecurity vulnerabilities can sometimes affect even small DIY projects if digital plans or instructions are stored insecurely. To achieve a durable and reliable assembly, consider inspecting for any structural weaknesses and reinforcing joints as needed. Conducting a safety check during assembly can help identify potential issues early and prevent future problems. Regularly inspecting your project can also help maintain its long-term stability and safety.
Ensuring Square Assembly
Have you checked that each corner forms a perfect 90-degree angle as you assemble the sides and frame? Ensuring square corners is essential for a sturdy, professional-looking planter. Use a carpenter’s square or speed square to verify right angles during assembly. Legal zoning restrictions in your area may impact your ability to build and position your planter, so it’s important to be aware of local regulations. To further enhance accuracy, employing a measuring technique such as measuring diagonally across the assembled sides can confirm a square structure. Clamp the side panels firmly to prevent shifting and keep the corners square. Measure diagonally across the assembled sides; equal lengths confirm a square structure. Incorporating automated tools like laser levels can help improve the precision of your assembly process. Attach slats or panels systematically from one corner, maintaining alignment. Double-check each corner’s squareness after every step before moving forward. Adjust clamps or remeasure if any corner isn’t perfectly square before proceeding. Incorporating a proper measuring technique can further ensure the accuracy of your assembly. Following these steps helps maintain proper assembly and guarantees your planter box will be stable and square, ready for planting.
Installing the Bottom Panel and Ensuring Proper Drainage
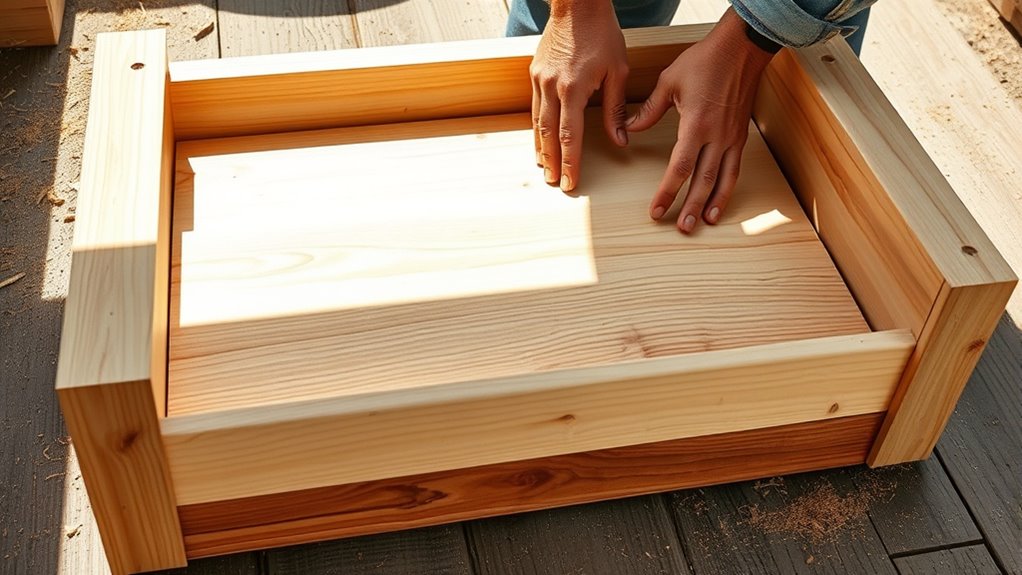
Start by fitting the bottom panel snugly inside the frame, leaving a 1 ¼” gap for drainage. Drill several evenly spaced holes in the panel to let water escape and prevent pooling. Line the interior with landscape fabric or mesh, then secure it tightly to keep soil from blocking the drainage.
Attaching the Bottom Panel
To secure the bottom panel properly, measure and cut it to fit snugly inside the planter frame, matching the interior dimensions precisely. This guarantees a stable base for your planter. Next, attach the bottom by drilling through the side walls into the edges of the bottom panel using exterior-rated screws. Keep in mind, you’ll want to drill 4-5 evenly spaced holes in the bottom panel, about 3/4 inch in diameter, to allow water to drain. Here are key steps:
- Make sure the bottom of the planter is level before attaching
- Use screws to attach the bottom securely to the side walls
- Drill holes in the bottom panel for drainage
- Line the interior with landscape fabric or galvanized steel mesh
- Secure the fabric with staples or nails to protect the wood
Ensuring Drainage Holes
Make sure the bottom panel of your planter allows for proper drainage by installing evenly spaced holes using a 3/4-inch drill bit. These drainage holes are essential for water to escape, preventing root rot and overwatering. Elevate the bottom panel slightly above the ground or surface, so water can drain freely. To prevent soil from clogging the drainage holes, line the interior of the bottom panel with landscape fabric or galvanized steel mesh. When attaching the bottom panel, use screws that won’t block the holes and are resistant to outdoor conditions, like galvanized or stainless steel screws. After assembly, test the drainage by pouring water into the planter, ensuring that excess water flows out smoothly through the drainage holes.
Lining for Water Flow
Installing the bottom panel with proper lining is essential for effective water flow and soil retention. First, choose a waterproof lining material like landscape fabric or heavy-duty screen to prevent debris from clogging drainage holes. Before attaching the bottom panel, secure the lining with small staples or nails along the interior edges to prevent shifting. Drill multiple drainage holes in the bottom panel, spaced evenly and no larger than ¾ inch, to promote water flow without weakening the structure. Ensure these drainage holes align with the planter’s exterior drainage holes for ideal water escape. This setup prevents waterlogging and maintains healthy soil conditions, enabling your planter to drain efficiently and stay durable over time.
- Prevents soil loss through drainage holes
- Facilitates proper water flow
- Filters debris with lining material
- Ensures drainage holes align correctly
- Maintains structural integrity and drainage
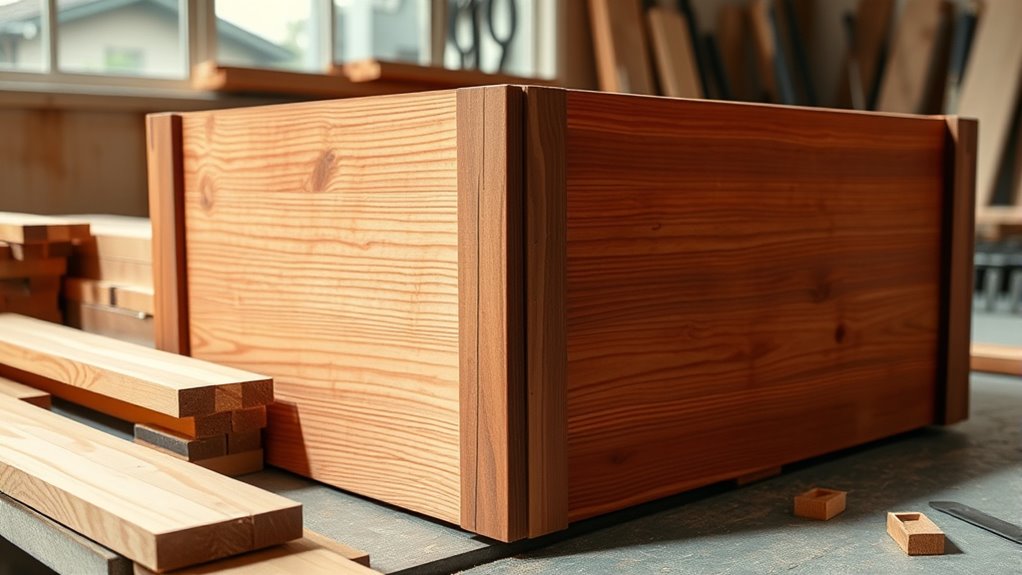
Adding Trim and Finishing Details

Have you considered how adding trim can elevate the look of your planter box? Trim pieces should be cut at 45° angles with a miter saw to create clean, professional corners along the top edges. Gluing and nailing the trim with 1 ½” brad nails ensures a secure attachment that covers rough edges and provides a polished finish. Using nails prevents splitting and keeps the trim flush with the wood surface. After attaching, sand the trim to smooth any rough edges and prepare it for painting or staining. Applying a finish like paint, stain, or polyurethane protects the trim from weathering and enhances your planter’s appearance. These finishing details give your planter box a professional look and extend its durability.
Lining the Interior and Preparing for Planting

To guarantee your wooden planter box retains soil and drains properly, lining the interior is essential. A lined interior prevents soil from escaping through drainage holes and improves soil retention. Start by choosing a waterproof material like landscape fabric, nylon screen, or galvanized steel mesh. Cut the lining slightly larger than the interior dimensions to ensure full coverage and easier installation. Secure the lining with small nails, staples, or waterproof adhesive, making sure it fits snugly against the sides and bottom. Punch or cut drainage holes in the lining directly over the existing drainage holes to maintain proper water flow. Cover the bottom with gravel or small stones to enhance drainage and prevent waterlogging. Proper lining ensures longevity and healthy plant growth.
Applying Finish and Final Touches

Applying a weather-resistant finish and adding final touches protect your wooden planter box from the elements and give it a polished look. To guarantee durability, apply a weather-resistant finish like exterior stain, paint, or sealant to all surfaces, including inside and the bottom. Use a brush or roller for even coverage, and apply multiple coats as recommended, especially on vulnerable end-grain areas. Allow each coat to dry fully before adding the next and before planting. To seal the interior, consider using a waterproof, non-toxic coating to prevent soil moisture from damaging the wood. Regularly inspect the finish and reapply as needed to maintain protection and extend the planter’s lifespan.
| Step | Tips |
|---|---|
| Choose the right finish | Exterior stain, paint, or sealant |
| Apply coats | Multiple, even coats |
| Protect vulnerable areas | End-grain surfaces |
| Seal the interior | Waterproof coating |
| Maintenance | Reapply annually |
Frequently Asked Questions
What to Put in the Bottom of a Wooden Planter Box?
When filling the bottom of your wooden planter box, you should start with a layer of landscape fabric or weed barrier cloth to improve drainage and keep soil from escaping. Add a layer of gravel or small stones for extra drainage and place a drainage screen or mesh over it to prevent soil mixing with the gravel. This setup guarantees healthy roots and prevents waterlogging, keeping your plants happy and thriving.
Do Wooden Planter Boxes Need to Be Lined?
Imagine your plants thriving, their roots reaching into rich soil, protected from decay. Wooden planter boxes usually need lining to shield the wood from moisture, preventing rot and extending their life. You can use plastic or landscape fabric, with gravel beneath for drainage. This simple layer acts like armor, safeguarding your investment and ensuring your garden stays vibrant and healthy for years to come.
What Kind of Wood Should You Use for a Planter Box?
When choosing wood for your planter box, you should pick a material that’s durable and resistant to rot and insects. Cedar and redwood are excellent because they naturally resist decay and don’t require chemical treatments. If you want something more budget-friendly, pressure-treated lumber works but avoid it for food-safe planters. Keep in mind, hardwoods like ipe are durable but pricier. Your choice depends on your budget and planter’s purpose.
What Do You Line a Wooden Box With to Use for a Planter?
You should line your wooden planter with a material that allows water drainage and protects the wood. Garden fabric or landscape screen works well because it prevents soil from escaping while letting excess water drain. Heavy-duty plastic liners or pond liners also do the job, containing the soil and shielding the wood from moisture damage. Just make sure to cut the liner to fit snugly and align drainage holes properly.
Conclusion
Now your wooden planter box is ready to breathe life into your space, like a cradle cradling new growth. With each nail and board, you’ve crafted a miniature sanctuary for your plants to flourish. Think of it as planting seeds of patience and care, nurturing your garden’s dreams. So, fill it with soil and promise, and watch as your backyard transforms into a living, breathing masterpiece—your very own patch of paradise.